https://www.miops.com/blogs/news.atomMIOPS - News2025-04-08T09:49:29+03:00MIOPShttps://www.miops.com/blogs/news/harold-doc-edgerton-the-man-who-froze-time-and-transformed-photography-forever2025-04-08T09:49:29+03:002025-04-27T09:03:30+03:00Harold Doc Edgerton: The Man Who Froze Time and Transformed Photography ForeverErkan Yigiter
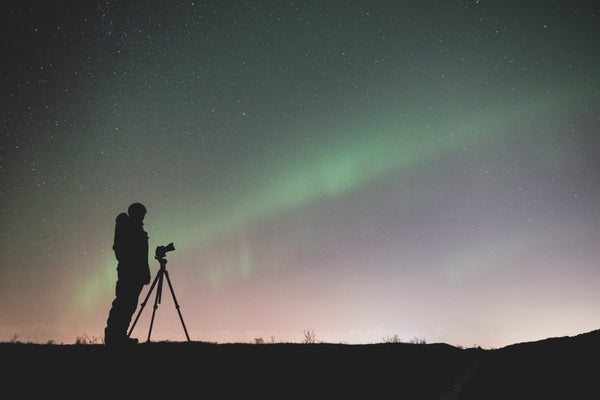
Photography has always been about capturing moments. But what if those moments happen too fast for the human eye to see—like the flutter of a hummingbird’s wings, or the instant a balloon bursts? That’s where high-speed photography comes in. And if there’s one name that stands above all others in this field, it’s Harold “Doc” Edgerton—the man who quite literally froze time.
The Father of High-Speed Photography
Born in 1903 in Nebraska, Harold Eugene Edgerton was an electrical engineer, professor at MIT, and an inventor whose love for understanding motion led him to create the modern electronic stroboscope. Though he may not have set out to become a photographer, his contributions would go on to redefine what photography could do—and what it could reveal.
Doc’s stroboscope emitted rapid flashes of light, which when synchronized with a moving object, allowed cameras to capture ultra-fast events with crisp clarity. His work led to images that no one had ever seen before: a bullet passing through a playing card, a drop of milk creating a crown-like splash, or the graceful wings of a hummingbird frozen mid-flight
These weren’t just technical achievements. They were moments of wonder—beautiful, fleeting glimpses into the invisible world of motion. Edgerton’s work bridged the gap between science and art, physics and photography.
High-Speed Photography: What Is It?
To fully appreciate Edgerton’s legacy, it’s important to understand what high-speed photography is. In essence, it's a technique used to capture images of events that happen too quickly for normal cameras or the human eye to observe.
These moments may last just microseconds—a bullet exiting the barrel of a gun, glass shattering mid-air, or a water droplet colliding with a surface. Traditional photography, even with fast shutter speeds, struggles to freeze such rapid action without blur. But with high-speed flash photography—using ultra-short bursts of light instead of mechanical shutter speed—you can achieve crystal-clear images of even the most fleeting events.
This breakthrough has applications far beyond the studio. High-speed photography plays a vital role in scientific research, ballistics, industrial testing, sports analysis, wildlife observation, and even filmmaking. But it all began with the curious mind and inventions of Doc Edgerton.
From MIT Labs to Every Photographer’s Toolkit
In the 1930s and 1940s, Edgerton’s techniques were revolutionary, but the equipment was large, complex, and expensive—limited to labs and research institutions. For decades, high-speed photography remained inaccessible to the everyday photographer.
Today, that has changed. Thanks to modern digital technology and the spirit of innovation that Edgerton ignited, high-speed photography is no longer just for scientists. It’s available to anyone with a camera and the right tools. And that’s where MIOPS comes in.
Carrying the Torch at MIOPS
At MIOPS, we’re proud to stand on the shoulders of a giant like Doc Edgerton. His groundbreaking work continues to inspire our team, our users, and the entire photography community. We believe in democratizing photography—making advanced techniques like high-speed capture available to everyone, not just the few.
Our flagship products reflect this commitment:
MIOPS Smart+ is a multi-functional camera trigger that brings precision and control to high-speed photography. It can detect lightning, sound, laser beams, or motion to trigger your camera or flash at just the right moment—perfect for capturing everything from a bursting balloon to a popping water balloon.
MIOPS Splash is the world’s first standalone water drop photography kit. With precise timing controls, photographers can create stunning splash effects and explore a whole new world of creative possibilities—no complicated setups, no expensive lab equipment.
With these tools, nearly a century after Edgerton’s invention, a regular photography enthusiast can achieve results that once required a team of engineers and researchers. That’s not just progress—it’s a revolution.
A Legacy That Endures
Doc Edgerton was more than an inventor; he was a visionary. He once said, “The trick to education is to teach people in such a way that they don't realize they're learning until it's too late.” His approach combined curiosity, creativity, and a relentless pursuit of excellence—values that continue to guide us at MIOPS.
Whether you’re a beginner experimenting with splash photography or a seasoned pro pushing the boundaries of motion capture, every time you freeze a millisecond in time, you’re participating in the legacy of Doc Edgerton.
We are proud to honor his vision. His innovations continue to shape the field of photography, and at MIOPS, we are dedicated to keeping that spirit alive. From the lab at MIT to camera bags around the world, his influence endures in every drop, every spark, and every stunning still frame
[star star="170"]
]]>
https://www.miops.com/blogs/news/how-to-take-professional-photos-with-your-iphone2025-02-27T10:15:54+03:002025-04-27T09:03:32+03:00How to Take Professional Photos with Your iPhone?Onur Celik
Gone are the days when professional photography was limited to expensive cameras. With the advancements in smartphone technology, your iPhone is now a powerful tool for capturing stunning, high-quality photos. Whether you're a beginner or an experienced photographer, knowing a few key techniques can significantly enhance your iPhone photography skills. This guide provides deep yet simple insights into how to take professional-quality photos using your iPhone.
1. Clean Your Lens for Crisp Shots
One of the simplest yet most overlooked steps in photography is ensuring your camera lens is clean. Since your iPhone is often in your pocket or bag, the lens can accumulate dust, fingerprints, or smudges, which can blur your photos. Before taking a picture, wipe the lens gently with a microfiber cloth for clear and sharp images.
2. Use the Grid for Better Composition
Composition is key to creating visually appealing photos. The "Rule of Thirds" is a fundamental guideline where the frame is divided into nine equal parts using two horizontal and two vertical lines. Placing your subject along these lines or at their intersections creates a balanced and aesthetically pleasing composition.
To enable the grid on your iPhone:
Open Settings
Scroll down and tap Camera
Toggle on Grid
This will help you align your shots and improve composition effortlessly.
3. Adjust Focus and Exposure Manually
Your iPhone's automatic settings work well, but manual adjustments can significantly improve your photos. To set focus and exposure manually:
Open the Camera app.
Tap on the part of the screen where you want to focus.
Drag the sun icon up or down to adjust brightness.
To lock focus and exposure, tap and hold until "AE/AF Lock" appears.
This feature is especially useful in challenging lighting conditions or when capturing moving subjects.
4. Take Advantage of Natural Light
Lighting is one of the most critical aspects of photography. Natural light enhances colors and details, making your photos look more professional. The best times to shoot are during the golden hours—shortly after sunrise and before sunset—when the light is soft and warm.
Pro Tip: Avoid using the flash unless necessary, as it can create harsh shadows and unnatural colors.
Bonus Tip: You can use the Photo Expert app to check the exact Golden Hour and Blue Hour times in your location and plan your shots accordingly.
5. Experiment with Different Angles and Perspectives
Instead of shooting at eye level all the time, try different perspectives to add depth and uniqueness to your photos. Some creative angles include:
Low-angle shots: Make your subject appear more dynamic.
Overhead shots: Great for food photography and flat lays.
Side angles: Capture unique lighting and perspectives.
6. Avoid Digital Zoom
Digital zoom essentially crops and enlarges your photo while shooting, leading to a significant loss in image quality. This process stretches existing pixels, resulting in:
Grainy appearance
Loss of detail
Reduced sharpness
Visible pixelation
Better Alternatives to Digital Zoom:
Physical Positioning: Move closer to your subject when possible, find creative angles that don't require zoom, and use leading lines to create depth.
Post-Processing Solutions: Crop photos afterward using editing apps while maintaining original resolution. This allows you to control the exact composition.
Pro Tip: If you absolutely must zoom, invest in external iPhone camera lenses that provide true optical zoom capabilities without compromising image quality.
For situations where you can't get closer to your subject, consider:
Using the telephoto lens (available on newer iPhone models)
Shooting in RAW format for better editing flexibility
Planning your shot composition before taking the photo
7. Keep Your Hands Steady
Blurry photos can ruin an otherwise great shot, but achieving crystal-clear images is possible with proper handling techniques. Here's how to maintain stability while shooting:
Essential Stability Techniques
Hold your iPhone with both hands in a firm grip, keeping your elbows close to your body
Use your thumbs and index fingers to create a stable platform
Keep your feet shoulder-width apart for better balance
Lean against a wall or stable surface when possible
Camera Controls for Stability
Use the volume buttons as a shutter release to minimize movement
Activate the timer function (3 or 10 seconds) for hands-free shooting
Enable the grid feature to help maintain level shots
Use the burst mode by holding down the shutter button to increase chances of sharp captures
Advanced Stability Solutions
For challenging shooting conditions:
Invest in a smartphone tripod for:
Low-light photography
Long exposure shots
Time-lapse videos
Self-portraits
Consider using a stabilizing gimbal for:
Walking shots
Action sequences
8. Utilize HDR Mode for Balanced Exposure
HDR (High Dynamic Range) helps balance the exposure between the brightest and darkest areas of a scene, making it ideal for capturing high-contrast settings such as landscapes and backlit subjects.
To enable HDR:
Open the Camera app.
Tap HDR at the top of the screen.
Select Auto or On to ensure a more balanced image.
9. Edit Your Photos for a Professional Look
Editing plays a crucial role in professional photography. The iPhone’s built-in editing tools allow you to adjust brightness, contrast, and saturation. However, for more advanced editing, using third-party apps can make a significant difference.
Built-in Editing Tools
The iPhone's default editing features provide essential adjustments:
Exposure and Brilliance: Fine-tune the overall brightness and add depth
Highlights and Shadows: Recover details in bright and dark areas
Warmth and Tint: Adjust color temperature for more natural-looking images
Definition and Sharpness: Enhance image clarity and crispness
Noise Reduction: Minimize graininess in low-light photos
Pro Editing Tips
Start with Basic Adjustments: Begin with exposure and contrast before moving to advanced tools
Use Selective Editing: Focus on specific areas rather than applying global adjustments
Maintain Consistency: Develop a signature editing style for your photo series
Save Versions: Keep original copies before making significant edits
10. Shoot in RAW for Better Editing Control
RAW format preserves all the data captured by your iPhone's sensor, providing uncompressed image files that retain crucial details in highlights and shadows. Unlike JPEG files, which automatically compress and process images, RAW files give you complete control over:
White balance adjustments
Shadow recovery
Highlight preservation
Color correction
Exposure modifications
While JPEG files typically range from 3-5MB, RAW files can be 20-30MB.
Pro Tip: When shooting in RAW, ensure you have sufficient storage space on your device, as these files can quickly fill up your memory.
Remember: While RAW files offer superior editing flexibility, they require post-processing to look their best, unlike JPEG files which are ready to share immediately after capture.
Elevate Your Photography with the Snap Pro Camera App
Now that you've mastered the fundamentals of iPhone photography, taking your skills to the next level is easier with the Snap Pro Camera app. Designed for photographers of all levels, this app provides powerful tools that make capturing professional-quality images effortless.
Here’s how it helps:
Manual Controls: Adjust shutter speed, ISO, and white balance for precise shots.
RAW Capture: Shoot in RAW format for high-quality post-processing.
Instant Color Grading & Filters: Apply professional-grade filters and color grading in real-time.
Advanced Photography Modes: Enjoy features like motion blur, light trails, and long exposure for creative photography.
Background Removal & Replacement: Seamlessly remove or change backgrounds to create stunning portraits and product photos.
Object Removal Tool: Easily remove unwanted objects or distractions from your shots.
Cinematic Video Stabilization: Capture smooth and professional-looking videos without the need for additional equipment.
AI-Powered Enhancements: Improve the quality of your photos with AI-driven adjustments for lighting, sharpness, and detail.
Pro-Level Portrait Mode: Enhance portraits with adjustable bokeh and skin-smoothing features.
Conclusion
Taking professional photos with your iPhone is easier than ever with the right techniques and tools. By mastering composition, lighting, and manual controls, you can capture stunning images effortlessly. Pairing your iPhone with Snap Pro Camera further enhances your photography experience, making professional-grade photography accessible to everyone.
So, grab your iPhone, apply these techniques, and see how Snap Pro Camera helps bring your vision to life with ease!
FAQs (Frequently Asked Questions)
What accessories can enhance my iPhone photography experience?
Consider investing in accessories such as a tripod for stability, lens attachments for varied perspectives, external lighting kits for better illumination, and a portable charger to ensure your device remains powered during extended shoots.
What are the benefits of shooting in RAW format on my iPhone?
Shooting in RAW format allows you to capture all the data from your iPhone's camera sensor, providing greater flexibility in post-processing. This means you can make more significant adjustments to exposure, color balance, and details without losing quality, making it ideal for professional-quality images.
How can I effectively use natural light to enhance my iPhone photography?
To make the most of natural light, shoot during the golden hour—shortly after sunrise or before sunset—when the light is soft and warm. Position your subject to face the light source for better illumination and avoid harsh shadows. Experiment with backlighting for creative effects.
What techniques can I use to achieve better stability when taking photos with my iPhone?
To improve stability, hold your iPhone with both hands and keep your elbows close to your body. Use a tripod or a stabilizer for challenging conditions, and consider using the volume buttons as a shutter release to minimize camera shake. Practicing deep breathing can also help steady your hands.
How can I use the grid feature on my iPhone to improve photo composition?
Enabling the grid feature on your iPhone helps you apply the rule of thirds, a fundamental principle of photography composition. By aligning key elements of your shot along the grid lines or at their intersections, you can create more balanced and visually appealing photos.
What are some common mistakes to avoid when taking photos with my iPhone?
Common mistakes include neglecting to clean your lens, relying too heavily on digital zoom instead of moving closer, and not adjusting focus and exposure manually. Avoiding these pitfalls can significantly improve your photo quality.
How can I make the most of my iPhone's editing features after taking a photo?
To maximize your iPhone's editing capabilities, start with basic adjustments like exposure and contrast. Utilize built-in tools for cropping and filtering, and consider using advanced editing apps for more control over details.
How can experimenting with angles improve my iPhone photography?
Experimenting with different angles and perspectives can add depth and interest to your photos. Shooting from above, below, or at unusual angles can help you capture unique compositions that stand out.
[star star="679"]
]]>
https://www.miops.com/blogs/news/8-tips-for-creating-stunning-sunset-photos2025-02-17T12:23:53+03:002025-04-27T09:03:33+03:008 Tips For Creating Stunning Sunset PhotosOnur Celik
The magic of sunset photography lies in capturing nature's most spectacular light show. These tips will help you master the art of sunset photography and create breathtaking images that tell compelling stories.
1. Plan Your Shoot with Photo Expert
Timing is crucial for sunset photography. Photo Expert app serves as your ultimate planning companion by providing:
Precise sunset times
Golden hour duration
Blue hour timing
Sun position tracking
Location scouting features
2. Arrive Early, Stay Late
The best sunset photos require preparation:
Set up 1 hour before sunset
Scout your location during daylight
Stay 30-45 minutes after sunset
Capture the entire color progression
3. Master the Golden Hour
The golden hour - that magical period just before sunset - creates:
Warm, soft lighting
Long, dramatic shadows
Rich, golden tones
Perfect conditions for silhouettes
4. Utilize the Blue Hour
The blue hour occurs after sunset, offering:
Deep blue skies
Soft, diffused light
Urban lighting balance
Mysterious atmosphere
5. Choose the Right Camera Settings
Best Camera Settings
Aperture Settings:
Use f/8 to f/16 to get everything in focus
f/11 works best for most sunset photos
Choose f/16 when the sun is in your picture
Pick f/8 when it's getting dark to keep photos sharp
ISO Settings:
Begin with ISO 100 for the clearest photos
Move up to 400 as it gets darker
Stay under ISO 400 to avoid grainy photos
Use ISO 200 around sunset time
White Balance Settings:
Cloudy mode (5500K) makes sunset colors pop
Shade mode (7000K) adds orange tones to cool scenes
Auto mode works but might dull sunset colors
Manual mode gives you exact color control
Camera Modes
Using Manual Mode:
You control all settings yourself
Your photos stay consistent
Better for tricky lighting
Using Aperture Priority Mode:
Quick to adjust as light changes
Keeps your chosen focus range
Good for taking multiple exposure shots
Best when the sun is setting quickly
Pro Tip: Always shoot in RAW format to preserve maximum detail in highlights and shadows, allowing for greater flexibility in post-processing.
Rule of Thirds: Place horizon on upper/lower third
Leading Lines: Use paths, roads, or shorelines
Foreground Interest: Include rocks, trees, or structures
Silhouettes: Position subjects against bright sky
Reflections: Utilize water surfaces when available
8. Post-Processing Tips
Enhance your sunset photos:
Adjust white balance for mood
Fine-tune exposure
Enhance colors selectively
Balance highlights and shadows
Maintain natural appearance
How to Take Better Sunset Photos
Take better sunset photos with these proven methods:
Using HDR (High Dynamic Range)
Take several photos at different light levels and combine them
Best Camera Settings:
Take photos 2 steps darker and lighter than normal
Use lowest ISO possible for clear photos
Don't move the camera between shots
Use HDR software to blend photos naturally
Getting the Right Exposure
Three-Photo Method:
One normal photo
One darker photo
One brighter photo
Five-Photo Method for very bright and dark scenes:
Two darker photos
One normal photo
Two brighter photos
Use your camera's auto-bracketing for quick shots
Combining Different Focus Points
How to Do It:
Focus on close objects
Focus on middle objects
Focus on far objects
Keep the same exposure for all shots
Use manual focus for better control
Combine photos in editing software
Making Time-lapse Videos
What You Need:
Timer remote
Sturdy tripod
Backup batteries
Best Settings:
Take a photo every 5-10 seconds
Begin 30 minutes before sunset
Use manual mode for consistent photos
Gradually adjust settings as light changes
Use darkening filters to control bright light
Weather Considerations
Different conditions create unique opportunities:
Partly Cloudy: Dramatic light rays
High Clouds: Vibrant colors
Clear Skies: Clean, minimalist shots
Stormy Weather: Dramatic atmosphere
Location Selection
Best Places to Photograph Sunsets
High Ground
Hills and Ridges: Clear views in all directions
Lookout Points: Steady spots for longer shots
Building Rooftops: Great for city sunset shots
Fire Lookouts: Clear views above the trees
By the Water
Rocky Shores: Add drama to the foreground
Beaches: Great for catching reflections
Piers: Create depth with lines and structures
High Cliffs: See both ocean and sky
Harbors: Mix boats and sunset colors
City Spots
Parks: Mix trees with buildings
Bridges: Combine structures with natural light
Downtown: Get building shadows against colorful skies
Factory Areas: Mix industrial views with sunset glow
Town Squares: Add people to sunset scenes
In the Mountains
Peaks: See above the clouds
Valley Views: Show depth in the landscape
Mountain Lakes: Catch mirror-like reflections
High Trails: Find unique angles
Open Meadows: Add flowers and grass to the scene
In the Desert
Sand Dunes: Create simple, clean shots
Rock Shapes: Add natural patterns
Green Spots: Mix plants with desert views
Old Ruins: Include historic places
Canyon Edges: Frame sunsets with rock walls
Common Mistakes to Avoid
Centering the horizon
Underexposing foreground
Using automatic settings
Forgetting composition basics
Over-processing images
The art of sunset photography combines technical skill, creative vision, and careful planning. Using Photo Expert for timing and location planning gives you an edge in capturing stunning sunset shots. Remember, it's not just about the technical aspects - it's also about being present in the moment and capturing the mood and beauty of nature's daily spectacle. So grab your camera, find a beautiful spot, and let the magic unfold. Happy shooting! a significant advantage. Practice these techniques regularly, experiment with different conditions, and develop your unique style. Each sunset presents a new opportunity to capture nature's most beautiful moments.
Remember to respect nature, follow local regulations, and preserve the locations you photograph for future generations to enjoy.
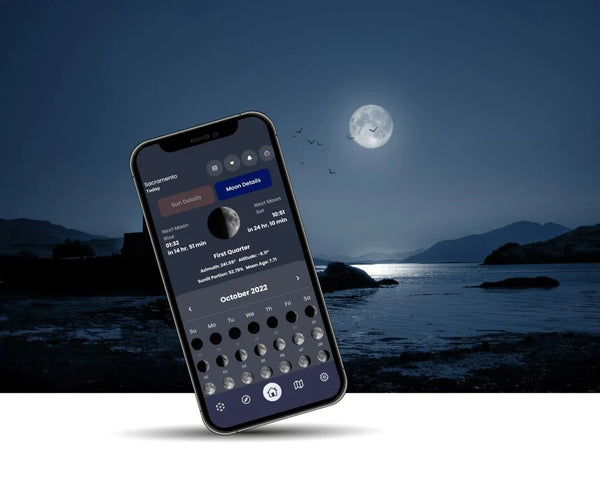
Transform your photography with Photo Expert's comprehensive planning features designed to help you capture extraordinary moments. From celestial events to perfect timing, our tools ensure you never miss the perfect shot.
Photo Calendar Track photography opportunities with ease:
Visual Event Calendar
View celestial events, super moons, meteor showers, and rocket launches
Easy-to-read icons for quick reference
Monthly overview of opportunities
Event Details
Access precise timing information
Location-specific details
One-tap event information
Smart Reminders
Customizable notification settings
Never miss critical moments
Advance planning alerts
Upcoming Events Overview
Quick-access event list
Chronological timeline
Priority event highlighting
Shoot Planner Perfect your shots with precise planning tools:
Interactive Mapping
Real-time Sun and Moon positioning
Milky Way tracking
Date and time-specific visualization
Location Management
Mark current position
Set target shooting locations
Save favorite spots
Time Control Features
Dynamic Time Bar navigation
Light condition previews
Hour-by-hour planning
Event Planning
Eclipse alignment tools
Meteor shower tracking
Moon phase optimization
Composition planning with adjustable pins
Date Flexibility
Multiple date comparisons
Alternative timing options
Optimal shooting time identification
Blue hour timing
Sun position tracking
Location scouting features
Sun & Moon Tracking
Map View: See solar, lunar, and Milky Way positions on an interactive map for any location and date
Augmented Reality (AR) View: Use your phone's camera to overlay the real-time positions of the Sun, Moon, and Milky Way directly on the sky
Sun Tracker: Get exact sunrise, sunset, golden hour, and blue hour timings for any location
Moon Tracker: View detailed moon phase information, including moonrise, moonset, and moon age
Milky Way Planner: Prepare for stunning night photography by knowing exactly when and where the Milky Way will appear
Conclusion
These comprehensive tracking features work seamlessly together to provide photographers with unparalleled precision in planning their shoots. Whether you're capturing a dramatic moonrise over city skylines or the ethereal glow of the Milky Way in remote landscapes, having accurate celestial positioning data at your fingertips ensures you'll never miss that perfect moment. The combination of map-based planning and AR visualization makes it remarkably straightforward to envision your shots before arriving on location, saving valuable time and maximizing your chances of capturing stunning astronomical phenomena.
FAQs (Frequently Asked Questions)
What is the best time to photograph sunsets?
Timing is crucial for sunset photography. It's recommended to plan your shoot using the Photo Expert app to determine the exact time of sunset and arrive early to set up your equipment.
What camera settings should I use for sunset photography?
For sunset photography, it's best to use aperture settings between f/8 and f/16 to ensure everything is in focus. Using Manual Mode allows you to control all settings yourself for optimal results.
What is the golden hour and why is it important?
The golden hour refers to the magical period just before sunset when the light is soft and warm. This time enhances the colors in your photos, making it ideal for capturing stunning sunset images.
How can I enhance my sunset photos during post-processing?
To enhance your sunset photos, adjust the white balance to set the mood and fine-tune exposure levels. Post-processing can significantly improve the overall look of your images.
What common mistakes should I avoid in sunset photography?
Common mistakes include centering the horizon, underexposing the foreground, and relying solely on automatic camera settings. Being mindful of these issues can greatly improve your results.
Where are some of the best locations for photographing sunsets?
Great locations for photographing sunsets include high ground like hills and ridges for clear views, rocky shores or beaches by the water for dramatic foregrounds, city parks that mix trees with buildings, and desert landscapes featuring sand dunes or unique rock shapes.
[star star="376"]
]]>
https://www.miops.com/blogs/news/from-amateur-to-pro-how-the-best-camera-app-for-iphone-transforms-your-shots2025-02-11T15:47:40+03:002025-04-18T09:00:18+03:00From Amateur to Pro: How the Best Camera App for iPhone Transforms Your ShotsOnur Celik
Introduction
In today's world, capturing moments is just as important as experiencing them, and that's where smartphone photography comes in. It's become an essential way to document our daily lives. With the rise of social media, sharing high-quality images has gone from being a rare hobby to something we do every day. As mobile photography becomes more important, there's a growing need for tools that can improve image quality.
Over the years, iPhone cameras have evolved significantly, showcasing impressive advancements in technology. They've gone from basic point-and-shoot capabilities to having advanced lenses and sensors, making iPhones powerful tools for photography. However, even with these improvements, the built-in camera apps may not meet all creative needs.
That's where the best camera app for iPhone comes into play. These apps offer advanced features and customization options that are perfect for both casual enthusiasts and professional photographers. With these apps, you can have more flexibility and control over your photography, turning ordinary pictures into stunning works of art.
The Rise of Smartphone Photography
The evolution of smartphone cameras has sparked a significant shift in photography, challenging the dominance of traditional DSLR cameras. As mobile technology continues to advance, these pocket-sized devices now possess capabilities that rival professional-grade equipment.
Growth and Impact on DSLRs
Accessibility and Convenience: Smartphones are everywhere and always ready for spontaneous moments, making them the preferred choice for everyday photography.
Technological Advancements: Features like high-resolution sensors, optical zoom, and sophisticated image stabilization elevate smartphone photography to new heights.
Decline in DSLR Sales: With improving quality and ease of use, smartphone cameras have contributed to a decline in the sales of entry-level DSLRs.
Influence of Social Media on Photography Habits
Social media platforms have a significant impact on modern photography trends. These platforms:
Encourage sharing instantaneous visual content where smartphones excel due to their connectivity and user-friendly interfaces.
Foster creativity through constant exposure to diverse styles and techniques, inspiring users to experiment with their smartphone photography.
Drive demand for high-quality images that can be easily edited and uploaded directly from mobile devices.
Mobile photography trends continue to evolve as smartphones become an essential tool for both amateur photographers and seasoned professionals alike. The integration of advanced features in mobile apps further enhances this evolution by offering greater creative control over capturing compelling images.
Why You Need an Advanced Camera App on Your iPhone
The default iOS Camera app is convenient and easy to use, but it has some limitations that can hold back your creativity. iPhone camera limitations like the absence of manual controls can be a disadvantage for photographers who want to take precise pictures similar to those taken with a DSLR camera.
Limitations of the Default iOS Camera App
Here are some of the key limitations of the default iOS Camera app:
Automatic Settings: The app predominantly relies on automatic settings, which may not always provide the best results in varying lighting conditions.
Limited Control: Absence of manual adjustments for ISO, shutter speed, and white balance can lead to missed opportunities for capturing the perfect shot.
Basic Features: While suitable for casual users, the default app lacks advanced features needed by serious photographers.
Benefits of Using Third-party Camera Apps
This is where third-party camera apps come into play—places where creativity and control thrive. By selecting the best camera app for iPhone, you gain access to a wide range of features that enable you to go beyond these limitations:
Manual Controls: Adjust ISO, shutter speed, and white balance to capture images as envisioned.
Enhanced Flexibility: Experiment with exposure settings to achieve desired effects, from dramatic contrasts to soft highlights.
Professional Results: Achieve DSLR-like quality without needing bulky equipment.
Exploring these advanced options empowers you to elevate your photography game significantly. With tools that offer both creative freedom and technical precision, your iPhone becomes more than just a smartphone—it transforms into a powerful camera ready to capture breathtaking images.
Key Features to Look For in a Camera App
Choosing the best camera app for iPhone involves understanding the key features that can take your photography skills to the next level. Here are some important elements every photographer should consider:
1. ISO Control
This feature allows you to adjust the camera's sensitivity to light, similar to film speed in traditional cameras. Lower ISO settings are ideal for bright conditions, while higher settings help capture images in low-light environments without introducing excessive noise.
2. Shutter Speed Adjustment
Controlling the duration the camera shutter remains open directly influences motion capture and exposure. A fast shutter speed freezes motion, perfect for action shots, while a slower speed creates artistic blurs and enhances low-light photography.
3. White Balance
Proper white balance settings ensure colors appear natural under various lighting conditions. Adjusting this feature compensates for different light sources, whether it’s warm indoor lighting or cool daylight, ensuring accurate color reproduction.
4. Manual Focus Settings
Autofocus sometimes struggles with capturing detailed subjects or shooting through glass or screens. Manual focus puts control back into your hands, enabling you to fine-tune focus for crisp and sharp images regardless of shooting conditions.
Mastering these features can transform any amateur into a skilled photographer, providing the tools necessary to adapt to different scenes and lighting challenges.
Spotlight on Snap Pro Camera: The Best Camera App for iPhone Users
When it comes to advanced camera apps for the iPhone, the Snap Pro Camera stands out as a top contender. Its robust feature set is designed to cater to both amateurs and seasoned photographers alike, making it a popular choice for those looking to elevate their mobile photography game.
Standout Features
1. Intuitive User Interface
Snap Pro Camera boasts an interface that is both intuitive and visually appealing. This design ensures that users can easily navigate through settings and options without feeling overwhelmed.
2. Advanced Manual Controls
With precise adjustments for ISO, shutter speed, and white balance, photographers gain unparalleled control over their shots. Whether capturing the serene beauty of a sunset or the dynamic energy of a bustling cityscape, this app provides the tools needed to achieve professional-quality images.
In-App Editing Suite
The in-app editing suite is another draw for users. It allows photographers to fine-tune their images directly within the app, streamlining the post-processing workflow. With features such as exposure adjustment, color correction, and cropping at your fingertips, Snap Pro Camera transforms a simple snapshot into a masterpiece.
This seamless blend of advanced features and usability underscores why many regard Snap Pro Camera as the best camera app available for iPhone.
Taking Control: Advanced Manual Settings in Snap Pro Camera
Snap Pro Camera takes your iPhone photography to new heights by offering advanced manual settings that allow you to precisely control exposure and lighting conditions. Real-world examples highlight how these features can transform everyday shots into stunning images.
Key Features for Precise Control
1. ISO Settings in Snap Pro Camera
Adjust the ISO to manage sensor sensitivity. In low-light situations, increasing the ISO can help capture more light, reducing the need for a flash and preserving natural ambiance.
2. Shutter Speed Adjustments in Snap Pro Camera
Control motion in your photos by altering the shutter speed. A fast shutter speed freezes action, perfect for capturing dynamic scenes like a dog mid-leap. On the other hand, slowing down the shutter speed can create artistic blur effects, such as the smooth flow of a waterfall.
3. White Balance
Fine-tune the color temperature to ensure that whites appear true to life. This adjustment is crucial when shooting under mixed lighting conditions where automatic settings may falter.
4. Manual Focus
Gain complete control over focus, allowing for creativity in depth-of-field effects—ideal for portraiture and macro photography.
Practical Tips for Effective Use
Experiment with ISO: Start with a low ISO for bright environments; increase it incrementally in darker settings while monitoring noise levels.
Play with Shutter Speed: Test various speeds to master both action shots and creative motion blurs. Remember, slower speeds require steadier hands or a tripod.
Adjust White Balance Thoughtfully: Match white balance settings to your shooting environment—consider using presets like daylight or tungsten for quick adjustments.
Use Manual Focus Creatively: Focus manually on subjects at varying distances to achieve desired depth-of-field effects.
These advanced controls empower photographers to tailor their shots precisely, making Snap Pro Camera an invaluable tool for capturing professional-quality images on an iPhone.
Exploring Other Top iPhone Camera Apps You Should Consider
Diving into the world of iPhone photography doesn't limit you to a single app. While Snap Pro Camera is a powerhouse, exploring other top contenders can enhance your photographic skills. Here's a look at some popular alternatives that boast unique features worth considering.
Halide Mark II
When discussing the best camera app for iPhone, Halide Mark II frequently emerges as a standout option. This app is renowned for its comprehensive controls. Users appreciate its intuitive design, offering advanced manual settings that rival professional-grade cameras.
Key Features:
ISO and Shutter Speed Adjustments: Allows precise control over exposure.
Focus Peaking and Depth Capture: Ensures sharp images with depth information.
RAW Capture Support: Provides high-quality image files suitable for post-processing.
These features make Halide Mark II a preferred choice for those who crave full control over their shooting experience.
FiLMiC Firstlight
For those who love experimenting with aesthetics, FiLMiC Firstlight offers an intriguing twist on mobile photography. Its standout feature lies in its film simulations, allowing photographers to infuse their shots with vintage flair reminiscent of classic film photography.
Unique Aspects:
Film Grain and Vignette Effects: Adds character to digital photos.
Customizable Presets: Tailors the filmic look to personal style preferences.
Live Analytics: Provides real-time feedback on exposure adjustments.
The app's ability to emulate film characteristics makes it a creative playground for enthusiasts aiming to add nostalgic elements to their images.
ProCamera+
Another noteworthy mention is ProCamera+, known for its robust set of tools catering to both beginners and seasoned photographers. The app's highlight is its integrated editing suite, simplifying the process of refining images right after capture.
Notable Features:
Advanced Editing Tools: Offers precision in tweaking exposure, contrast, and saturation.
Low Light Mode: Enhances performance in challenging lighting conditions.
HDR Capture and Anti-Shake Feature: Improves image quality in dynamic situations.
ProCamera+'s all-in-one approach makes it a convenient choice for users seeking both shooting and editing capabilities within a single platform.
Exploring these alternatives enriches your photographic toolkit, providing diverse functionalities that cater to various creative needs and preferences.
Enhancing Your Photography Skills with Mobile Apps: A Learning Journey
Advanced camera apps offer a unique opportunity to delve into the intricacies of photography, allowing users to learn about mobile photography techniques through apps. By providing control over exposure parameters like ISO, shutter speed, and white balance, these apps become an educational tool for budding photographers. With each adjustment, users gain a deeper understanding of how different settings affect the final image, enabling them to experiment and refine their skills over time.
Resources to Enhance Your Mobile Photography Journey
A wealth of resources is available to enhance your journey in mobile photography:
Online Tutorials and Guides: Websites like Digital Photography School and YouTube channels dedicated to smartphone photography offer tutorials that cover everything from basic concepts to advanced techniques.
Photography Workshops: Many online platforms provide virtual workshops and courses taught by professional photographers. These sessions often include comprehensive lessons on using advanced camera apps effectively.
Photography Communities: Joining forums or social media groups such as those on Reddit or Facebook can connect you with fellow photographers who share tips, advice, and feedback on your work.
By leveraging these resources alongside advanced camera apps, you can systematically improve your mobile photography expertise. Each image captured becomes a stepping stone towards mastering the art of photography with your iPhone.
Post-Processing Magic: Editing Your Photos Like a Pro on iPhone
In the world of mobile photography, capturing an image is only half the battle. Post-processing plays a crucial role in transforming basic snapshots into breathtaking visual stories. By mastering the editing features in mobile photography apps, you can elevate your images from ordinary to extraordinary, allowing you to express your artistic vision more vividly.
Editing Tools and Their Significance
Several apps stand out in the world of photo editing, offering tools that are as good as desktop software solutions:
1. Darkroom
This app is known for its easy-to-use interface and powerful editing tools. It offers features like curve adjustments, selective color tuning, and batch processing, making it an excellent choice for photographers looking to improve their workflow.
2. Adobe Lightroom for iOS
Lightroom is famous for its wide range of professional editing tools. It gives you complete control over exposure, contrast, and color balance. Its integration with Creative Cloud ensures seamless syncing across devices, making it a favorite among professionals.
Both apps emphasize non-destructive editing, meaning adjustments can be made without changing the original file. This feature is crucial for maintaining image quality while trying out different styles.
Importance of Post-Processing
The importance of post-processing cannot be emphasized enough. It allows photographers to:
Correct Exposure and Color: Adjust lighting and color tones to match the intended mood or fix issues caused by difficult shooting conditions.
Enhance Details: Sharpen images and bring out textures that might be lost in raw captures.
Apply Artistic Effects: Add filters or creative effects that transform the image's aesthetic appeal.
Using these tools not only improves technical aspects but also develops a photographer's unique style. As you explore the world of post-processing magic, you'll discover how these edits can bring life to your photos, turning them into captivating masterpieces ready to share with others.
Bridging the Gap Between Amateur and Professional Photography with Snap Pro Camera
Smartphone cameras have changed the game in photography, giving traditional DSLR cameras a run for their money with their convenience and accessibility. The Best Camera App for iPhone, like Snap Pro Camera, is a key player in this evolution.
1. Advanced Manual Controls
Snap Pro's features, such as ISO control and shutter speed adjustments, empower users to capture stunning images that rival those taken with professional equipment. This capability allows enthusiasts to experiment with different techniques without investing in bulky gear.
2. User-Friendly Interface
The app's intuitive design caters to both beginners and seasoned photographers. Its seamless controls make it easier to understand complex photography concepts, fostering a learning environment that bridges the knowledge gap.
3. In-App Editing Suite
By integrating editing tools directly within the app, Snap Pro encourages users to refine their photos immediately. This feature not only enhances creativity but also contributes to developing a professional touch in mobile photography.
Snap Pro Camera transforms your iPhone into a powerful tool for capturing high-quality images, making it an essential companion on the journey from amateur to pro.
Conclusion: Unleash Your Creative Potential with Snap Pro Camera
Snap Pro Camera is an innovative app for iPhone users who want to improve their photography skills. With its user-friendly interface and extensive manual controls, it is the best camera app for iPhone enthusiasts.
Explore Creativity: Enter a realm where your artistic ideas come to life effortlessly. Snap Pro Camera provides you with the necessary tools to turn ordinary photos into breathtaking visual stories.
Download Now: Are you prepared to elevate your photography? Download Snap Pro Camera and begin an enriching photographic adventure.
Snap Pro Camera is more than just an application; it is a source of inspiration that connects creativity and reality with each captured moment.
Unleash your creative potential today with Snap Pro Camera – the ultimate companion for iPhone photography enthusiasts.With access to advanced editing tools, exclusive filters, and unlimited storage, you'll have everything you need to transform your photos into works of art. Upgrade now and let your creativity soar with Snap Pro Camera.
[star star="912"]
]]>
https://www.miops.com/blogs/news/high-speed-flash-photography-a-complete-guide2025-02-09T13:36:20+03:002025-04-18T09:00:08+03:00High-Speed Flash Photography: A Complete GuideErkan YigiterHigh-speed flash photography is a fascinating technique that allows photographers to freeze fast-moving subjects with incredible precision. Whether you're capturing water droplets, smashing objects, or wildlife in action, high-speed flash photography can help you achieve stunning results. This guide will walk you through the essentials of high-speed flash photography and how to master it.
1. What is High-Speed Flash Photography?
High-speed flash photography involves using a fast, short-duration burst of light to capture objects in motion. Unlike traditional photography, where shutter speed determines the exposure time, in high-speed flash photography, the flash duration is what freezes the action. The shorter the flash duration, the better the motion will be frozen without blur.
This technique is widely used in scientific research, product photography, and creative artistic shots. It is ideal for capturing moments that the human eye cannot perceive, such as a bursting balloon, a matchstick igniting, or an insect in mid-flight.
2. Essential Equipment for High-Speed Flash Photography
Camera:
A DSLR or mirrorless camera with manual mode for better control.
Cameras with high flash sync speed help reduce ghosting effects.
Flash Unit:
A speedlight or studio strobe with adjustable power settings.
MIOPS Smart+ – A smart trigger that helps synchronize your flash with motion or sound events.
A flash unit with low power settings (1/32 - 1/128) will produce shorter flash durations, making it ideal for high-speed photography.
Tripod and Remote Trigger:
A sturdy tripod to keep your camera steady.
A remote shutter release to eliminate camera shake.
Dark Room or Controlled Environment:
A dark or low-light setting helps enhance the impact of the flash.
A black background can help isolate the subject and reduce distractions.
3. Camera and Flash Settings
Camera Settings:
Mode: Manual (M)
ISO: 100-400 (to reduce noise)
Aperture: f/8 - f/16 (for sharp focus and better depth of field)
Shutter Speed: Set to 2-3 seconds for long exposure to allow the flash to freeze the motion effectively.
Focus: Manual (pre-focus on the subject using a test shot)
Flash Settings:
Power: Lower power settings (1/32 - 1/128) produce shorter flash durations.
Triggering: Use a sound, laser mode for motion detection, or infrared trigger to precisely trigger the flash.
Multiple Flashes: Using multiple flashes from different angles can help eliminate unwanted shadows and enhance details.
4. Techniques for Capturing High-Speed Action
1. Water Droplet Photography
Use MIOPS Splash – a specialized water drop kit for precise and consistent droplet release.
MIOPS Splash drips the water and simultaneously triggers the flash to capture the moment precisely.
Experiment with colored gels for unique effects.
Try backlighting to highlight the details of the droplets.
2. Breaking Objects in Mid-Air
Use a hammer or air gun to break glass, fruits, or balloons.
A sound trigger can detect the impact and fire the flash.
Use a fast frame rate to increase the chances of capturing the exact moment of impact.
3. Capturing Fast-Moving Wildlife
Position flashes around feeding areas.
Use motion detection to trigger the flash when animals move.
Ensure flashes are diffused to avoid startling the subjects.
4. Freezing Smoke and Fire
Use controlled bursts of flame or vapor for artistic images.
A short-duration flash will help capture intricate smoke trails without blur.
Experiment with different angles to enhance the dramatic effect of fire and smoke.
5. Post-Processing Tips
Adjust brightness and contrast in Adobe Lightroom to enhance details.
Use Adobe Photoshop to remove unwanted reflections or distractions.
Stack multiple exposures for creative compositions.
Fine-tune color tones to emphasize the subject.
Reduce noise selectively while preserving sharpness in high-speed shots.
6. Additional Tips for Perfect Shots
Use multiple flashes for better lighting control and even illumination.
Experiment with different angles to add depth and dimension to your shots.
Try different flash power settings to see what works best for your specific subject.
Test shots are crucial—set up your scene and take test images to refine settings before attempting the final capture.
Patience and timing are key—some shots may require multiple attempts to perfect.
Conclusion
High-speed flash photography opens up a world of creative possibilities. With the right setup, equipment, and patience, you can capture stunning images that freeze action in time. By using MIOPS Smart+ and mastering your camera settings, you can take your high-speed photography to the next level.
Now, grab your camera, set up your flashes, and start capturing the unseen moments of high-speed action! ⚡📸
[star star="295"]
]]>
https://www.miops.com/blogs/news/how-to-capture-star-trails-with-long-exposure-photography2025-02-09T12:52:45+03:002025-04-18T09:00:10+03:00How to Capture Star Trails with Long Exposure PhotographyErkan YigiterCapturing star trails is an exciting way to showcase the movement of the stars across the night sky, creating stunning, ethereal images. Whether you are a beginner or an experienced photographer, this guide will help you master the technique of long exposure photography for star trails.
1. Choose the Right Location
The key to capturing beautiful star trails is finding a dark location away from city lights. Light pollution can wash out the stars and make them less visible in your photos. Consider using Photo Expertto find the best dark sky locations, access a Light Pollution Map, and track Moon and Sun events for optimal shooting conditions.
Best Places for Star Trails:
National parks and remote areas
High-altitude locations with clear skies
Dark sky reserves and observatories
2. Plan Your Shoot
Proper planning ensures you capture the best star trails.
Best Conditions:
Clear Skies: Check weather forecasts and avoid cloudy nights.
Moon Phases: A new moon or a crescent moon is ideal, as bright moonlight can overpower star trails.
Time of Year: Winter months often have clearer skies, but star trails can be captured year-round.
3. Essential Gear for Star Trails Photography
For DSLR and Mirrorless Cameras:
Camera: A DSLR or mirrorless camera with manual settings.
Wide-Angle Lens: Preferably f/2.8 or faster to capture more light.
Sturdy Tripod: Essential to avoid camera movement.
Remote Shutter Release or Intervalometer: Allows long exposures without touching the camera.
MIOPS Smart+– A smart camera trigger to automate long exposures and interval shooting.
For iPhone Users:
Snap Pro Camera App– Allows manual exposure control and long shutter speeds.
Tripod with Phone Mount: Essential for stability.
4. Camera Settings for Star Trails
For DSLR and Mirrorless Cameras:
Mode: Manual (M)
Aperture: f/2.8 – f/5.6 for optimal light intake.
ISO: 800 – 3200 (adjust based on light conditions).
Shutter Speed: 30 seconds per exposure (use Bulb Mode for longer exposures).
White Balance: 4000K – 5000K for a natural look.
Focus: Set to infinity and manually adjust for sharp stars.
For iPhone Users (Using Snap Pro Camera App):
Use Long Exposure Mode
ISO 400-1600 to balance noise and brightness.
Shutter Speed: Set to 15-30 seconds (or use time-lapse stacking).
Lock Focus to Infinity
Shoot in RAW for better post-processing flexibility
5. Shooting Techniques
Single Long Exposure Method:
This method involves a single exposure with a very long shutter speed (30 minutes to several hours).
Set the camera to Bulb Mode.
Use a remote shutter release to minimize vibrations.
Monitor the battery life, as long exposures drain power quickly.
Stacking Multiple Short Exposures (Recommended):
Instead of one long exposure, shoot multiple 30-second images and stack them in post-processing.
Use an intervalometer to shoot continuously for 1-3 hours.
Stack images using software like StarStaX or Adobe Photoshop.
Reduces noise and avoids overexposed images.
6. Post-Processing Tips
Editing star trails enhances their visibility and removes unwanted noise.
Recommended Software:
Adobe Lightroom: Adjust contrast, shadows, and clarity.
Adobe Photoshop: Use the blending mode to stack images.
StarStaX: Specializes in stacking star trail images for smooth results.
Editing Steps:
Import and select the best images.
Adjust contrast and sharpness in Lightroom.
Stack images in Photoshop or StarStaX.
Apply final touches like color correction and noise reduction.
7. Additional Tips for Stunning Star Trails
Include Foreground Elements: Mountains, trees, or buildings add depth.
Use the North Star (Polaris): Creates circular star trails when framed properly.
Experiment with Different Angles: Try vertical and panoramic compositions.
Shoot in RAW: Provides better editing flexibility.
Be Patient: Star trails require time, so plan accordingly.
Conclusion
Star trail photography is a rewarding experience that requires careful planning, the right settings, and patience. By using tools like Photo Expert for location tracking, light pollution mapping, and Moon/Sun event planning, along with MIOPS Smart+ for automation and Snap Pro Camera App for iPhone users, you can capture breathtaking images of the night sky.
Now, set up your gear, find a dark sky, and start capturing the magic of star trails!
[star star="583"]
]]>
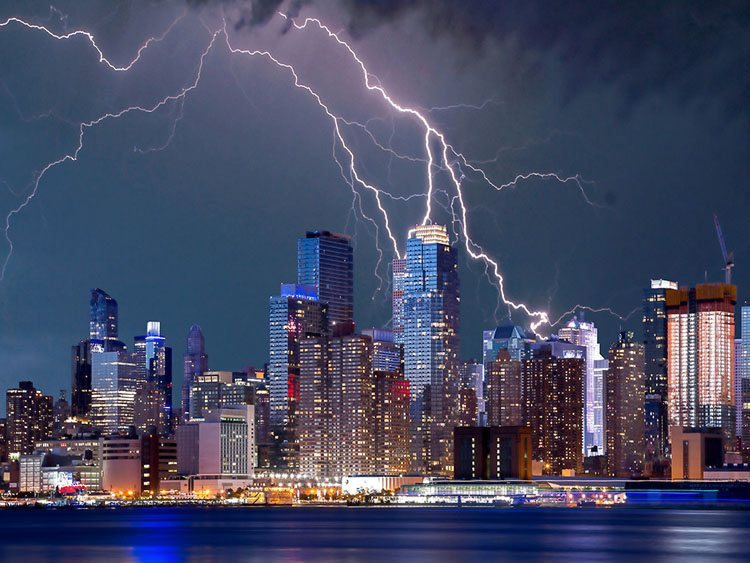
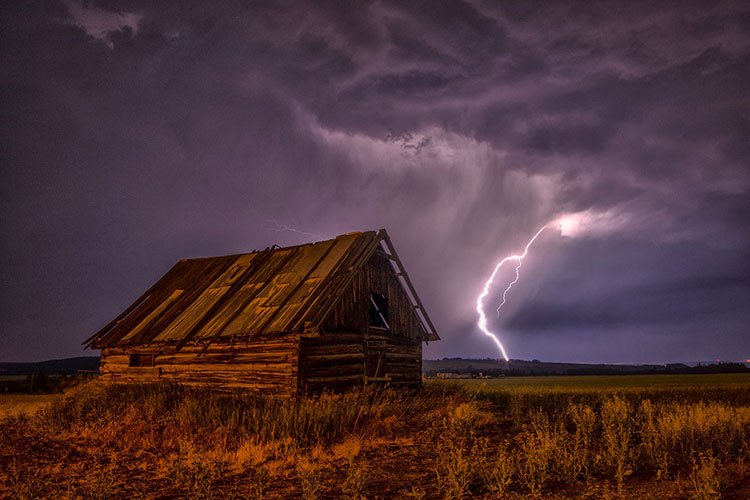
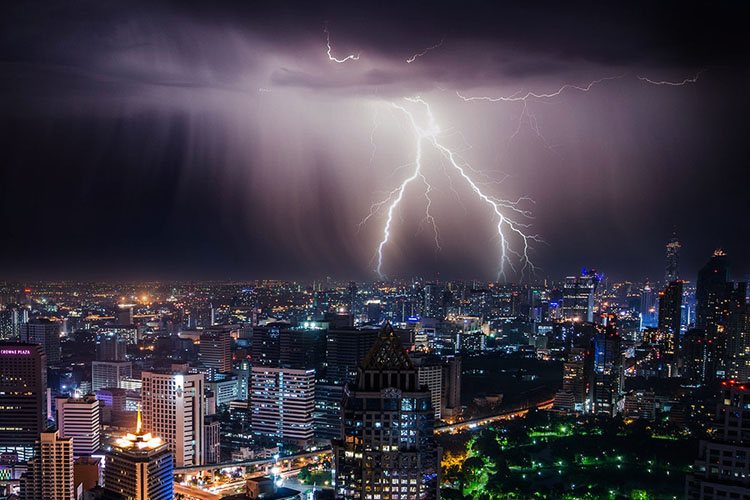
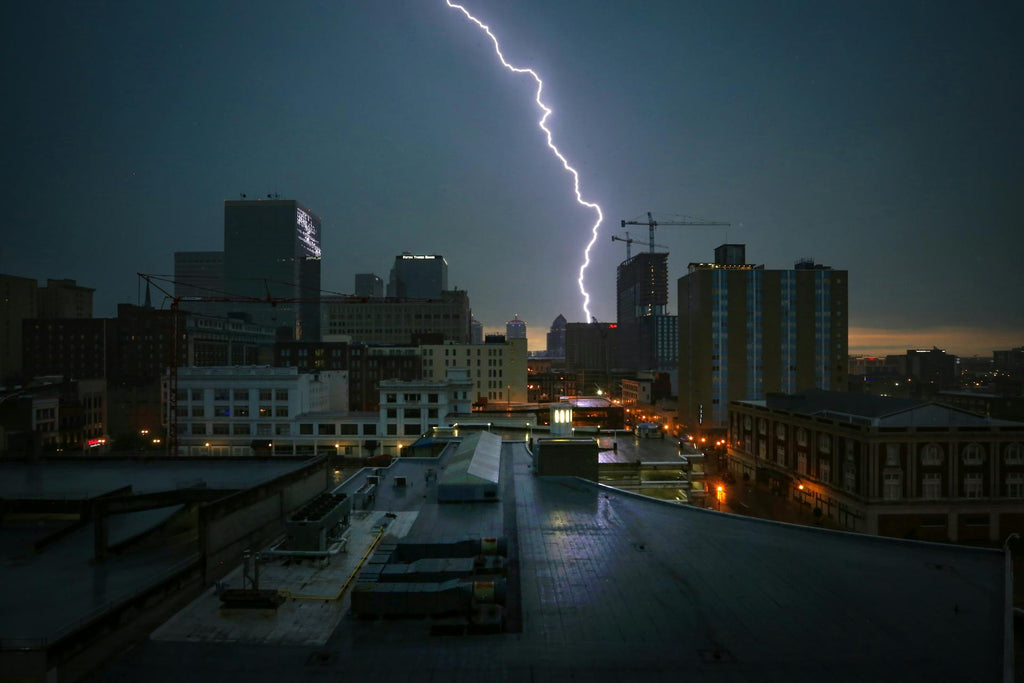
https://www.miops.com/blogs/news/the-complete-guide-to-storm-and-lightning-photography2025-02-09T12:25:59+03:002025-04-18T09:00:11+03:00The Complete Guide to Storm and Lightning PhotographyErkan YigiterCapturing the raw power of a storm and the brilliance of lightning strikes requires skill, patience, and the right equipment. Whether you're an amateur or a seasoned photographer, this guide will help you master storm and lightning photography with both DSLR cameras and iPhones.
1. Safety First
Before venturing out to capture storms and lightning, your safety should be the top priority. Here are essential precautions:
Find a safe location: Avoid open fields, high places, and tall trees.
Stay inside a vehicle or a shelter: A car with closed windows can provide protection.
Monitor weather forecasts: Use an app like Photo Expert.
Have an exit strategy: Be prepared to move if conditions worsen.
2. Essential Gear for Lightning Photography
For DSLR and Mirrorless Cameras:
Camera: A DSLR or mirrorless camera with manual settings.
Tripod: Essential for long exposures and stability.
Remote Shutter Release: Prevents camera shake.
Wide-Angle Lens: Captures more of the sky.
Lightning Trigger: MIOPS Smart+– A professional lightning trigger that detects lightning and triggers your camera for precise captures.
For iPhone Users:
MIOPS Spark– A lightning trigger with an internal sensor that detects lightning and triggers your iPhone to take a lightning photo.
Tripod: Stability is crucial for long exposures.
Clip-on Lens: Enhances field of view for iPhone users.
3. Choosing the Right Location
Select a spot that gives you a wide, unobstructed view of the sky. Some of the best locations include:
Open fields or plains
Coastal areas
Hilltops (but not too exposed to lightning)
Cityscapes for dramatic urban storm shots
4. Camera Settings for Lightning Photography
For DSLR and Mirrorless Cameras:
Mode: Manual (M)
Aperture: f/8 – f/16 for sharpness
ISO: 100 – 400 to minimize noise
Shutter Speed: 5-30 seconds (depending on storm activity)
Focus: Manual, set to infinity
White Balance: 4000K-5000K for a natural look
Use MIOPS Smart+ to automate capture when lightning strikes.
For iPhone Users (Using MIOPS Spark and Snap Pro Camera App):
Use MIOPS Spark to Automatically Capture Lightning
Use Long Exposure Mode
ISO 100-400 to reduce noise
Shutter Speed: Adjust manually to 3-10 seconds
Lock Focus to Infinity
Shoot in RAW for better editing flexibility
5. Post-Processing Tips
Editing can enhance lightning shots by improving contrast, sharpness, and color. Use:
For DSLR Users:
Adobe Lightroom: Adjust contrast and highlights.
Adobe Photoshop: Stack multiple lightning images for a dramatic effect.
Nik Collection: Enhance details and remove noise.
For iPhone Users:
Snapseed: Adjust highlights and shadows.
Lightroom Mobile: Fine-tune exposure and clarity.
Darkroom: Improve color balance.
6. Additional Tips for Stunning Lightning Shots
Use the Rule of Thirds: Compose with an interesting foreground element.
Shoot Multiple Frames: Increase the chances of capturing lightning.
Try Different Angles: Experiment with reflections and silhouettes.
Combine Multiple Shots: Layering images in post-processing can create more dramatic compositions.
Conclusion
Storm and lightning photography is both thrilling and challenging. By using the right settings, safety precautions, and tools like MIOPS Smart+ for DSLR and MIOPS Spark for iPhone (which works with Snap Pro Camera App), you can capture breathtaking images of nature’s raw energy.
Now, grab your camera, check the forecast, and head out safely to capture the storm! ⛈️📸
[star star="215"]
]]>
https://www.miops.com/blogs/news/how-to-photograph-the-milky-way-with-your-iphone-or-dslr2025-02-09T12:09:51+03:002025-04-18T09:00:12+03:00How to Photograph the Milky Way with Your iPhone or DSLRErkan YigiterCapturing the Milky Way can be one of the most rewarding experiences in photography. While traditionally done with high-end DSLR cameras, advancements in smartphone technology now allow iPhone users to take stunning night sky images as well. Whether you're using an iPhone or a DSLR, here’s a complete guide to photographing the Milky Way.
1. Choose the Right Location
The key to capturing the Milky Way is finding a location with minimal light pollution. Cities and urban areas emit excessive artificial light that can obscure the stars, so head to remote locations, national parks, or dark sky reserves. Websites like Light Pollution Map can help you find the best spots.
2. Plan Your Shoot
The Milky Way is best visible during certain times of the year, typically from March to October in the Northern Hemisphere and February to October in the Southern Hemisphere. Use apps like Photo Expertto determine the position of the Milky Way and the best time to shoot.
Best Conditions:
New Moon (or minimal moonlight)
Clear skies (check weather forecasts)
Late evening to early morning (generally between 10 PM and 4 AM)
3. Gear and Settings for DSLR Cameras
A DSLR or mirrorless camera provides more flexibility for astrophotography. Here’s what you need:
Recommended Equipment:
A wide-angle lens (preferably f/2.8 or faster)
A sturdy tripod to prevent camera shake
A remote shutter release (or use a timer to reduce vibrations)
A dark sky location
Best Camera Settings:
Mode: Manual (M)
Aperture: f/2.8 (or the lowest possible)
ISO: 1600-3200 (experiment for best results)
Shutter Speed: 10-25 seconds (use the 500 rule: 500 / focal length = max exposure time in seconds before stars blur)
Focus: Manual (set to infinity)
White Balance: 4000K-5000K for a natural look
4. How to Capture the Milky Way with an iPhone
With recent advancements, iPhones (especially models from iPhone 11 and newer) have powerful Night Mode features.
Recommended App for iPhone Astrophotography:
Snap Pro Camera– Provides professional manual controls and RAW capture for night photography.
Best iPhone Settings:
Use Night Mode (available on newer iPhones)
Manually adjust exposure (hold the shutter button and slide to increase exposure time)
Set ISO between 800-3200
Use a tripod or a stable surface to avoid motion blur
Shoot in RAW if supported (this helps with post-processing)
5. Post-Processing for Stunning Results
Post-processing can dramatically enhance your Milky Way shots. Here are some recommended tools:
For DSLR Images:
Adobe Lightroom (adjust exposure, contrast, and color balance)
Adobe Photoshop (stacking multiple exposures for better noise reduction)
DeepSkyStacker (useful for stacking Milky Way images for clarity)
For iPhone Images:
Snapseed (adjust contrast, shadows, and highlights)
Lightroom Mobile (enhance colors and reduce noise)
Darkroom (great for fine-tuning the Milky Way’s visibility)
6. Additional Tips for Capturing the Milky Way
Use the Rule of Thirds: Compose your shot with an interesting foreground element like mountains or trees.
Take Multiple Shots: Some images may come out blurry, so always capture multiple exposures.
Experiment with Light Painting: Use a flashlight to softly illuminate foreground objects.
Stack Images: Multiple images can be stacked to reduce noise and enhance clarity.
Conclusion
Photographing the Milky Way requires patience and practice, but with the right tools and techniques, you can capture breathtaking images whether using a DSLR or an iPhone. Find a dark location, plan your shoot with Photo Expert, use Snap Pro Camera for the best manual controls on iPhone, experiment with settings, and refine your image in post-processing. With these tips, you'll be on your way to creating mesmerizing astrophotography shots.
Now, go out and explore the night sky with your camera! 🌌📸
[star star="325"]
]]>
https://www.miops.com/blogs/news/light-pollution-in-photography-how-to-capture-clear-night-skies2025-02-07T14:26:36+03:002025-04-18T09:00:14+03:00Light Pollution in Photography: How to Capture Clear Night SkiesErkan YigiterWhat is Light Pollution?
Light pollution refers to the excessive or misdirected artificial light in the night environment, which disrupts the natural darkness of the sky. It is a significant challenge for astrophotographers and night sky enthusiasts, as it reduces the visibility of stars, planets, and other celestial objects. Light pollution originates from sources such as streetlights, billboards, commercial buildings, and residential areas.
How Light Pollution Affects Photography
When photographing the night sky, light pollution can result in:
Washed-out skies: Artificial light brightens the sky, making it harder to capture faint celestial objects.
Reduced contrast: Light pollution diminishes the contrast between stars and the dark background.
Unwanted color casts: Some artificial lights create an orange or yellow glow in long-exposure images.
Limited exposure times: Increased light levels force photographers to use shorter exposure times, which may not be ideal for deep-sky photography.
How to Reduce Light Pollution in Your Photos
Although light pollution is widespread, there are several ways to minimize its impact and improve your night photography.
1. Choose the Right Location
Selecting a dark sky location is crucial for astrophotography. Consider visiting dark sky reserves, rural areas, or national parks where artificial light is minimal. You can use our Light Pollution Map to find the best locations with minimal light pollution for capturing clear night skies.
2. Use a Light Pollution Filter
A light pollution filter, also known as an LPF or LPS (Light Pollution Suppression) filter, helps reduce the impact of artificial light, particularly sodium and mercury vapor lights. These filters improve contrast and clarity by blocking specific wavelengths of light.
3. Shoot During the Right Conditions
New Moon Nights: A new moon provides the darkest skies, enhancing visibility for stars and galaxies.
Higher Altitudes: Shooting from mountains or elevated locations reduces the effects of ground-level light pollution.
After Midnight: Many artificial lights, such as businesses and homes, start dimming after midnight, resulting in a darker sky.
4. Use Proper Camera Settings
Wide Aperture (f/2.8 or lower): Allows more light into the sensor without extending exposure times excessively.
Long Exposure (15-30 seconds): Captures more light, but be mindful of star trails if shooting without a tracker.
High ISO (800-3200): Increases sensitivity to light while balancing noise levels.
Manual Focus: Autofocus struggles in low-light conditions, so switch to manual focus and use live view to focus on a bright star.
5. Post-Processing Techniques
If light pollution affects your images, post-processing can help recover details:
Use Gradient Removal Tools: Software like Adobe Lightroom, Photoshop, and PixInsight offer gradient removal tools to reduce sky brightness.
Adjust White Balance: Tweaking white balance can correct color casts from artificial lights.
Enhance Contrast: Increasing contrast selectively can help make stars stand out against the background.
6. Try Star Trackers for Deep-Sky Photography
For capturing faint deep-sky objects, consider using a star tracker. A star tracker compensates for Earth's rotation, allowing longer exposures without star trails. This technique improves image quality and reduces the impact of light pollution by increasing the signal-to-noise ratio.
Conclusion
Light pollution is a significant challenge for night photographers, but with careful planning and the right techniques, you can still capture breathtaking images of the night sky. Choosing dark locations, using light pollution filters, adjusting camera settings, and post-processing your images can help overcome the effects of artificial light. Whether you're shooting the Milky Way, meteor showers, or deep-sky objects, reducing light pollution's impact will allow you to create stunning night photography
[star star="412"]
]]>
https://www.miops.com/blogs/news/christmas-photography-ideas-for-miops-users2024-12-06T12:11:03+03:002025-04-18T09:04:53+03:007 Christmas Photography Ideas for MIOPS UsersVictorino Abrugar
Christmas season is upon us, and we all know that this is the time for striking poses with family and friends! This season is for making great memories, and there is no better way to remember dear moments clearly than by capturing great photographs that can last a lifetime. With everyone you love and great decor at your disposal, you will surely find that taking pictures during Christmas is fun and energizing.
[blognewsletter]
Before we get into some great ideas to amp up your Christmas photos, here are some tried and tested tips that can make your photos pop in the sea of greetings online and offline:
Take advantage of the lighting around you. Christmas is all about those bright ambient lights, so avoid using your flash. If you take the photo right, the lights will lend some wonderful illumination and appropriate shadows in your pictures. With all the lights around you, it may also be smarter to lower your ISO.
If you are in a place where a flash is absolutely necessary, bring a flash diffuser to avoid overexposing your subjects. An external flash will also be better for the job because it will give you more flexibility in terms of where you want your light to hit. Try directing the light towards ceilings or walls to reduce its impact n the photo.
Pack smart. Make sure that your batteries are fully charged, and bring extras for good measure. Have empty memory cards available to you to make sure that you can take as many beautiful shots as possible. A portable tripod will also be useful, especially if you want to be in some of the shots.
Bring a macro lens to take better photos of decors, small details, or portraiture.
Now that you have these tips to remember, here are some creative ideas to try for your Christmas photography:
1. Go for bokeh.
Christmas lights and decor are great, but we all know that they can be a bit cliche during the holidays. However, these details can be your money shots when you know how to play around with your settings and imagination. Using the bokeh technique can make your photos look better and compelling. Bokeh refers to the colorful orbs created out of the background or foreground lighting and a wide aperture. The latter results in a shallow depth of field and blurring in the background. By using this technique, you will be able to let your subjects shine in photographs, whether they are people or minute details as the party venue.
The Christmas season highlights the importance of family and friends and is also a season of merrymaking among our circles. During this season, you will have a chance to photograph people who are enjoying themselves and their company. Take pictures of brothers and sisters, best friends, or husbands and wives. They will happily oblige and smile before your camera, and you will undoubtedly capture their genuine expressions. This is what makes holiday pictures treasurable--emotional moments that will be cherished for years to come.
3. Take pictures of well-decorated homes.
People in your neighborhood surely took their time to decorate their homes for the holidays. It may be worthwhile to stroll around your street to take pictures of their homes. While walking around, you may even chance upon carolers who are singing their hearts out. Whip out your camera and take advantage of these moments. Christmas really offers great opportunities to practice your photography skills.
4. Document gift opening.
In addition to merrymaking, this season is also a time of gift-giving and receiving. Get your cameras ready to capture the joyful reactions of your loved ones as they open their gifts. Do not fret too much about their smiles. You will surely be able to take pictures of their authentic smiles, and maybe even tears of joy. If you have the chance, focus on the children. There may be nothing more precious than a child’s elation from a new toy.
5. Jump into food photography.
Before your family and friends gather around the spread of delectable food, make sure to set some time to capture the food at their best. If possible, you may even be lucky to add human elements to your food photography by taking pictures of the cooking process. Do not forget that the key to this niche is composition and great lighting.
6. Experiment with long exposure.
Christmas lights and great ambient lighting are great for long exposure photography. Bring your MIOPS RemotePlus Camera Trigger or MIOPS Mobile Dongle Kit to instantly turn your smartphone into a cable release for your DSLR camera. With it, you can control your camera’s shutter through a button on your smartphone. Use this to take long exposure shots of your Christmas trees with ease.
7. Tell a story.
Christmas definitely lends some great stories. Approach the event as if you are a photojournalist who was tasked to tell stories through photographs. Be ready to capture your nieces’ laughter, a cousin’s wacky expressions, or your kid playing with his toys. Christmas is an eventful day. Show people how your food was prepared, how your family welcomed guests, and how they reacted to jokes, stories, or surprise gifts. At the end of the day, your goal is to document the day. Find expressions of love, happiness, and laughter around you. We are sure that there are hundreds of opportunities to capture these moments.
Christmas is a special day that happens only once a year, so keep these ideas in mind before you head for your family’s annual reunion. Among these tips, we would like to emphasize the importance of telling memorable stories through your photographs. Giving your loved ones a means to remember a wonderful holiday season is probably the greatest gift you could give them. Also, remember that the holidays are for merrymaking and enjoyment. While it is important to be creative in taking pictures, it is more important that you enjoy the holidays. Smile behind the camera and enjoy the beautiful Christmas moments around you.
[faq q1="what kinds of pictures can be taken in christmas?" a1="This season is for making great memories, and there is no better way to remember dear moments clearly than by capturing great photographs that can last a lifetime." q2="what are the tips for christmas photography?" a2="Take advantage of the lighting around you. Christmas is all about those bright ambient lights, so avoid using your flash." q3="how to do bokeh in christmas photos?" a3="Christmas lights and decor are great, but we all know that they can be a bit cliche during the holidays. However, these details can be your money shots when you know how to play around with your settings and imagination."]
[star star="849"]
]]>
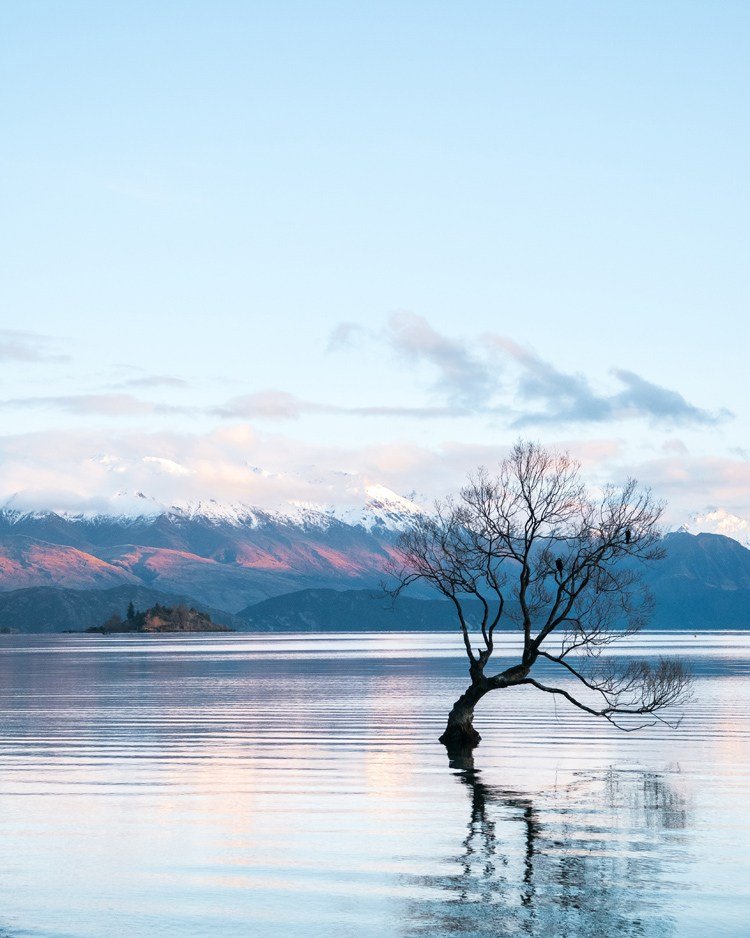
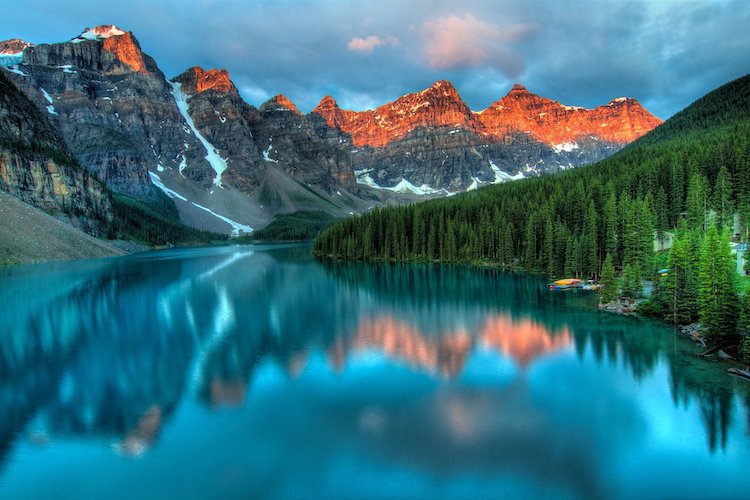
https://www.miops.com/blogs/news/landscape-photography-any-time-of-the-day2024-12-02T12:30:00+03:002025-04-18T09:02:09+03:00Landscape Photography, Any Time of the Day Onur Celik
Landscape photography remains to be one of the most universally loved genres of photography because of its ability to transport the viewers instantly to a certain place and give a glimpse of the experience of being there. Landscape photography not just allows us to photograph and document a certain place and the environment but also allows us to use the world around us to express our creativity and even our emotions in a singular image.
For new photographers trying out landscape photography, a common tip for more successful pursuits of breathtaking images is to shoot either at sunrise or sunset. The golden soft light often gives an easily vibrant feel to any location and this is why that tip has always been effective. However, for more experienced landscape photographers, any time of the day can be turned into a unique aesthetic environment with the use of various exposure techniques and shooting methods.
Golden Hour
There's a reason why the golden hour is the most favorable shooting scenario for landscape photography or any kind of photography in general. For one, the quality and direction of light are more favorable in a way that the shadows are produced to give the scene more texture and depth, and the colors of the sky have a characteristic vibrance.
Shooting landscapes during the golden hour can often be the most rewarding. The light coming from a mildly cloudy sky can produce a very dynamic and rapidly changing backdrop. No matter where you may be shooting from, even the simplest of locations to the grandest views, the vibrant skies of the sunrise or sunset can definitely transform it into a stunning scene.
Shooting landscapes during the golden hour can be done in various ways. If you’re shooting from a perspective facing the sun or the bright sky directly, the easiest way is to capture the fiery sky with a characteristic silhouette of significant foreground elements. This can be done very simply with any camera without the need for tripods or filters.
In locations where applicable, photographing landscapes with the sunlight coming from the side can be a great way to produce dynamic images. Tangential lighting emphasizes depth and increases the contrast in the scene. However, a common problem encountered in such near-perfect shooting conditions is dynamic range limitations. This problem arises from the huge gap in luminosity between the foreground elements and the bright sky. Specifically when you would want to retain details in the darker foreground while making sure that the sky remains vibrant and properly exposed.
One solution is to use graduated neutral density filters. GND filters limit the entry of light into your camera’s sensor but only do so to a fraction of the frame depending on how you position it. The most common use of the GND filter is to put the darker part of the filter in line with the sky so that you can adjust your settings to make the foreground brighter while keeping the sky properly exposed. However, using such filters has its own limitations especially in very busy compositions.
Another way to overcome the challenge of dynamic range is to use exposure bracketing or HDR. This process involves shooting three to five consecutive exposures with varying levels of brightness. This way, the camera can capture as much detail as possible through the sequence of shots. This is then put together either by an automated built-in function or through post-processing to combine the most detail-rich parts of each image into one high dynamic range photograph. Many cameras have automatic exposure bracketing modes on board. However, more advanced camera control devices such as the MIOPS Flex not only automate the exposure bracketing sequence but also gives an instant preview of the resulting HDR image, as well as back up the data to its own built-in storage.
Early Morning Light
The light given by the early morning sun has its own characteristic vibe. The soft light from the relatively diffused light source gives a pleasant and gentle feel to the landscape. Shooting landscapes from relatively higher altitudes often has an added bonus of a moody atmosphere. This can be due to relatively low clouds that interact with the mountains or due to moisture and fog. These environmental elements make great additions to your landscape images as they render smooth textures to complement your composition.
The movement of these atmospheric elements can be a great tool to utilize in landscape photography. With the use of 6 or 10-stop neutral density filters, one can shoot long exposure images that will allow the clouds or the fog to move across the frame and produce softly brushed textures that enhance contrast against the still solid elements of the landscape. These exposures can be as short as 5 to 10 seconds or even longer as the light intensifies. With the use of a smart camera remote trigger, exposures can be stretched to minutes to achieve smoother textures.
High Noon
Many photographers dread the harsh light of noon. This is mostly true for portrait photographers who shoot outdoors. However, in landscape photography, the harsh lighting of noon can be used to a certain advantage. Shooting landscapes at noon when the weather is right can give significantly compelling results.
The brightest part of the day also means the best time to do even longer exposures. When shooting locations with flowing water or waves, this can be a great opportunity to create minimalist landscape images by shooting for very fine textures on the surface of the water. Alternatively, strong winds with moderate clouds can give very interesting textures in the background when shot in very long exposures. This can be done with the use of heavier neutral density filters typically between 12 to 20 stops. Neutral density filters reduce the entry of light allowing the photographer to extend the exposures to achieve such effects.
MIOPS’ selection of camera control devices allows for easier and more precise processes for long exposure. Both the MIOPS Smart+ and the MIOPS Flex offer precise use of the smartphone as a remote trigger not just to start and exposure but also to achieve a setting beyond what the camera already offers. These smart remote triggers offer both extended long exposure times, timer delay, and interval shooting. At the same time, the MIOPS smartphone application includes a handy calculator for ND filters to give you a more precise approach in estimating how long your exposures should be depending on the lighting scenario and your choice of filters.
Twilight
Twilights are the simplest and easiest times to shoot landscapes. Whether dusk or dawn, this means that the luminosity of the sky is very close to that of the foreground and therefore the challenges of dynamic range are eliminated. With the sun below the horizon but still casting light onto the sky enough to give it vibrance and detail.
For any beginning landscape photographer with no experience in using filters and processing HDR, shooting at twilight will be the best way to master exposure. Simply with the use of a camera with manual functions and a tripod, one can capture the perfect balanced exposure just by shooting at the perfect time. In this scenario, the perfect time means the few minutes when the foreground is just as bright as the sky.
Clear Nights and Astro Photography
Many photographic genres avoid the nighttime due to the relative absence of light sources. However, for landscape photographers, the night brings out a whole new array of natural wonders, a different character of nature, and entirely different perspectives on the world we see during the day. Night photography makes use of the absence of sunlight for us to see and photograph the distant and more faint light sources from the moon, the stars, and other distant galaxies.
Photographing the night sky can be done to almost any landscape location that one may have already photographed during the day but the resulting images are drastically different. While the challenges of photographing landscapes with daylight lie in achieving good dynamic range and balanced exposures, the challenges of night photography come from the scarcity of light and physical obstacles that may reduce the visibility of these distant light sources.
Night photography is best done on clear cloudless nights. Even if exposures are long and the stars are relatively bright, a few seconds of obstruction from thin clouds can lessen the clarity and vibrance of the night sky. In addition, the best time to be shooting nighttime landscapes is either during the new moon when the moonlight will not affect the luminosity of the stars, or before the moon rises at night.
To photograph the stars, there are typically more technical requirements needed to achieve clearer images. A good camera with great low light performance obviously leads to better images and this is best paired with a fast lens with a wide aperture for better low light performance. Lastly, one non-negotiable is a sturdy tripod. Long exposure is a make-or-break method that can be ruined by even the slightest camera shake.
Exposure times for night photography generally differ depending on the presence of foreground elements, the lens’ focal length, and the astronomical elements in the sky. Generally, wider lenses allow for longer exposures that also allow for lower ISO for cleaner images.
However, using longer focal lengths to achieve a high magnification of the distant night sky elements also limit the feasibility of doing longer exposures due to the emphasized movement of the earth that can lead to light trails. Alternatively, shooting star trails with multiple consecutive exposures also produce interesting images and with the use of automated interval shooting, one can even produce dynamic nighttime time-lapse videos.
Photographing the night is made easier with convenient camera control triggers such as the MIOPS Flex. These smartphone-controlled devices give the option of precisely timed long exposures, reduce the risk of camera shake with the remote trigger on your phone, and can also automate your night photography and time-lapse shooting process.
Landscape photography is not just about warm sunsets and daylight. For a passionate landscape photographer, any location can be turned into a masterpiece at any time of the day. With experience, curiosity, and the right gear, any envisioned image can be made.
Blog Credit: Nicco Valenzuela
Nicco started his photographic journey in 2007 practicing the craft as a hobby. Currently, he shoots for various local and international architectural firms and construction companies. Out of his love for sharing his knowledge, Nicco began writing about photography and various pieces of gear.
[faq q1="what is golden hour in photography?" a1="There's a reason why the golden hour is the most favorable shooting scenario for landscape photography or any kind of photography in general." q2="how can you do nighttime photography?" a2="Photographing the night sky can be done to almost any landscape location that one may have already photographed during the day but the resulting images are drastically different." q3="how can you shoot at noon?" a3="Many photographers dread the harsh light of noon. This is mostly true for portrait photographers who shoot outdoors. However, in landscape photography, the harsh lighting of noon can be used to a certain advantage."]
iPhone portrait photography has become increasingly popular in the world of modern photography. It allows users to effortlessly capture stunning portraits using their iPhones, thanks to its advanced technology and features that compete with professional cameras. With the power of Portrait mode, anyone can achieve impressive studio-like effects right from their smartphone.
However, mastering portrait techniques is crucial for creating truly captivating images. By understanding how to effectively use natural light and composition, photographers can elevate the emotional impact and visual appeal of their photos. This guide will provide you with essential tips for achieving breathtaking portrait photography on your iPhone, empowering you to create extraordinary portraits that leave a lasting impression.
In this guide, you will learn:
An in-depth exploration of your iPhone's advanced portrait features.
Expert advice on capturing stunning images with natural light.
Professional editing techniques to enhance your photos.
A look into innovative apps that can take your mobile photography skills to new heights.
Get ready to revolutionize your approach to portrait photography with insights that inspire creativity and precision.
Understanding Your iPhone's Portrait Features
The introduction of Portrait Mode on the iPhone 7 Plus transformed mobile photography by allowing users to take pictures with beautifully blurred backgrounds, similar to those taken with a professional DSLR camera. This feature is designed to keep the subject in sharp focus while artistically softening everything in the background, adding depth and dimension to your shots.
The Importance of Portrait Mode
Portrait Mode uses the dual-camera system on devices like the iPhone 7 Plus and newer models, which includes both wide-angle and telephoto lenses. It employs advanced software algorithms to create a shallow depth of field effect, commonly known as bokeh, isolating the subject from its surroundings. This technology enables photographers to effectively highlight their subjects, turning ordinary smartphone photos into stunning portrait masterpieces.
Discovering Portrait Lighting Effects
With each new generation of iPhones, Apple has improved the storytelling capabilities of its camera systems. One significant enhancement is the Portrait Lighting feature, introduced on the iPhone 8 Plus and subsequent models. These lighting effects are designed to replicate professional studio setups:
Natural Light: The classic choice that maintains even lighting across your subject, perfect for capturing authentic skin tones.
Studio Light: Adds a clean look with brightened facial features, ideal for headshots or when you want your subject's face to stand out.
Contour Light: Offers high contrast between light and shadow, sculpting facial features for a more dramatic effect.
Stage Light: Blackens the background entirely, spotlighting your subject as if they're on stage.
Stage Light Mono: Similar to Stage Light but adds a classic black-and-white filter.
These effects can be accessed in real-time before capturing your portrait picture on iPhone, allowing for immediate adjustments based on your creative vision. To achieve optimal results across different subjects—from individuals to pets—it's essential to understand how these lighting options interact with various skin tones and textures. By mastering these settings, photographers can elevate their portrait mode photos into works of art that evoke emotion and clarity.
Tips for Capturing Stunning iPhone Portraits
Mastering the art of capturing stunning portraits with your iPhone begins with understanding the importance of natural light. Natural light serves as the cornerstone of portrait photography, offering a soft and flattering illumination that enhances facial features and creates a captivating ambiance.
Indoor Tips
Utilize diffused window light.
Position subjects at varying angles to explore different shadow effects.
When photographing indoors, position your subject near a window to utilize diffused window light. This type of lighting provides an even and gentle glow, reducing harsh shadows and highlighting the natural beauty of your subject. Experiment with different angles and positions relative to the window to achieve desired effects—such as side lighting for dramatic shadows or front lighting for a more balanced look.
Outdoor Tips
Aim for shoots during the "golden hours."
Overcast days provide even, diffused light similar to studio conditions.
For outdoor portraits, timing is crucial. The "golden hours"—shortly after sunrise and before sunset—offer ideal lighting conditions. During these times, the sun casts a warm and soft light, enveloping your subject in a radiant glow without causing unwanted glare or overexposure.
Harnessing the power of natural light enables you to create extraordinary portraits that captivate and engage viewers, elevating your iPhone photography to professional standards.
Editing Your iPhone Portraits Like a Pro
The art of editing can transform a good portrait into a masterpiece. Snapseed, a favorite among mobile photographers, offers comprehensive tools that elevate iPhone portrait photography to new heights.
Popular Editing Apps for iPhone Portraits:
Snapseed: Renowned for its intuitive interface and a suite of powerful features, Snapseed provides:
Selective Adjustments: Target specific areas of your image for precise edits.
VSCO: Known for its film-like presets and advanced editing options, VSCO offers tools to fine-tune exposure, color balance, and more.
Mextures: Ideal for adding texture, light leaks, and gradients to create mood and atmosphere.
Tips For Stunning Portrait Photography On iPhone:
Focus on Skin Tones: Use the Selective tool in Snapseed to ensure natural skin tones by adjusting brightness and warmth.
Enhance Eyes and Details: The Details panel sharpens eyes and other focal points without introducing noise.
Experiment with Filters: Try different styles; Snapseed’s filters can add drama or serenity to your portraits.
These tools enable photographers to craft images that resonate with their vision while maintaining the authenticity of their subjects.
Taking iPhone Portrait Photography to the Next Level with Snap Pro Camera App
The Snap Pro Camera app is a fantastic tool for anyone looking to improve their portrait photography on iPhone. It turns your phone into a camera that can compete with professional ones, offering a wide range of features designed specifically for portrait photographers.
Unique Features of Snap Pro Camera App
1. Manual Controls
With the ability to adjust ISO, shutter speed, and white balance, you have full control over your shots. This means you can capture every detail exactly how you want it, making sure your portrait photo matches your creative vision.
2. Advanced Bokeh Effects
The app uses automatic depth adjustments and aperture simulation to create beautiful background blur. This effect, ranging from F1.4 to F22.0, helps draw attention to the subject and makes any portrait iphone photography situation more visually appealing.
3. AI-Based Enhancements
Thanks to artificial intelligence, the app can automatically adjust exposure settings and recognize different scenes. This means it can adapt to various lighting conditions without any effort on your part, ensuring each iphone portrait photo looks its best.
4. Instant Color Grading
With Snap Pro Camera, you can apply filters while taking photos. This lets you experiment with different moods and tones right away, making it easier to create compelling portrait photo iphone compositions.
5. Comprehensive Editing Suite
After capturing an image, you can use the app's powerful editing tools to make it even better. These tools support multiple formats like ProRAW and TIFF for high-quality results.
The Snap Pro Camera app is a must-have for iPhone users who want to take their portrait photography skills to new heights. Its advanced features guarantee stunning results whether you're snapping candid moments or carefully arranged poses.
Conclusion
You can improve your iPhone photography skills. By using the advanced features of your device and trying out tools like the Snap Pro Camera app, you can take amazing portraits that look as good as those taken with professional equipment. The secret to getting better at this art form is to practice regularly and be open to trying out different techniques.
Practice Regularly: Develop a routine that allows you to refine your skills over time.
Experiment With Techniques: Explore various lighting conditions, compositions, and angles.
Utilize Advanced Tools: Leverage the powerful capabilities of apps like Snap Pro Camera for enhanced control and creativity.
These strategies will not only improve your portrait photography but also spark your creativity. Whether you're taking candid shots or posed portraits, these tips for stunning portrait photography on iPhone will help you create amazing images every day.
[star star="866"]
]]>
https://www.miops.com/blogs/news/discover-the-power-of-ai-for-fun-headshots-with-snap-pro-camera2024-11-04T14:06:39+03:002025-04-18T09:00:21+03:00Discover the Power of AI for Fun Headshots with Snap Pro CameraOnur Celik
Introduction: The Rise of AI in Photo Editing – Just for Fun!
AI technology has transformed the way we edit and enhance photos, making it easier for users to create eye-catching, personalized images in seconds. One such innovation is the AI headshot generator, a tool that enables users to make unique and fun headshots with just a few clicks. While many headshot generator tools focus on professional or realistic results, Snap Pro Camera takes a creative and playful approach to the AI headshot experience.
Snap Pro Camera’s AI headshot generator is an ideal tool for those who want to explore the possibilities of AI for personal or social media use. With Snap Pro Camera’s headshot app, users can quickly transform ordinary photos into head-turning portraits, perfect for social media profiles or sharing with friends. Let’s explore how Snap Pro Camera works, why it stands out as one of the best AI headshot apps, and how you can make the most of it.
What is an AI Headshot Generator?
An AI headshot generator is a tool that uses artificial intelligence to transform facial images with various effects and enhancements. Unlike traditional headshot tools that focus on ultra-realism or business portraits, AI headshot generators like Snap Pro Camera are designed to offer a unique, creative spin. By using deep learning and computer vision, these tools can alter and enhance photos to create stylized, visually captivating headshots that go beyond traditional photography.
Snap Pro Camera’s AI headshot generator, for instance, allows users to explore their creativity by adding filters, color enhancements, and stylized effects. Instead of focusing purely on realistic adjustments, this headshot app encourages users to experiment with fun, social-media-ready styles that stand out. If you’re looking for the best AI headshot generator for personal, creative purposes, Snap Pro Camera is an excellent choice.
Why Choose Fun and Creative AI Headshots?
In a world where photos are shared frequently on social media, having a unique headshot can make a big difference. While professional headshots are essential in certain scenarios, creative headshots made with an AI headshot app can be just as impactful. Here are a few reasons why Snap Pro Camera’s AI headshot generator is a fantastic option for users seeking a fun alternative to the traditional headshot:
Showcase Personality: Instead of a stiff or overly formal look, creative AI headshots let users express their individuality.
Stand Out on Social Media: A vibrant, stylized headshot can grab more attention on social profiles, especially on platforms like Instagram and TikTok.
Make Memorable Moments: Snap Pro Camera’s headshot generator helps you create images that capture moods and themes, perfect for holidays or special occasions.
With Snap Pro Camera’s headshot app, you’re not just creating a photo—you’re crafting a statement. Whether it’s for a new Instagram profile or just a fun image to share with friends, Snap Pro Camera offers the best AI headshots for personal expression.
How Snap Pro Camera’s AI Headshot Generator Works
Getting started with Snap Pro Camera’s AI headshot generator is easy. This user-friendly headshot app makes it simple for anyone to experiment with AI-powered headshots. Here’s how it works:
Upload a Photo: Start by selecting a photo from your gallery that you’d like to transform. Choosing a clear, well-lit image of your face will give the AI more to work with.
AI Transformation: The AI headshot generator applies a unique style to your photo, transforming it with effects and adjustments that bring out artistic qualities in the image.
Save and Enjoy: Once the AI has created your headshot, you can save the result. While filters aren’t applied at this stage, Snap Pro Camera allows you to add additional edits afterward, letting you further customize your headshot if you choose.
This AI headshot app provides instant results, letting you see the transformation in seconds. Because Snap Pro Camera is focused on fun and creativity, users have the freedom to experiment with various images and styles to find the look that best suits them.
Top Fun Use Cases for AI Headshots with Snap Pro Camera
Snap Pro Camera’s AI headshot generator offers endless creative possibilities. Here are some of the best ways to use your AI-generated headshots for maximum fun:
Social Media Profiles: Give your social media profiles a fresh look with a unique headshot created by Snap Pro Camera’s AI. These headshots are ideal for platforms where personality shines, like Instagram, Facebook, and Twitter.
Seasonal Themes: Create headshots that reflect the current season or holiday. Snap Pro Camera’s headshot generator is perfect for producing themed images that make your profile pop.
Memorable Moments: Whether it’s for a birthday or a holiday, an AI-generated headshot can capture the occasion in a unique way.
Digital Art Pieces: Use your AI headshots as a base for digital art, layering additional effects or edits to create a fully customized portrait.
By using Snap Pro Camera, you can turn everyday photos into artistic expressions that reflect your mood, personality, and style.
Creating Unique, Shareable Content with Snap Pro Camera
In today’s online world, unique content is king. AI headshots generated by Snap Pro Camera are perfect for sharing, helping you create images that get noticed. With the app’s headshot editor, you can refine your images to better fit the look and feel you’re after. Want a classic black-and-white headshot? Or maybe a bold, vibrant color theme? Snap Pro Camera’s headshot editor lets you add finishing touches to ensure that each image is exactly as you envision.
Whether you’re using your AI headshot for your LinkedIn profile or adding it to your digital art collection, Snap Pro Camera offers the tools you need to make it shine. The app’s features make it the best AI headshot app for users seeking creative, social-ready photos.
Why Snap Pro Camera Stands Out as the Best AI Headshot Generator
There are plenty of AI headshot generators available, but Snap Pro Camera is among the best for a few key reasons:
Ease of Use: The headshot editor and AI tools are designed to be accessible, even for beginners.
Creative Freedom: Snap Pro Camera encourages users to experiment with different styles, making it ideal for artistic and fun headshots.
Fast and Reliable: With instant transformations, users can quickly see the results of their AI-generated headshots.
While other apps may focus on realism, Snap Pro Camera’s headshot AI features are built to spark creativity, making it one of the best AI headshot generators for casual users.
Tips for Getting the Most Out of Snap Pro Camera’s AI Headshot Generator
To make your headshots even more impressive, keep these tips in mind:
Use High-Quality Images: Starting with a clear photo will give the AI a better foundation for creating your headshot.
Experiment with Styles: Snap Pro Camera allows you to try various photos to see how different images respond to the AI transformation.
Refine Your Headshot: After saving, use the app’s headshot editor to add any additional effects or filters that enhance your headshot’s look.
Share and Enjoy: Snap Pro Camera is designed for social sharing, so don’t hesitate to post your creations and see what friends think!
Conclusion: Embrace Creativity with Snap Pro Camera’s AI Headshot Generator
AI headshot generators like Snap Pro Camera are opening up new possibilities for digital creativity. With this headshot app, you can go beyond basic photo editing and tap into artistic transformations that add personality and flair. Snap Pro Camera’s headshot AI is all about giving users the freedom to express themselves in fun and unique ways, whether for social media, digital art, or just sharing with friends.
Snap Pro Camera is truly one of the best AI headshot generators available, offering a playful and engaging way to experiment with AI technology. Ready to dive in? Visit miops.com/pages/snap and discover how Snap Pro Camera’s AI headshot app can help you create images that stand out in the digital world.
[star star="137"]
[star star="689"]
]]>
https://www.miops.com/blogs/news/how-to-blur-background-on-iphone-a-complete-guide2024-10-01T14:18:03+03:002025-04-18T09:00:23+03:00How To Blur Background On iPhone: A Complete GuideOnur Celik
Blurring the background in your photos can give them a professional and polished look, making your subject stand out. Whether you're photographing a person, a pet, or an object, a blurred background helps keep the focus on your main subject while creating an aesthetically pleasing effect. The good news is that you don’t need a high-end DSLR camera to achieve this look—your iPhone can do the job with its built-in features and apps like Snap Pro Camera. In this guide, we'll explore different ways you can blur the background on your iPhone, step by step.
1. Use Portrait Mode To Create Beautifully Blurred Backgrounds
One of the easiest and most effective ways to blur the background on your iPhone is by using Portrait Mode. This feature, available on most modern iPhones, allows you to take stunning photos with the background blurred while keeping your subject in sharp focus.
1.1 What Is Portrait Mode?
Portrait Mode is a special camera feature designed to create a depth-of-field effect, which is a photography technique used to blur the background while keeping the subject in focus. This effect, also known as "bokeh," is commonly seen in professional photography taken with DSLR cameras. Fortunately, Apple has integrated this feature into the iPhone’s Camera app, making it accessible to everyday users.
In technical terms, Portrait Mode works by using both the wide and telephoto lenses on your iPhone (for iPhones with dual or triple camera systems). It uses software to recognize the subject and differentiate it from the background, applying a blur to the areas that are further away from the focus point.
1.2 How To Blur Background On iPhone Using Portrait Mode
Blurring the background using Portrait Mode is a simple process. Here's how you can do it:
Launch the Camera app on your iPhone and choose Portrait mode from the options at the bottom of the screen.
Position your subject between two to eight feet away from the camera for the best results. Ensure there's enough lighting, as Portrait mode works best in well-lit environments.
Frame your shot and look for the Natural Light (or Depth Effect for older models like the iPhone 7 Plus) label to appear in yellow, which indicates the blur effect is active.
Verify the effect in the viewfinder. Your subject should appear sharp, while the background starts to blur.
Once you’re satisfied with the setup, tap the shutter button to take your portrait photo with a nice background blur.
That's all!
The iPhone’s AI and camera sensors automatically create a beautifully blurred background. You can see the result right after taking the photo, and if you're not happy with the blur, you can adjust it afterward.
1.3 Edit Or Remove Background Blur In Portrait Photos
One great thing about Portrait Mode is that you can adjust or remove the background blur even after taking the photo. Follow these steps:
Open the Photos app and find the Portrait photo you want to edit.
Tap Edit button.
You’ll see a slider labeled Depth. This controls the amount of blur in the background. Moving the slider to the left increases the blur, while moving it to the right reduces it.
If you want to completely remove the blur, tap the yellow Portrait button at the top of the screen. This will turn off the Portrait effect.
Tap Done to save your changes.
By adjusting the f-stop value, you can control how much blur you want in the background, giving you the flexibility to fine-tune your image even after it’s been taken.
2. Get Close To Your Subject To Blur The Background
While Portrait Mode is a convenient way to blur the background, there are other manual techniques you can use to achieve a similar effect, even if your iPhone doesn’t support Portrait Mode. One of the most effective ways is to get physically closer to your subject.
2.1 Move Closer To Your Subject
Moving closer to your subject helps create a natural background blur due to the way lenses work. The closer you are to the subject, the shallower the depth of field becomes, meaning the background will appear more blurred. Here's how to do it:
Find your subject and move as close as possible without compromising the composition.
Tap on your subject to focus. When the subject is in sharp focus, the background will start to blur naturally.
Take the photo once the focus is locked in.
This method works particularly well when the background is far behind the subject. The greater the distance between your subject and the background, the more noticeable the blur will be.
2.2 Set The Focus Point Manually
To ensure the subject stays in focus and the background blurs, you can manually set the focus point. Here’s how to manually adjust the focus:
Open the Camera app.
Frame your shot and tap on the screen where you want the camera to focus (usually, this will be your subject).
A yellow focus box will appear. This tells your iPhone that it should keep the subject in sharp focus.
Now, take your photo.
By manually setting the focus, you’ll achieve a sharper subject with a more distinct background blur, even without Portrait Mode.
2.3 Getting Closer vs. Portrait Mode
While both methods (getting close and using Portrait Mode) can blur the background, there are some differences:
Portrait Mode uses software and dual-lens technology to create the blur. It works well in a wider range of situations, but it might struggle with certain subjects (like objects without distinct edges).
Moving closer to the subject relies on optical effects to blur the background. This method can be more natural but requires the right distance and lighting conditions to work well.
Both techniques have their advantages, so experiment with both to see which one works best for the specific shot you’re trying to capture.
3. Use Snap Pro Camera App To Blur Background
While the iPhone’s native Camera app does a great job with background blur, third-party apps like Snap Pro Camera can offer even more options and customization. If you’re looking for greater control over your background blur or want to apply it in post-production, Snap Pro Camera is an excellent tool.
3.1 Use Portrait Mode of Snap Pro Camera
Snap Pro Camera offers a Portrait Mode that functions similarly to the iPhone’s built-in mode but provides additional flexibility and control. Here’s how you can use it:
Open Snap Pro Camera on your iPhone.
Switch to Portrait Mode by selecting the relevant icon.
Position your subject and follow the on-screen prompts to ensure proper distance and lighting.
Once everything is set, take the photo.
One key advantage of Snap Pro Camera’s Portrait Mode is the ability to adjust the depth value by changing the Depth parameter between f1.4 and f22.0. This allows you to fine-tune the blur intensity to suit your preferences. You can also apply dozens of filters, including Cinematic, Vintage, Black & White, Retro, and more, giving your photos a unique and personalized touch.
3.2 Use AI Background Blur
Another powerful feature of Snap Pro Camera is its AI Background Blur, which allows you to blur the background of any photo, whether you captured it in Portrait Mode or not. This is especially useful for older photos that weren’t taken with a blur effect or for when you want to apply a more customized blur.
Here’s how to use AI Background Blur in Snap Pro Camera:
Select a photo from your library or capture a new photo using Snap Pro Camera. You can either use Auto mode or adjust camera settings like Shutter Speed, ISO, White Balance, and more manually.
Once you’ve chosen the photo, select the AI Background Blur option from the editing tools.
The app will automatically detect the subject and apply a background blur.
Use the blur intensity slider to adjust the amount of blur to your liking.
Tap Save to apply the changes.
The flexibility of Snap Pro Camera’s AI Background Blur feature allows you to blur the background of virtually any photo, giving you control over the look and feel of your images. Whether you're capturing new photos or editing existing ones, this tool ensures you can achieve professional-level background blur effects with ease.
Final Thoughts
Blurring the background in your photos can instantly elevate their quality, drawing attention to your subject and creating a more professional look. Whether you’re using the iPhone’s built-in Portrait Mode or experimenting with third-party apps like Snap Pro Camera, there are several ways to achieve this effect. From adjusting the focus manually to using AI-powered editing tools, you now have everything you need to create stunning photos with beautifully blurred backgrounds.
So, go ahead and try these methods! Whether you’re photographing a portrait, a pet, or an object, these techniques will help you get the best out of your iPhone camera and create photos that truly stand out.
[star star="706"]
]]>
https://www.miops.com/blogs/news/exploring-extraordinary-usage-of-miops-products-beyond-the-lens-of-photography2024-08-22T11:19:45+03:002025-04-18T09:00:26+03:00Exploring Extraordinary Usage of MIOPS Products: Beyond the Lens of PhotographyErkan Yigiter
When people think of MIOPS, the first thing that comes to mind is often its applications in high-speed photography, captivating time-lapses, and creative light painting. And while MIOPS products are indeed popular among both amateur and professional photographers for these purposes, the truth is that their versatility extends far beyond the conventional. From capturing rocket launches to testing bomb inflation, MIOPS products have found their way into some of the most extraordinary and unexpected settings, serving professionals in a variety of high-stakes industries.
Precision in High-Stakes Environments: The US Army, NASA, and Lockheed Martin
In environments where precision and reliability are non-negotiable, MIOPS products have become indispensable tools. Organizations like the US Army, NASA, and Lockheed Martin rely on MIOPS technology for a range of critical operations. These are organizations where even the smallest detail matters—where capturing the precise moment could mean the difference between success and failure.
For example, in the field of aerospace and defense, timing is everything. Whether it's capturing the intricate details of a rocket launch or monitoring bomb inflation tests, these organizations depend on MIOPS products to deliver the accuracy and performance needed in these demanding scenarios. The precision with which MIOPS products can be programmed to trigger cameras and flashes is crucial in environments where every millisecond counts.
At NASA, for instance, capturing the exact moment a rocket leaves the launchpad is vital. The images captured are not just for public relations or media distribution; they are also critical for analyzing the performance of the rocket and its components during launch. MIOPS products provide the timing accuracy needed to ensure that every crucial moment is documented, helping engineers and scientists gather the data necessary for continuous improvement in space exploration.
Similarly, Lockheed Martin, a global aerospace and defense giant, utilizes MIOPS products in their testing facilities. When it comes to testing new technologies, capturing the precise moment a device is activated or a system is deployed is essential for evaluating performance. The reliability of MIOPS products in these high-stakes environments has earned them a reputation for being tools that can be counted on when it matters most.
Lightning Photography: A Storm Chaser’s Best Friend
Lightning photography is one of the most challenging genres of photography, requiring not only a deep understanding of weather patterns but also the right equipment to capture the perfect shot. The unpredictable nature of lightning makes it nearly impossible to photograph without specialized tools. This is where MIOPS products, particularly the MIOPS Smart+ Trigger, come into play.
Thousands of storm chasers and photographers around the world trust MIOPS for capturing lightning in all its electrifying glory. The accuracy and reliability of MIOPS triggers allow photographers to freeze the powerful and fleeting moments of a lightning strike. The Smart Trigger, for example, can be set to detect lightning and automatically trigger the camera's shutter in response. This means that photographers don't have to rely on luck or guesswork to capture the perfect shot—they can set up their equipment, sit back, and let MIOPS do the work.
Photo by Chris Ambler / @chris.ambler
What makes MIOPS products particularly valuable in this context is their ability to function under challenging conditions. Storm chasers often find themselves in extreme environments—out in the open, exposed to the elements, and dealing with high winds, rain, and sometimes even hail. MIOPS products are designed to withstand these harsh conditions, providing reliable performance when it’s needed most. This ruggedness, combined with precise triggering capabilities, makes MIOPS the go-to choice for lightning photography.
MIOPS Splash: Elevating Water Drop Photography
Another area where MIOPS has made a significant impact is water drop photography, a niche but highly creative genre that requires precision timing to capture stunning images of water drops in mid-collision. The MIOPS Splash is a device that has revolutionized this type of photography, allowing photographers to control the exact timing of each drop and flash, making it easier than ever to capture the mesmerizing moments of water droplets interacting.
Water drop photography is all about timing and control. The slightest delay in triggering the camera or the flash can mean the difference between a perfect shot and a missed opportunity. The MIOPS Splash gives photographers complete control over the timing of their shots, allowing them to capture water drops at the precise moment they collide, form crowns, or create other intricate patterns.
The precision of the MIOPS Splash has made it a favorite among photographers who specialize in this genre. By automating the timing of the drops and the camera's trigger, the MIOPS Splash allows photographers to focus on creativity rather than technical details. This has opened up new possibilities in water drop photography, enabling photographers to experiment with different liquids, colors, and lighting setups to create truly unique and captivating images.
Revolutionizing Fashion Photography with MIOPS
While MIOPS is widely recognized for its contributions to high-speed and creative photography, its impact on the fashion industry is also noteworthy. Commercial photographers around the world use MIOPS products to capture stunning fashion shoots with unmatched precision. The ability to synchronize multiple flashes, trigger cameras remotely, and capture motion at high speeds has transformed the way fashion photographers work, allowing them to create dynamic and captivating images that stand out.
In fashion photography, timing and coordination are everything. Whether it's capturing the perfect moment when a model's dress is caught mid-twirl or ensuring that the lighting is just right as a model walks down the runway, MIOPS products provide the tools needed to achieve these effects with precision. The ability to remotely trigger cameras and flashes from different angles gives photographers the flexibility to experiment with new techniques and perspectives, resulting in images that are both innovative and visually striking.
One notable example of MIOPS products being used in the fashion industry comes from SVONY, a company renowned for having the largest rug and carpet collection in the world. SVONY uses MIOPS products in their photography studio to photograph tens of thousands of carpets in their inventory. The precision and reliability of MIOPS technology enable SVONY to produce consistent, high-quality images that showcase the intricate details of their carpets. This application highlights the versatility of MIOPS products in commercial photography, proving that they are not just tools for capturing moments but also for enhancing product presentation in a visually appealing way. You can read the full story about SVONY’s Innovative Use of MIOPS Technology here.
MIOPS in Space: Leading the Spaceflight Photography Industry
Spaceflight photography is another area where MIOPS has established itself as a leader. The breathtaking images of rocket launches that captivate audiences worldwide are often made possible by MIOPS products. Photographers who specialize in spaceflight, such as Erik Kuna, rely on MIOPS for its ability to capture the exact moment of a rocket’s launch, with all the grandeur and intensity that comes with it.
Rocket launches are incredibly fast-paced events, with the most critical moments lasting only a few seconds. Capturing these moments requires equipment that can perform with pinpoint accuracy under extreme conditions. MIOPS products, with their precise triggering capabilities and robust construction, are up to the task.
Erik Kuna, a renowned spaceflight photographer, has shared his experience with MIOPS, which speaks to the reliability of these products in even the harshest environments. In a tweet, he stated:
“True story, I’ve had @MiopsTrigger smart triggers survive in the worst conditions, even had one thrown 100 feet in the air by a @stoke_space rocket engine. Still works to this day, albeit not the prettiest MIOPS trigger anymore.”
This anecdote is a testament to the durability and reliability of MIOPS products, even when subjected to the extreme forces generated by a rocket launch. For photographers like Kuna, who push the boundaries of what’s possible in spaceflight photography, MIOPS provides the tools needed to capture the awe-inspiring events that take place beyond our atmosphere.
Beyond the Expected: The MIOPS Legacy
From high-stakes military operations to the delicate intricacies of water drop photography, the versatility of MIOPS products continues to surprise and inspire. Whether you’re photographing a lightning strike, documenting a rocket launch, or capturing the beauty of a luxury carpet, MIOPS provides the tools you need to achieve extraordinary results.
What sets MIOPS apart is not just the precision and reliability of its products, but also the breadth of applications they support. From hobbyist photographers capturing beautiful moments in nature to professionals in industries like aerospace, fashion, and defense, MIOPS products are trusted by those who need to capture moments that matter. This wide range of applications is a testament to the versatility and innovation that MIOPS brings to the table.
At MIOPS, we’re proud to support such a diverse range of applications, and we’re excited to see where our technology will be used next. Whether you’re a hobbyist photographer, a storm chaser, a fashion photographer, or part of a global organization, MIOPS products are designed to help you capture the extraordinary. The stories and experiences shared by our users, from Erik Kuna’s spaceflight adventures to SVONY’s commercial carpet photography, underscore the impact that MIOPS has across different fields.
As we continue to innovate and develop new products, we remain committed to providing the tools that empower photographers and professionals to push the boundaries of what’s possible. MIOPS is more than just a brand—it’s a legacy of precision, reliability, and creativity that continues to inspire and enable extraordinary achievements.
[star star="778"]
]]>
https://www.miops.com/blogs/news/essential-faqs-on-iphone-long-exposure-photography-everything-you-need-to-know2024-03-11T13:27:02+03:002025-04-18T09:00:28+03:00Essential FAQs on iPhone Long Exposure Photography: Everything You Need to KnowOnur Celik
While the Live Photos feature offers a simple way to create long exposure effects, it's not the only method available for iPhone users. For those looking to dive deeper into the world of long exposure photography and unlock even more creative potential, third-party apps like theSnap Pro Camera appprovide an excellent solution.
]]>
Long exposure photography lets you take unique photos where moving things like water or cars blur into interesting patterns, while everything else stays sharp. It used to be something only professional photographers with fancy cameras could do. But now, if you have an iPhone, you can try it too. This means you can capture cool photos of things like smooth waterfalls or busy city streets at night with just your phone. In this guide, we're going to answer some common questions about taking long exposure shots with your iPhone, showing you that great photography is more accessible than ever.
As you dive into the world of iPhone long exposure photography, you might find yourself with a bunch of questions. How exactly can your iPhone capture these mesmerizing shots? Which models support this feature? And what are the secrets to nailing the perfect long exposure photo with your device? Whether you're a photography enthusiast looking to explore this creative technique or simply curious about maximizing your iPhone's camera capabilities, our comprehensive FAQ section has got you covered. Here, we'll unravel the mysteries of iPhone long exposure photography, providing you with all the information you need to start capturing stunning images today.
Basic Questions
1. Does the iPhone Have Long Exposure?
Yes, your iPhone can indeed take long exposure photos, and it does this through a feature called Live Photos. Introduced with the iPhone Live Photos feature, Live Photos record what happens 2 seconds before and after you take a picture. While not originally designed for long exposures, this feature can be cleverly used to create a long exposure effect. By blurring motion in the recorded frames, your iPhone can simulate the look of a traditional long exposure photograph, all without needing any special camera gear. This makes it incredibly easy for anyone to experiment with and enjoy the creative possibilities of long exposure photography.
2. What iPhone Has Long Exposure?
Long exposure photography using Live Photos is available on most of the iPhone models. Here's a quick list of iPhone models that support this feature:
iPhone 15
iPhone 15 Plus
iPhone 15 Pro
iPhone 15 Pro Max
iPhone 14
iPhone 14 Plus
iPhone 14 Pro
iPhone 14 Pro Max
iPhone 13
iPhone 13 mini
iPhone 13 Pro
iPhone 13 Pro Max
iPhone 12
iPhone 12 mini
iPhone 12 Pro
iPhone 12 Pro Max
iPhone 11
iPhone 11 Pro
iPhone 11 Pro Max
iPhone XS
iPhone XS Max
iPhone XR
iPhone X
iPhone 8
iPhone 8 Plus
iPhone SE (3rd generation)
iPhone SE (2nd generation)
If your iPhone can take Live Photos, it can create long exposure images. This opens up a wide range of creative opportunities, no matter which of these models you own.
3. What Does Long Exposure Do on iPhone?
Long exposure on an iPhone works by stitching together the frames captured before and after you take a Live Photo, creating a sense of motion or blurring moving elements in the scene. For example, water flowing over a waterfall can appear silky smooth, and cars' lights at night can turn into long, glowing trails. Static elements in your photo, like buildings or trees, remain sharp and in focus, creating a beautiful contrast between the still and moving parts of your image. This effect mimics traditional long exposure photography but is achieved through the software magic in your iPhone, allowing you to capture stunning photos without needing a tripod or professional camera equipment.
How to Guide
1. How to Take Long Exposure Photos with an iPhone?
Taking long exposure photos with your iPhone is simpler than you might think, thanks to the Live Photos feature. Here's a step-by-step guide on how to capture these stunning images, along with some tips to get the best results:
Step-by-Step Guide
Enable Live Photos: Open the Camera app on your iPhone. Make sure the Live Photos feature is turned on; you'll see the Live Photos icon (a series of concentric circles) at the top of the screen. If it's not highlighted, tap it to activate Live Photos.
Find Your Subject: Choose a scene with movement for an interesting long exposure effect. Moving water, busy streets, and nighttime cityscapes work well.
Stabilize Your iPhone:For the clearest photos, it's important to keep your iPhone as still as possible. Using a tripod is ideal, but if you don't have one, try to steady your hands or rest your iPhone on a stable surface.
Take the Photo: Press the shutter button to take your Live Photo. Remember, your iPhone captures 2 seconds of video before and after you press the shutter, so keep it steady for a few seconds before and after taking the photo.
Edit Your Photo: After taking your Live Photo, open it in the Photos app. Swipe up on the photo, and you'll see various effects you can apply. Choose "Long Exposure." Your iPhone will automatically blend the frames together to create the long exposure effect.
Tips for the Best Results
Use a Tripod: This cannot be overstated. Even a slight movement can blur your photo, reducing the clarity of stationary objects. A tripod ensures your iPhone remains stable.
Shoot in the Right Conditions: Long exposure photography works best in low to moderate light conditions, especially for capturing light trails or smoothing water. In bright daylight, long exposures can lead to overexposed images.
Experiment with Different Scenes: The beauty of long exposure photography lies in experimentation. Try different settings and subjects to see what works best.
Be Patient: Sometimes, getting the perfect shot takes a few tries. Don't be discouraged if your first few attempts don't turn out as expected.
By following these steps and tips, you'll be well on your way to capturing breathtaking long exposure photos with your iPhone. Remember, practice makes perfect, so keep experimenting with different subjects and conditions to refine your skills.
Advanced Information
1. Can iPhone Do Long Exposure Without Live Photos?
While the Live Photos feature offers a simple way to create long exposure effects, it's not the only method available for iPhone users. For those looking to dive deeper into the world of long exposure photography and unlock even more creative potential, third-party apps like the Snap Pro Camera app provide an excellent solution.
The Snap Pro Camera app takes iPhone photography to the next level with specialized long exposure modes such as Motion Blur, Light Trail, and Low Light. These modes offer greater control and flexibility over the settings, allowing you to fine-tune the exposure time, sensitivity, and other parameters for your long exposure shots. Whether you're capturing the bustling movement of city streets at night or the serene flow of a waterfall, Snap Pro Camera equips you with the tools to achieve stunning, professional-quality results.
With Snap Pro Camera, users can explore long exposure photography beyond the limitations of the iPhone's built-in Camera app. Its intuitive interface and advanced features make it easier for photographers of all skill levels to produce breathtaking long exposure images that stand out from the crowd.
2. What Is iPhone Long Exposure and How Does It Work?
Long exposure photography on the iPhone, whether using the built-in Camera app or a powerful third-party application like Snap Pro Camera, involves capturing and blending multiple frames over a period to create a single, seamless image. This technique allows moving elements in the frame to blur, creating a dynamic sense of motion, while keeping stationary elements crisp and focused.
The iPhone's native Camera app simulates this effect in post-processing by stitching together frames from a Live Photo. However, Snap Pro Camera offers a more authentic and customizable experience. It allows users to actively control the exposure time and adjust settings to match the shooting conditions perfectly. The app processes the images in real-time, giving you immediate feedback on how your adjustments affect the outcome.
Snap Pro Camera's advanced algorithms are designed to handle the complexities of long exposure photography, such as balancing light levels and reducing noise for low light conditions. This results in images that are not only stunning but also retain a high level of detail and color accuracy. Whether you're an experienced photographer or just starting out, Snap Pro Camera provides the tools and flexibility needed to experiment with long exposure photography and achieve exceptional results that are sure to impress.
Conclusion
Long exposure photography transforms ordinary scenes into extraordinary images, blending motion into a smooth, mesmerizing flow that adds a magical touch to your photos. With the iPhone, capturing these stunning images has never been more accessible. Whether you're using the built-in Live Photos feature or exploring the advanced capabilities of third-party apps like Snap Pro Camera, the potential for creativity is limitless.
We've covered the basics of getting started with long exposure photography on your iPhone, from leveraging the Live Photos feature to diving deeper with Snap Pro Camera's specialized modes like Motion Blur, Light Trail, and Low Light. Each method opens up new possibilities for capturing the world around you in a uniquely captivating way.
Remember, the key to great long exposure photography is experimentation. Don't be afraid to try different settings, subjects, and conditions. With the Snap Pro Camera app, you have a powerful tool at your fingertips that offers unparalleled control and flexibility, allowing you to push the boundaries of what you thought was possible with your iPhone.
So grab your iPhone, head out into the world, and start capturing the beauty of motion in your photos. Whether it's the rush of a waterfall, the trails of city lights, or the serene movement of the stars, long exposure photography allows you to see the world in a new light. Happy shooting!
]]>
https://www.miops.com/blogs/news/13-best-iphone-photography-tips-for-better-photos-unleash-your-inner-photographer2024-02-22T10:37:56+03:002025-04-18T09:00:31+03:0013 Best iPhone Photography Tips for Better Photos: Unleash Your Inner PhotographerOnur Celik
Discover the top iPhone photography tips to enhance your photos instantly! Our comprehensive guide covers everything from mastering natural light and composition to exploring manual controls and creative modes with the Snap Pro Camera app. Learn how to capture stunning images with techniques like motion blur mastery, light trail creativity, manual focus precision, and more. Whether you're a beginner or an avid photographer, these 13 tips will help you unleash your inner photographer and elevate your iPhone photography skills. Start taking breathtaking photos today with our expert advice!
]]>
Welcome to the world of iPhone photography, where every shot you take has the potential to be a masterpiece. If you've ever wanted to dive deeper into photography without lugging around a bulky DSLR, your iPhone is your ticket to this creative journey. Photography is all about capturing light, and to do this effectively, understanding the basics like exposure, ISO, and white balance is crucial. But did you know your iPhone offers you more than just point-and-shoot convenience? With the manual mode available in your iPhone's camera or through various dedicated camera apps, you gain unprecedented control over how your photos turn out.
This guide is here to arm you with essential iPhone photography tips that will not just improve your photos but will truly unlock the artistic photographer within you. Let's embark on this journey to elevate your iPhone photography game to dazzling new heights!
Unlocking Natural Light
1. Harness the Magic of Natural Light: Embrace the Golden Hour
Taking amazing iPhone photos often comes down to using natural light well. The best time for this is the golden hour, which is right after sunrise or just before sunset. During these times, everything gets a soft, warm light that makes photos look incredible.
The light during the golden hour is bright but soft, and it makes long shadows. This makes your photos look like they're from a dream, full of depth and emotion, something you can't really get at other times of the day.
There's also the blue hour, which is just before the golden hour in the morning or just after it in the evening. The light is cooler and calmer then, giving your photos a peaceful and almost magical feel.
Leveraging these moments of natural light not only enhances your photos visually but also brings out your creative side, allowing you to explore and capture the world in its most flattering light. So next time you're planning a photography session, sync up with the sun's schedule and let the golden hour's magic elevate your iPhone photography.
2. Soften Your Scenes: Mastering Light Diffusion
Elevating your iPhone photography means becoming a wizard with natural light, especially when it comes to softening its impact. Harsh sunlight can create unflattering shadows and highlights, but there's a simple, effective trick to combat this: light diffusion. By positioning your subjects near a window or in a shaded spot, you can transform the quality of your photos dramatically.
This technique harnesses softer, indirect light, which naturally smoothens and evens out the lighting on your subject. The result? Portraits that look professional, with a gentle illumination that flatters rather than overwhelms. It's all about finding those spaces where the light is mellow yet sufficient, whether it's under a tree or beside a softly lit window.
Understanding and applying light diffusion in your iPhone photography not only improves the aesthetic quality of your images but also brings a level of sophistication and depth that mimics professional shoots. So next time you're out capturing moments, remember that sometimes, the best light is not the brightest, but the softest.
3. Clear Vision: The Importance of a Clean Lens
The clarity of your iPhone photos hinges on something as simple as the cleanliness of your camera lens. Over time, fingerprints, dust, and smudges can accumulate on your lens, obscuring your shots with blur and haze, and diminishing the beauty of your captures.
To elevate your iPhone photography, integrating lens cleaning into your routine is a small but transformative habit. A quick wipe with a microfiber cloth or a dab of lens cleaning solution can banish those imperfections, restoring the crispness and vibrancy to your images.
This straightforward care step is key to unlocking the full photographic potential of your iPhone. With a clean lens, each photo you take steps closer to perfection, enabling you to capture the world in its majestic beauty. So, before you snap that next breathtaking shot, remember: a clean lens is your gateway to stunning, sharp images.
Creative Composition
4. Elevate Your Perspective: Experiment with Angles
The art of iPhone photography is not just about capturing what you see; it's about presenting it in a way that intrigues and captivates. A key ingredient in this creative quest is experimenting with different angles and perspectives. This approach can breathe life into your photos, turning the mundane into the magnificent.
Don't hesitate to change your viewpoint—stoop down, climb up, and look at the world from an angle others might not consider. This exploration can introduce a new dimension to your photographs, adding layers of depth and a fresh, dynamic edge. Whether it's capturing the grandeur of a landscape from a bird's eye view or the intricate details of a flower at ground level, each new angle offers a unique story to tell.
Incorporating this creative flexibility into your photography practice encourages you to see beyond the obvious, transforming everyday scenes into captivating visual narratives. Challenge yourself to look at your surroundings from a new perspective, and watch as your iPhone photography ascends to exciting new levels.
5. Composition Mastery: The Rule of Thirds and Beyond
In the realm of iPhone photography, the Rule of Thirds is a fundamental principle that can dramatically enhance your compositions. This technique involves envisioning your frame divided by two horizontal and two vertical lines, creating nine equal segments. Strategically positioning your subjects at the points where these lines intersect can lead to more aesthetically pleasing and balanced photos.
But there's more to composition than just balance. The Rule of Thirds encourages you to compose your shots with intention, guiding the viewer's eye to the most important elements of your photo. It's about creating a visual flow that feels both natural and compelling.
To put this principle into practice effectively, tools like the Snap Pro Camera app come into play, offering advanced features like the Rule of Thirds and Golden Triangle grid overlays. These tools not only help you visualize the ideal placement of your subject within the frame but also push your creative boundaries. Whether you're aligning a horizon along a horizontal line or placing a point of interest at an intersection, these features can be invaluable in refining your photographic eye.
Incorporating the Rule of Thirds and utilizing the grid features of photography apps such as Snap Pro Camera can significantly uplift your iPhone photography game. By embracing these composition tools, you're not just taking photos; you're crafting visually engaging stories that captivate and resonate.
Mastering Manual Control
6. Dive into Manual Mastery
To truly unlock your photographic potential with your iPhone, stepping into the realm of manual controls is a game-changer. Snap Pro Camera offers a bunch of settings like ISO, shutter speed, and white balance that put the creative reins firmly in your hands.
Adjusting ISO lets you manage the light sensitivity, perfect for balancing shots in varying lighting conditions. Tweaking the shutter speed opens up creative avenues for capturing motion in your frames—freeze a fleeting moment or blur it artistically. And by fine-tuning the white balance, you ensure your colors are true to life, regardless of the lighting environment.
Snap Pro Camera's manual controls are not just features; they are your toolkit for elevating your photography. Whether you're aiming for the precision of a professional shot or exploring the boundaries of your creative expression, these settings are instrumental in crafting the images you envision.
7. Exploring Beyond Auto
While the Auto mode on your iPhone provides convenience and quick snaps, venturing into the manual capabilities of the Snap Pro Camera app unveils a whole new dimension of photography. Advanced settings like exposure compensation, white balance presets, and focus peaking are at your disposal to refine your shots to perfection.
Exposure compensation gives you the power to dial in the brightness, bringing life to underexposed scenes or adding mood to overbright ones. With white balance presets, you can adjust for the warm glow of a sunset or the cool shades of shadow, ensuring your photos look natural and vibrant. Focus peaking is a revolutionary tool that visually marks the sharpest parts of your scene, making it invaluable for capturing detailed textures or creating a mesmerizing depth of field.
These advanced features push you beyond the simplicity of point-and-shoot, challenging you to think like a photographer and see like an artist. By mastering these tools within the Snap Pro Camera app, you open up a world where your iPhone is not just a camera, but an extension of your creative vision.
Unleashing Your Creativity with Snap Pro Camera
8. Embrace Motion Blur for Dramatic Effects
Harness the power of motion blur with the Snap Pro Camera app to transform your photos from ordinary to extraordinary. This feature enables you to beautifully capture the fluid motion of elements like waterfalls or the enchanting trails of stars across the night sky. Motion Blur isn't just a tool; it's a gateway to capturing the world in motion, allowing you to convey movement in a still image with surreal clarity and beauty. Dive into the possibilities of iphone long exposure photography and watch as your images gain a new dimension of allure.
9. Illuminate Your World with Light Trails
Unlock the magic of night photography and light painting with the Light Trail mode in Snap Pro Camera. This feature is your key to crafting vibrant light trails and artistic compositions, transforming the way you capture light and darkness. Whether you're painting with city lights or capturing the trails of stars, the app equips you with the precision needed to bring your vision to life. Explore the art of long exposure to add dynamic, mesmerizing elements to your photographic repertoire.
10. Precision Focus and Exposure Control
Move beyond the constraints of autofocus with Snap Pro Camera's manual focus feature, allowing you to pinpoint the exact part of your scene you wish to highlight. From isolating a delicate flower against a soft background to capturing the intricate details of an eye, manual focus places complete control in your hands. Coupled with manual exposure adjustments, you can ensure your subject is perfectly lit, overcoming the challenges of backlit scenes or uneven lighting conditions. Snap Pro Camera is your companion in refining each detail for photos that truly stand out.
11. Master Histograms and Zebra Stripes for Flawless Shots
Taking your iPhone photography to unprecedented heights requires a deep dive into the advanced features offered by Snap Pro Camera, especially mastering Histograms and Zebra Stripes.
Histograms provide a powerful visual representation of the light and color distribution in your photos, allowing you to ensure that your shots are perfectly exposed, with balanced highlights and shadows. This tool is invaluable for making precise adjustments to your exposure, guaranteeing that every detail is captured with clarity and impact.
Zebra Stripes, on the other hand, are a critical feature for identifying overexposed areas within your frame. These alternating black and white patterns appear on the parts of your image that are at risk of losing detail due to excessive brightness. By adjusting exposure settings in real-time, based on the feedback from Zebra Stripes, you can preserve the nuances in every shot, ensuring that your photos retain their intended expression.
Embracing these advanced tools within the Snap Pro Camera app empowers you to overcome common photography challenges, such as uneven lighting or complex scenes. By leveraging Histograms and Zebra Stripes, you elevate your craft, ensuring that every photo you take with your iPhone stands out with professional-grade perfection.
Creative Tools and Techniques
12. Live Filters: Transform Your Shots Instantly
The magic of live filters lies in their ability to transform your photography in real-time, offering a glimpse into the final look of your images before you even take them. With the Snap Pro Camera app, you have access to an array of filters that you can preview and adjust on the fly, ensuring that the mood, tone, and intensity are just right. This feature acts as both your inspiration board and your editing suite, enabling you to craft and fine-tune your vision with precision as you shoot. It's a powerful way to express your unique artistic style and tell your story with each photo.
13. Minimize Camera Shake: Capture with Precision
Camera shake is a common challenge that can blur the details of your photos, but Snap Pro Camera offers a clever solution with its Apple Watch integration. This feature allows you to trigger your iPhone's camera remotely, significantly reducing the risk of shake and ensuring your photos come out sharp and clear. Whether you're delving into macro photography, snapping the perfect group selfie, or exploring creative angles, the remote control capability offers several key benefits:
Sharper Images: Remote triggering means you can keep your iPhone stationary, resulting in crisp, clear shots free from the blurring effects of hand movement.
Creative Flexibility: Achieve unique shots and explore different perspectives without compromising stability. From low angles to distant views, control your camera without physically touching it.
Effortless Group Photos: No more awkward stretches or missed moments waiting for a timer. The Apple Watch app simplifies capturing group selfies, ensuring everyone makes it into the frame with ease.
By incorporating live filters and minimizing camera shake through remote control, you're equipped to elevate your iPhone photography, making every shot a testament to your creativity and precision.
Conclusion: Unleashing Your iPhone Photography Potential
As we wrap up this journey through the art of iPhone photography, it's clear that the power to capture stunning, professional-grade images lies right in your pocket. By embracing the tips and techniques discussed—from mastering natural light and composition to delving into the manual controls and creative modes of Snap Pro Camera—we've seen how every shot can be transformed into a visual masterpiece.
Photography is more than just pointing and shooting; it's about seeing the world through a lens of creativity and expression. Whether you're experimenting with different angles or exploring the dynamic capabilities of live filters and minimizing camera shake, each tip offers a stepping stone to elevate your photography skills.
Remember, the best camera is the one you have with you, and with your iPhone, you're equipped with an incredibly powerful tool. The journey doesn't stop here; continue to explore, experiment, and push the boundaries of what you can achieve with iPhone photography. Your next great photo is just a click away.
Happy shooting, and may your creativity shine through every image you capture!
[star star="807"]
]]>
https://www.miops.com/blogs/news/how-to-capture-stunning-long-exposure-photos-on-iphone2024-02-06T15:40:17+03:002025-04-18T09:00:32+03:00How to Capture Stunning Long Exposure Photos on iPhone?Onur CelikLong exposure photography, a favorite technique among professional photographers, allows for the creation of breathtaking landscape shots and mesmerizing light trails. This effect, which involves a slow shutter speed to blur moving elements while keeping stationary ones sharp, was hard to replicate on iPhones due to their hardware limitations. DSLR cameras could easily achieve this with their manual settings, but iPhones, including their "Pro" models, lacked this capability in their native camera apps.
Long exposure works by leaving the camera's shutter open for an extended period, allowing it to record the movement of objects, creating visually appealing images. Despite this, the built-in iPhone camera app doesn't support long exposure photography directly. This might sound disappointing, especially since iPhones have become powerful photography tools over the years, versatile enough for everything from capturing moments on global travels to everyday still life scenes.
But there's good news: achieving these effects with your iPhone is still possible, opening up a world of creative photography opportunities. Even though the iPhone's standard camera app doesn't offer manual control for long exposures, various methods and apps enable you to explore this fascinating photography technique with your device. Unlock the secret to capturing breathtaking long exposure iphone photos with our step-by-step guide.
What exactly is long exposure in photography?
Ever marveled at how waves crashing or waterfalls appear seamlessly smooth in certain images? Or observed city life captured in a single frame, where moving cars and bustling crowds blur into a lively streak while buildings stand sharp and clear? This technique, known as long exposure photography, relies on using a slow shutter speed combined with a tripod to minimize camera movement. When using a DSLR or mirrorless camera, you adjust the shutter speed to a range between 1/15 of a second to 30 seconds, aiming for the specific visual effect you desire.
Long exposure, or slow shutter speed photography, involves dialing down the shutter speed to keep unmoving subjects crisp and transform moving ones into a soft blur, creating dynamic streaks, or making them disappear from the scene altogether. The essence of a long exposure shot isn't tied to a specific shutter speed; it's about using motion to contrast with the stillness, giving long exposure its distinct look.
For example, capturing athletes with a shutter speed of half a second might count as a long exposure shot, while photographing the celestial dance of stars might require an exposure lasting 30 seconds or longer.
This photography style is commonly linked with capturing scenes in low light or at night, such as the celestial trail of stars or the glowing paths of car lights. However, long exposure isn't confined to the dark. Daytime photos, such as ocean waves looking otherworldly with a long exposure, clearly compare the moving water with the unmoving landscape, highlighting how this method works well in different kinds of light.
When is the Best Time for Long Exposure Photography?
The beauty of long exposure photography with your iPhone is that you're free to experiment with it anytime. To help ignite your creative spark, here are some perfect scenarios for trying out.
Nighttime is perfect for capturing light trails. Dark settings, such as city streets with moving cars or starry skies, are great for getting stunning photos with longer exposures.
Landscapes with moving clouds or waterfalls offer another excellent chance for long exposure photography. It's a creative method to capture the beauty of nature's movement and dynamism in your photos.
For those who love the great outdoors, nature photography benefits immensely from long exposure techniques. Whether it's showcasing the graceful flight of birds and insects or the serene flow of water, it allows you to convey motion in a captivating way, instead of simply freezing a moment in time.
Does iPhone Have Long Exposure?
Yes, iPhones can capture long exposure photos, allowing you to showcase motion and light in a single image. While there isn’t a dedicated long exposure mode in the default camera app, iPhones can still create stunning effects with built-in features and third-party apps.
How to Take Long Exposure on iPhone?
Although the iPhone's built-in camera lacks direct support for long exposure photography due to the inability to manually adjust shutter speed, you can still create those captivating light trail images. This is achievable through two main alternatives: using a dedicated long exposure app or transforming Live Photos into long exposure shots. These methods offer a unique approach to achieving effects akin to those produced with a DSLR camera.
Despite the absence of manual controls on the iPhone, Apple provides a workaround for capturing long exposure shots directly within its native camera app. This method leverages the Live Photos feature, which can be transformed into long exposure images right from the Photos app. Follow these steps to create your own long exposure images:
Launch the Camera app on your iPhone.
Activate Live Photo mode by tapping the icon at the top right corner.
Press the shutter button to take your picture.
To ensure sharpness, use a tripod and either a timer or a remote shutter.
After capturing the photo, open the Photos app.
To turn your Live Photo into a long exposure shot, first go to your Live Photo. Then, tap on the "Live" label located below the top-left corner. After that, select "Long Exposure" from the options that appear.
And that's it! You've successfully turned a Live Photo into a long exposure masterpiece using just your iPhone.
How to Use Snap Pro Camera for iPhone Long Exposure Photography
While traditional DSLR cameras can easily achieve this effect, iPhone users have often felt left out due to hardware limitations. However, the Snap Pro Camera app changes the game, enabling iPhone enthusiasts to explore the world of long exposures without needing professional equipment.
Snap Pro Camera app is your solution to this limitation. Designed to bring professional camera modes to your iPhone, it offers an intuitive way to capture long exposure photos, combining ease of use with powerful features.
Key Features
AI-Based Stabilization: Ensures sharp images even without a tripod.
Automatic Scene Recognition: Optimizes settings based on your environment.
Smart Exposure: Balances light for perfect exposures every time.
Unlike the native Camera app, Snap Pro Camera gives you control over your exposure settings, mimicking the manual adjustments available on a DSLR. This control, paired with cutting-edge computational photography techniques, makes it a superior choice for iPhone photography enthusiasts looking to push the boundaries of their creative expression.
Achieving stunning iphone long exposure photos with Snap Pro Camera is straightforward. Here's how to get started:
Select Motion Blur Mode: Open the app and navigate to the camera modes. Choose "Motion Blur" to access the settings tailored for this type of photography.
Adjust the Settings: Pick a shutter speed from the available options (1, 2, 4, 5, 10, 20, 30 seconds or bulb mode). The longer the shutter speed, the more pronounced the motion blur effect. Bulb mode gives you complete control, allowing you to end the exposure manually.
Capture Your Shot: With your iPhone mounted on a tripod for stability, compose your shot and press the shutter. The app will process the image in real-time, letting you see the long exposure effect as it's created.
Advanced Tips
Use the lowest ISO setting for sharper images, especially in low-light situations.
Experiment with different shutter speeds to find the perfect balance of motion blur and sharpness for your scene.
Advice for Capturing Long Exposure Photos with Your iPhone
To maximize the quality of your long exposure on iphone, consider these essential tips. Adhering to this guidance will help ensure your efforts in taking long exposure photos are rewarding. Pay attention to the following advice:
Invest in a Tripod: For long exposure shots, your camera needs to remain still for extended periods. Handheld shots can lead to unwanted blur, as keeping your hands steady is challenging over long durations. Using a tripod guarantees the stability needed for crisp, clear long exposure images. While you can improvise with items around the house, a dedicated tripod is a worthwhile investment for those serious about their long exposure photography.
Focus on Composition: The magic of long exposure photography often lies in the composition. Taking extra time to thoughtfully arrange your shot can significantly enhance its impact. For instance, a long exposure photograph capturing the blur of a speeding train becomes even more compelling with a stationary subject in the foreground, adding depth and narrative to the image. Don't hesitate to experiment with different perspectives, adjust your scene, or include a friend as a model to introduce a contrasting element to the dynamic blur created by long exposures.
Creative Ideas for iPhone Long Exposure Photography with Snap Pro Camera
Innovative Concepts for iPhone Long Exposure Shots Using Snap Pro Camera
City Night Lights: Seize the dynamic glow of urban life after dark by photographing light trails. The bustling avenues transform into rivers of light, showcasing the city's pulse.
Water's Grace: Immortalize the serene beauty of waterfalls and rivers with a soft, velvety appearance. This technique turns the natural flow into a mesmerizing, smooth cascade.
Celestial Paths: Venture into astrophotography by capturing the majestic trails of stars across the night sky, adding a touch of the infinite to your portfolio.
Busy Cityscapes Without the Crowds: Utilize longer exposures to magically erase the hustle of pedestrians from popular tourist spots, offering a unique view of urban landmarks.
Moving Clouds Over Landscapes: Capture the swift movement of clouds over a landscape for a dramatic effect, emphasizing the contrast between the land and the sky.
Ghostly Seascapes: Use long exposure to give the ocean a fog-like quality, especially around piers or rocks, creating an ethereal and tranquil scene.
Festive Fireworks: Turn fireworks displays into vibrant, exploding stars with trails that light up the night sky, perfect for celebrations and special occasions.
Flowing Traffic: Capture the rush of traffic to create streams of light that illustrate the flow of life in the fast lane, ideal for overpasses or busy intersections.
These ideas can broaden your creative horizons and inspire you to explore the vast possibilities of long exposure photography with your iPhone using the Snap Pro Camera app.
Conclusion
The Snap Pro Camera app empowers iPhone users to explore the artistic potential of long exposure photography, traditionally reserved for DSLR cameras. With its user-friendly interface and powerful features, you can capture breathtaking images that stand out. Whether you're a seasoned photographer or new to the craft, Snap Pro Camera is your gateway to unlocking creative possibilities and elevating your photography to new heights.
[star star="650"]
]]>
https://www.miops.com/blogs/news/discover-the-best-iphone-camera-app-master-professional-photography2024-02-05T13:12:13+03:002025-04-18T09:00:34+03:00Discover the Best Camera App for iPhone: Master Professional PhotographyOnur Celik
When it’s time to capture a memory—whether it’s a beautiful sunset or a fun gathering with friends—your iPhone is usually your first choice for taking pictures. People want their photos to be clear, sharp, and creative. Our guide, "Discover the Best iPhone Camera App: Master Professional Photography," will help you take amazing photos with your iPhone.
We introduce Snap Pro Camera, the best camera app for iPhone, for a DSLR-like experience in your pocket. With advanced manual controls, an easy-to-use interface, and professional tools, Snap Pro Camera will take your iPhone photography to the next level. Whether you’re a beginner or a pro, this guide will show you how to unlock the full potential of your iPhone's camera.
Mobile Photography Trends
Mobile photography is changing how we capture and share moments. Smartphones now offer powerful cameras with advanced software. People want photos that look just as good as those taken with traditional cameras. Social media makes this even more important, fueling the demand for high-quality photos.
The Power of Smartphone Cameras
In recent years, smartphone cameras have improved dramatically. Many smartphones now have sensors that rival those in traditional cameras, allowing you to take clearer, sharper photos.
More and more people are choosing their smartphones over bulky DSLRs. This shows how much trust users place in smartphone cameras to deliver great results.
Smartphones can also perform well in low light. Thanks to better sensors, your phone can capture great detail even in dim conditions. With more megapixels, you can crop photos without losing quality, making mobile photography both creative and flexible.
Why You Need an Advanced iPhone Camera App
While the iPhone’s built-in camera is good, it doesn't always give you full control over your photos. That’s where advanced camera apps come in. These apps allow you to adjust key settings like ISO, shutter speed, and focus, so you can fine-tune your shots.
Snap Pro Camera is one of the best. It gives you DSLR-like control over your iPhone’s camera, letting you adjust settings and take beautiful photos.
Snap Pro Camera: The Best Camera App for iPhone Photography
Snap Pro Camera gives you a professional photography experience. With manual controls and customizable options, it lets you take full control of your iPhone’s camera. From adjusting exposure to applying filters, Snap Pro Camera helps you create stunning photos. Its simple interface makes it easy for both beginners and experts to use.
Why You’ll Love Snap Pro Camera for iPhone photography
Snap Pro Camera offers features that enhance your iPhone photography. You can adjust settings like ISO, shutter speed, and white balance, giving you complete control over your photos. Whether you’re shooting at sunset or in bright daylight, this app makes it easy to get the perfect shot.
The app’s user-friendly design makes it easy for anyone to use. The built-in editing tools let you perfect your photos without needing extra software.
Advanced Manual Controls for Precision and Creativity
Snap Pro Camera’s manual controls allow for precise adjustments. You can adjust focus for sharp, detailed images and change shutter speed to freeze motion or add a creative blur effect.
ISO lets you control brightness, even in tricky lighting. Shutter speed helps you capture fast action or create artistic motion blur. White balance ensures colors are true to life, no matter the lighting. Manual focus lets you decide where to focus for sharpness.
These DSLR-like controls give you the creative freedom to take the best shot possible, right on your iPhone.
Intuitive User Interface and Professional Quality
Snap Pro Camera’s simple design makes advanced tools easy to use. It’s perfect for fast-moving moments, letting you adjust settings quickly. Despite its simplicity, the results are professional. Snap Pro Camera helps you create beautiful photos with vibrant colors, sharp details, and great lighting.
The app includes live filters and real-time adjustments, so you can see how your changes affect the photo before you take it. This makes it easier to get the shot you want.
Precision Tools for the Perfect Shot
Snap Pro Camera also has tools that help you compose better shots. A tiltmeter and grid overlay help you keep your photos level. The histogram ensures your exposure is right, while zebra stripes warn you about overexposed areas. Focus peaking highlights the sharpest parts of your photo, so you can ensure your subject is perfectly in focus.
Simple Editing and Sharing
Once you've captured your photo, Snap Pro Camera makes editing and sharing easy. The app supports ProRAW, RAW, JPG, and TIFF formats, so you can choose the best option for your needs. The editing tools are simple to use, letting you enhance your photo without extra apps. You can share your images right from the app.
Master Long Exposures on iPhone
Snap Pro Camera also includes a Long Exposure Photography mode. Traditionally, long exposure photography required a DSLR. Now, Snap Pro Camera lets you create stunning long exposure shots with just your iPhone.
With AI-Based Stabilization, Scene Recognition, and Smart Exposure, Snap Pro Camera makes long exposure photography easy. You’ll be able to create smooth, flowing effects with your iPhone.
Conclusion
Snap Pro Camera turns your iPhone into a powerful tool for professional photography. With manual controls for ISO, shutter speed, white balance, and focus, it gives you the precision needed to create perfect shots. Whether you're an experienced photographer or just starting out, this app helps you take your iPhone photography to new heights. Download Snap Pro Camera today and unlock the full potential of your iPhone’s camera.
Snap Pro Camera is compatible with a wide range of iPhone models, ensuring users across several generations can enhance their photography with advanced manual controls. The supported iPhone models include:
iPhone 16
iPhone 16 Pro
iPhone Pro Max
iPhhone 16 Plus
iPhone 15
iPhone 15 Plus
iPhone 15 Pro
iPhone 15 Pro Max
iPhone 14
iPhone 14 Plus
iPhone 14 Pro
iPhone 14 Pro Max
iPhone 13
iPhone 13 mini
iPhone 13 Pro
iPhone 13 Pro Max
iPhone 12
iPhone 12 mini
iPhone 12 Pro
iPhone 12 Pro Max
iPhone 11
iPhone 11 Pro
iPhone 11 Pro Max
iPhone XS
iPhone XS Max
iPhone XR
iPhone X
iPhone 8
iPhone 8 Plus
iPhone SE (3rd generation)
iPhone SE (2nd generation)
For more photography insights and to take your skills even further, especially if you're using your iPhone, don't miss our blog post "13 Best iPhone Photography Tips for Better Photos: Unleash Your Inner Photographer." Dive into expert advice and techniques that will transform your smartphone shots into professional-looking masterpieces.
[star star="958"]
]]>
https://www.miops.com/blogs/news/the-essential-guide-to-forced-perspective-photography2024-02-04T13:00:00+03:002025-04-18T09:02:17+03:00The Essential Guide to Forced Perspective PhotographyOnur CelikPhotography is increasing rapidly day by day. Nowadays, every person carries a camera in their pocket. Over 50 billion photos have been posted to Instagram so far, and around 100 million images are being uploaded every day. That’s a huge figure, and it’s just one social media website. So, what can you do to make your photography work stand out? Well, the one way is to click some extraordinary pictures that are not being clicked by others. One of such photography is forced perspective.
What is forced perspective photography?
Forced perspective photography is a creative technique used by photographers. This technique uses optical illusion to make objects appear smaller, larger, closer to the camera, or further away from the camera. In simple terms, the placement of the subject is done in a way that the subject appears to interact with other people or objects in a totally unique way.
Forced perspective photography ideas
Let’s talk about forced perspective ideas. If this term is new for you, it’s a good idea to google “forced perspective photography ideas,” and you’ll find hundreds of forced perspective photos for your inspiration. Select some simple photos first that don’t require other people, and you can do it at the comfort of your home.
Some simple ideas like you can make yourself look like a giant or very tiny. If the other object in the picture is bigger than you, it’ll make you huge, and if the other object is smaller than you, it’ll make you tiny. You may use small toys like a dinosaur to make you appear smaller.
Another idea is to open your mouth and try to eat a tall building or align your face with a book cover. If you see clouds in the sky, you may use a spray can and make it appear like you are spraying the clouds.
Seven tips for forced perspective photography
1. Keep it simple:
Forced perspective photos should be simple. There should be only three things in the picture, the subject, the other object, and a clean background. If you find something that is creating a distraction, try to remove it from the composition. Keep the only elements that are important to create the illusion.
2. Placement of your subject:
The placement of your subject is crucial to create the optical illusion. Let’s say you are taking a picture of putting your finger on the top of a tall building. A slight movement of the camera or your finger can ruin the image. So, make sure that everything is placed correctly before clicking the picture, and don’t forget to use the rule of thirds and rule of space when you compose the photo.
3. Focusing:
In forced perspective photography, we place one object near the camera and another far away to create the illusion. Always make sure that both objects are in proper focus. If you are clicking using a mobile phone, everything will focus, but if you are using a DSLR or mirrorless camera, you need to take care of this. Use a narrow aperture like f/16 to keep everything in focus.
4. Use a wide-angle lens:
This photography doesn’t require any specific equipment, but it’s always better to use a wide-angle lens to shoot forced perspective photos. Using a wide-angle lens will give you more depth of field, so both objects in your image will be in focus without needing a very narrow aperture. The second advantage of using a wide lens is that you can get closer to your foreground object without cropping out the background. In simple terms, you’ll get more space in your background to place the other object.
You can use any other lens, but a wide-angle lens will give you better photographs.
5. Take a test shot and take lots of photos:
It’s always a good idea to take a test shot and fine-tune the placement of your subjects in the picture. As I wrote above, a tiny movement in the camera or the subject can ruin the illusion you are trying to create. So, take a shot, fine-tune everything and then take lots of images so you can get the one perfect shot.
6. Don’t forget about forced perspective photography during travel:
If you are traveling, you’ll get plenty of forced perspective ideas. Use them, so your travel photos stand out and look unique.
7. Take advantage of the technology:
Now day’s lots of camera gadgets are available for creative photography. Use them to your advantage. One such gadget is MIOPS Smart+ Camera Trigger. It gives you the option to trigger your camera from your smartphone. You can use smartphone app and press the shutter button remotely.
Let’s say you are one of your subjects in the picture and you don’t have anyone to help. How will you click the image? You need to set the camera, turn on the timer mode, click the shutter, go to the spot where you need to stand, and pose yourself within 10 seconds. After the shoot, you need to go near the camera, check the picture, and if there is some problem, you need to repeat these steps.
Now let’s say you are using MIOPS Smart+. You can trigger your camera remotely using this device. When everything is ok, you can use timer mode to press the shutter. Why are we using timer mode? So that you can get plenty of time to put your mobile in the pocket and pose properly.
So grab your camera, click some breathtaking pictures, and amaze the world. Good luck.
Blog Credit: Ramakant Sharda
Ramakant is an Award-Winning Photographer, Author, Mobile Apps Publisher based in the beautiful “Pink City” of India, known as Jaipur. Many of his works have been published in magazines, newspapers, and international blogs. He writes about photography and also teaches photography in his workshops. He has published three (so far) coffee table books. Get his latest bookMastering High-Speed Photography.
[faq q1="what is forced perspective photography?" a1="Forced perspective photography is a creative technique used by photographers. This technique uses optical illusion to make objects appear smaller, larger, closer to the camera, or further away from the camera." q2="what are the tips for forced perspective photography?" a2="The placement of your subject is crucial to create the optical illusion. Let’s say you are taking a picture of putting your finger on the top of a tall building." q3="what are the essential equipments for forced perspective photography?" a3="Now day’s lots of camera gadgets are available for creative photography. Use them to your advantage. One such gadget is MIOPS Flex. It gives you the option to control your camera from your smartphone."]
[star star="627"]
]]>
https://www.miops.com/blogs/news/how-to-photographing-lightning2024-01-31T09:30:00+03:002025-04-18T09:01:22+03:00How to Photograph LightningEsat Piroğlu
Chasing Thunderstorms and Photographing Lightning
Photographing lightning can be one of the most unpredictable yet also one of the most rewarding photographic endeavors. The effect that a lightning flash makes on a photograph definitely leaves a highly electrifying impact (pun intended). When and where lightning will exactly strike is almost impossible to predict but through patterns of occurrence, lightning density trends, and the general weather forecast, there are various ways through which you can increase your chances of being able to photograph lightning. In this article, let’s talk about some of the best points for lightning photography.
[blognewsletter]
How and Where
A lightning pulse is a result of charge differences between one surface and another. Lightning can happen from one cloud to another or from one cloud to the ground. This happens when particles within the clouds move and collide with each other at a rapid rate which results in an electric gradient against another cloud or the ground. As this difference in charge builds up, the potential increases as the system seeks to neutralize this difference. The air between the two opposing sides act as an insulator until the insulating capacity breaks and a rapid discharge of electricity occurs to transfer the energy and reach electrical equilibrium.
*Prepare for Lightning, https://www.wunderground.com/prepare/lightning
Lightning and thunderstorms can happen anywhere however there are particular regions have them more common and can be considered the best lighting photography places. Lightning happens commonly when there is unstable atmosphere, moisture, and abundance of warmth on the ground. This is why generally more tropical regions commonly get more thunderstorms. In the United States, Texas leads with the most number of lightning pulses in the year 2020 and various years before that, but Florida leads with a higher percentage of cloud-to-ground lightning strikes probably because of its more humid tropical climate. In Australia, the Western Top End and North Kimberly regions have shown to be more active when it comes to thunderstorms and lightning which makes these areas the best lightning photography places.
*2021 U.S. Lightning Report Recording, https://www.earthnetworks.com/
Spring and summer are generally considered lightning season for lightning photography as the frequency of thunderstorms happen more during these times. Autumn and winter generally get less but it is not impossible to happen. All these data and trends can be of help when preparing to photograph lightning.
Chasing the Storm
Being successful in doing lightning photography means being at the right place at the right time and also not being at the wrong place at the right time. Planning is the most crucial part of this creative process because lightning can be so elusive to photograph and you can never be caught wasting time and making mistakes. It’s not everyday that lightning happens in multiple continuous pulses generally happening in the same area enough for you to adjust to it. This is why finding the best points for lightning photography right as the storm starts is your biggest priority.
To find the spots where it will happen, there are various websites and apps that have real-time lightning and thunderstorm tracking that can guide you in finding an advantageous and safe vantage point to photograph the storm. These are apps such as Spark, Blitzortung Lightning Monitor, and My Lightning Tracker and websites such as LightningMaps.org and EarthNetworks.com. By using this information you can find a spot to shoot and even find foreground elements advantageous for your composition. Lightning tends to hit taller structures so being able to keep skyscrapers (in the city) and trees (in open areas) within the frame increases your chances of being able to capture the lightning strike. However it is important also to consider that you should have significant distance from such to ensure your safety.
Camera Settings for Lightning Photography
Photographing lightning requires a few considerations about the scenario to be able to determine the right camera settings. While it is possible to photograph lightning during the day, it is obviously more visible when the sky behind it is relatively dark. Much of the impact that photographs of lightning make comes from how it illuminates the clouds surrounding it especially when the lightning pulse goes from a cloud to another cloud. Taking photographs of lightning is best done at night and during twilight when the sky is dark enough for the lightning strike to stand out.
[smart]
Since you will be working with a relatively dim environment, it is necessary to shoot relatively long exposures and this will also be generally beneficial in increasing your chances of capturing the split-second lightning strikes. However, it is important to also limit the length of the exposure to make sure that the strikes are visible. Given those considerations, it is best to take 6-10 second exposures that will help you capture any and all lightning strikes that will happen within that period. At the same time, the exposure won’t be too long that the luminosity of other elements in frame will cancel out the bright but brief flash of light. To be able to do this, it is imperative to use a relatively small aperture such as f/8 or f/11 to prevent getting blown out exposures and at the same time ensure that both the sky and the ground elements are in-focus and clear. ISO can be relatively flexible but the goal is to keep it at a minimum since the flash of light from the lightning strike is much brighter than the luminosity of the scenario when there are is no lightning.
Essential Camera Gear for Lightning Photography
The camera gear and support gear to be used in photographing lightning play a key role in the success of the endeavor. Since this involves catching and photographing an elusive phenomenon that only happens in fractions of a second, it is important that the gear being used is reliable and can very well adapt to the situation.
Cameras with high resolution sensors and good low light performance offer a certain advantage especially if the goal is to produce large prints or if there is a need for significant cropping. However the more crucial aspect about the camera of choice is the availability of manual controls. It is important for the photographer to be able to set the exposure settings with a certain level of precision to be able to capture the scene better. The choice of lenses depend entirely on the distance of the photographer from the storm which means that shooting from within the area requires a wider lens, and shooting the storm from afar necessitates a telephoto lens. The goal is to fill the frame with the lightning and the ground elements to be able to give it the emphasis and attention that it deserves.
Since shooting involves long exposures, stable support gear are an absolute requirement. The choice of tripod should focus on one that is stable and can keep the camera still even with a bit of wind that usually comes with the storm. Both the gear and the tripod should also be able to withstand a bit of rain since precipitation commonly accompanies thunderstorms. Heavier downpours will either require a rain cover, that is if the rain does not hinder visibility of the clouds and of the lightning strikes.
To make the process much easier and automated, a dedicated lightning photography trigger makes all the difference.
Using A Lightning Photography Trigger
Lightning photography triggers make the process of shooting automated. There are various approaches to photographing lightning and the most basic one is doing so manually while hoping that lightning happens within the exposure time. Another way is to use an intervalometer to keep the camera shooting consecutive exposures whether or not lightning happens.
*Instagram: @baseballsizedhail
Using a smart camera remote trigger like the MIOPS Smart+ gives you the automation of a lightning trigger and many more. The Smart+ can be used for long exposures, time-lapse, HDR, special effects, star trails, and night photography in general. For photographing lightning, the MIOPS Smart+ is equipped with a light sensor that scans the scene for flashes of light that typically happens during a lightning strike. You can set the threshold level of sensitivity depending on the intensity of lightning flashes that you want to capture. When the sensor detects a sudden flash of light that is enough to hit the threshold, it triggers the camera to start an exposure. This way your camera is not simply shooting blindly and wasting exposures on shots wherein no lightning happened but instead giving you only photos wherein lightning actually struck. This doesn’t only automate the process of photographing lightning but also helps lessen the number of shots wasted while waiting for something spectacular.
Shooting A Storm-lapse
To better capture how the thunderstorm starts and progresses, shooting a time-lapse is a great option. Since doing interval shooting is one approach to shooting lightning, it requires exactly the same process to produce a time-lapse. Capturing consecutive exposures and compiling them into a video clip allows you to compress the time into a video clip that shows the changes in the environment that would otherwise be too slow to appreciate in real time. If the frequency of lightning pulses is significantly high, the option of using Storm-lapse mode on the Smart+ combines the automation of using the lightning sensor as the camera trigger and the process of producing consecutive exposures together that gives you a collection only of photos wherein lightning struck that can either be used as individual stills, combined into a more encompassing multiple exposure composite image, or to produce a highly dynamic time-lapse sequence of the thunderstorm.
Photographing lightning is a combination of luck, good planning, and preparation. The creative process can be quite a gamble given all the uncertainties surrounding the environment as well as the physical risk of being out during a storm, but when done successfully and with artistic intent, it can result to some of the most impactful and dynamic outdoor photographs that you will ever take.
Nicco started his photographic journey in 2007 practicing the craft as a hobby. Currently, he shoots for various local and international architectural firms and construction companies. Out of his love for sharing his knowledge, Nicco began writing about photography and various pieces of gear.
[star star="895"]
]]>
https://www.miops.com/blogs/news/6-tips-for-better-landscape-photography2024-01-15T17:00:00+03:002025-04-18T09:08:27+03:006 Tips to Elevate Your Landscape Photography SkillsErkan Yigiter
Learn to turn simple snaps of stunning views into professional-looking captures.
Landscape photography is all about capturing nature’s beauty. You might think you need a fancy camera or special software to take amazing pictures. But the real secret is learning a few simple tricks!
In this guide, you’ll discover easy tips to make your landscape photos look better. Whether you're just starting out or want to improve, these tips will help you take pictures with confidence and creativity.
1 – Choose the Right Location for Landscape Photography
Not every beautiful place makes a great photo. Some views look amazing in person but may seem flat in a picture. To fix this, add something interesting in the front of your photo. This could be: ✅ A tree ✅ A river ✅ A building
These things give your picture depth and make it more exciting. Also, don’t limit yourself to popular tourist spots. Sometimes, the best pictures come from places no one else notices!
2 – Get Your Settings and Composition Right for Landscape Photography
Before you take a photo, ask yourself: 🔹 Is it in focus? 🔹 Is the horizon straight? 🔹 Is the lighting good?
A tripod can help keep your camera steady. Also, using a small aperture (like f/14) makes sure everything is sharp and clear. Take your time—landscape photography isn’t about speed, it’s about getting the best shot!
3 – Choose the Right Equipment for Landscape Photography
Different lenses can change how your photo looks. Here are two great options:
Wide-angle lens (12-24mm): Makes the front of your photo look bigger and captures more of the scene.
Telephoto lens (70-200mm): Zooms in on faraway details and makes the background look closer.
Filters can also help!
Neutral Density filters make water look smooth.
Graduated filters balance bright skies and dark land.
Instead of taking tons of random photos, plan your shot and choose the best gear for it!
4 – Use Composition Rules (And Break Them When Needed!) for Landscape Photography
Good composition makes your photos more interesting. One great trick is the Rule of Thirds. Imagine your photo is divided into nine boxes by two vertical and two horizontal lines. Place important things along these lines for a better balance.
Other useful tips: ✔ Leading lines: Use roads, rivers, or fences to guide the viewer’s eye. ✔ Power points: The spots where the lines cross are great places to put important objects.
Sometimes, you can break the rules! For example, if you're photographing a lake with a perfect reflection, centering the horizon can create a beautiful mirror effect.
5 – Shoot at the Best Times of the Day
The best lighting happens at: 🌅 Golden Hour – Right after sunrise and before sunset (soft, warm light). 🌌 Blue Hour – Just before sunrise and after sunset (cool, dreamy light).
These times make colors pop and create magical photos. They also help you avoid harsh midday sunlight, which can make pictures look too bright.
If you don’t get the perfect light on your first try, don’t give up! Many photographers visit the same place several times before they get the perfect shot.
6 – Pay Attention to Every Detail
Sometimes, tiny things can ruin a great picture. Before you take a photo, check for: ❌ People wearing bright colors that distract from the scene. ❌ Objects like road signs that take away from nature’s beauty.
A small change in your position can make a big difference in your final image!
Suggested Camera Settings for Landscape Photography
Here are some easy camera settings to start with:
📷 Mode: Aperture Priority 📷 Aperture: f/8 to f/16 (for clear details) 📷 ISO: 100 (for sharp quality) 📷 Shutter Speed: Let the camera choose 📷 White Balance: Auto or adjust for lighting
More tips: ✅ Shoot in RAW to edit your photos better later. ✅ Turn off noise reduction to keep details sharp. ✅ Use a tripod for steady shots.
Final Thoughts
Landscape photography is about more than just taking pictures—it’s about capturing a feeling. The best photos come from patience, creativity, and practice.
So, grab your camera, explore new places, and have fun! The more you practice, the better your pictures will be.
Manuel Delgado is an award-winning photographer with a specialization in travel and documentary photography. He writes for Contrastly and is a Mentor for NGO Photographers Alliance, having led workshops in Africa with a focus on ethical and humanitarian photography. His work has been exhibited in Europe and the Americas.
Driven by an innate curiosity for his surroundings, Manuel´s process is mainly focused on capturing people in their natural environment; translating through his lens the subtle threads of daily life that are shared across cultures, borders, and races. Depicting people from diverse backgrounds, his work is united by a shared aesthetic that serves to tell each individual’s story. Manuel is currently living in Düsseldorf, Germany.
[faq q1="What is landscape photography?" a1="Sweeping vistas and timeless waterfalls have always formed the basis for a great photograph, but how is it that some photographers come away with gallery-worthy shots of these landscape locations" q2="What are the classic compositional techniques in landscape photography?" a2="Amateur photographers often approach the main subject within their scene by placing it within the middle of the image, while this can be effective for some photos" q3="Which equipment should be used in landscape photography?" a3="What lens are you using for your images and why? If you want to capture sweeping views and exaggerate foreground subjects, a wide-angle lens like a 12-24mm or 16-35mm zoom may be your best choice"]
[star star="796"]
]]>
https://www.miops.com/blogs/news/amazing-long-exposure-ideas-to-try-as-a-beginner2024-01-06T22:00:00+03:002025-04-18T09:01:11+03:00Amazing Long Exposure Ideas to Try as a BeginnerOnur CelikPhotography has allowed us to exceed our limits, especially in observing and capturing many visual phenomena that are elusive to the naked eye. The different genres of creative photography make this possible using camera equipment, techniques, and unique inspirations that have transformed how we see and experience the world around us.
In this article, we’ll talk about one of the best genres out there that have turned mundane scenes into ethereal and fantastic images that never fail to amaze: long exposure photography. Here, we’ll first define this type of photography, the camera equipment you need to try it, and long-exposure photo ideas to try for beginners and professionals alike.
Let’s go to the first part of our discussion.
What is Long Exposure Photography?
Long exposure photography is a unique creative photography genre that captures the mesmerizing contrast between highly defined stationary and fixed elements against the blurred and obscured patterns of moving elements.
Long exposure is also known as slow-shutter photography because this technique lets your camera’s shutter be left open for a lengthy period of time. When your shutter allows your camera’s lens to let in more light before it completely closes, it can capture blurry, smeared, and obscured trails that add creative drama to your images.
Why Do Photographers Use Long Exposure?
This photography genre is more exciting and dynamic than conventional images. There are different reasons why photographers would want to choose long exposure over a normal photo. Some include creating an effect that mimics the passing of time, capturing smoother water surfaces, mapping out and tracing the motion of the stars, creating patterns of light, and capturing beautiful human movements, such as a ballerina’s dance.
While these reasons may sound intimidating for beginners, did you know that even with regular, entry-level camera equipment, you can easily capture long-exposure images?
Here are the basic camera equipment and accessories you need for long-exposure photography.
What Equipment Do You Need for Taking Long Exposure Photos?
Long-exposure photography requires the most basic camera equipment. You don’t have to own the most expensive and advanced gear. You just have to learn how to use your camera’s manual settings and pair your device with the most camera versatile accessories for long exposure photography.
Here is a complete list of everything you need to get started.
1. DSLR Camera with Manual Mode
Entry-level cameras conveniently have automatic modes so you can easily take photos without worrying about your camera settings. However, if you want to step up and upgrade your photography skills, it’s time to learn how to use the Manual Mode. Using manual mode is crucial to a successful long exposure shot.
In long exposure photography, you will have to adjust multiple settings, especially your shutter speed. As mentioned earlier, this genre of photography uses slow shutter techniques, so your camera should also allow Bulb Mode. While on Bulb Mode, your camera’s shutter will remain open as long as you need it to be.
You also need your other camera settings adjusted to make sure that you’re getting the level of exposure and other aspects of your images right.
2. Sturdy Tripod
You cannot do long exposure photography while manually holding your camera. The technique of using a slow shutter requires your camera to be fixed on a stable platform or tripod, or else, all you’ll get is a blurry image.
Your goal is to achieve a contrast of high-definition static objects and trails and patterns of the moving elements. Remember, do not just rely on your camera or lens’s image stabilization function. The smallest shaking or movement can easily distort your images and waste your effort.
You don’t have to spend on an expensive and bulky tripod. You can go DIY and use stabilizers that will ensure that your mounted camera will stay in place. Seasoned photographers, especially those who shoot outdoors, use bags of sand or rice to weigh down their tripod, especially during harsh, windy weather.
3. Wireless Camera Trigger
Aside from using a tripod to stabilize your camera and prevent image distortion, using a wireless camera trigger can help you achieve the perfect long exposure photography images you want on your first try.
A remote camera trigger or a wireless camera shutter enables you to signal your camera to shoot from a comfortable distance, without risking blurry shots. Aside from remotely controlling your device, it will also reduce fatigue, especially if you’ve been shooting outside for hours.
Since long exposure shots take a long time, having a wireless trigger with a self-timer mode can help you manage your shots.
So far, these are the basic things that a regular remote camera trigger can offer, but imagine if you’re using an intuitive and versatile camera trigger that combines the power of your smartphone with technologies designed for creative photography! These are offered by both the MIOPS Smart+ and MIOPS FLEX, the most recommended remote camera triggers for long-exposure photography and other photography genres.
MIOPS has transformed how photographers take on the challenging yet exciting world of long exposure photography. Its MIOPS Smart+ has Long Exposure Mode that offers many possibilities for convenient and creative shots.
As a gadget for long exposure photography, you can also choose slow shutter settings, the duration of your shot and how many frames your camera can take per second.
It means that whether you’re trying a low-light, indoor long exposure photography idea or a bright, daytime long exposure idea, you’ll have the best camera settings that adjust to the presence or absence of light, during the shot! With this intuitive function, you don’t have to waste hours getting the best instant shot or post-processing.
4. Lens and Neutral Density Filter (ND Filter)
Another must-have camera equipment that will help you make difficult daytime long exposure ideas happen is a neutral density filter (ND filter.)
A neutral density filter will prevent the overexposure of your photos, especially if you’re shooting outdoors on a sunny day. How? These filters are designed to reduce and balance the amount of light that enters your camera lens. They can come in different light filtration levels, so it’s best to plan out your shoot to identify the filter strength you need beforehand.
Now that you have all your long exposure camera equipment ready, we can finally go to inspirations and creative long exposure photo ideas that you can try as a beginner.
Using the camera equipment that we listed and the knowledge that you discovered about long exposure photography techniques, you can find these examples easy and fun!
What Long Exposure Ideas Can You Try as a Beginner?
Light, motion, and vibrations provide some of the most spectacular trails and patterns that we can only observe through the lens of our camera. Here are some of the best examples that even beginner photographers with an entry-level camera can try!
1. Light Trails on a Busy Highway
One of the most beginner-friendly long exposure photography ideas is taking photos of light trails on a busy highway. These locations are easily accessible and you can find safe locations to set your tripod. However, because this is quite easy, it’s hard to take unique images of the same scene. Your goal is to find a location that will help your photo stand out.
Light trails offer streaks of differently patterned and coloured bands of lights. These light paintings follow the trails of the roads. While you have to focus on them as your subjects, don’t take your background for granted as this can make a huge difference. Shoot your image from a higher angle. Use a wide-angle lens to capture the beautiful landscape that will serve as the light trail’s canvas.
2. Stellar Movements at Night
Star trail photography or astrophotography is one of the most beloved contributions of long exposure techniques to the world of capturing the night sky. However, unlike photographing light trails on a busy highway, the stars and heavenly bodies are elusive.
Astrophotography is only possible in remote locations, away from the light pollution of the cities. This will also depend on the weather condition as you’ll need a clear night sky to capture the movement of the stars across the sky.
3. Exquisite Movement of Dancers
One of the most interesting indoor long exposure photography ideas you can try is taking a slow-shutter photo of a dancer’s movement. The resulting image of an interestingly smooth and obscured image is beyond evocative, capturing the beauty of the human body, and the freedom and passion of dance.
4. Eerie Portrait Photography
A long exposure technique adds eerie and enigmatic elements to creative portraitures, especially if you’re framing a Halloween-themed shot. Imagine how a long shutter effect can deliver ghostly apparitions and double images through repetitive exposures of the same elements. You can also use the same technique when creating a narrative photography portfolio under the same theme.
5. Busy Crowds at World Landmarks
When you see photos of a famous landmark, most images just focus on the structure. Sometimes, the images are empty and lifeless in an effort to emphasize the beauty of its architecture. However, through long exposure photography, you can capture a unique image that visually narrates a more interesting story.
Including the busy movement of crowds, tourists, pedestrians, and other elements in your frame, against a famous global landmark as a background will not just add life to your photo. It will deliver a timeless image that is full of life and filled with stories.
6. Foggy Mountains and Silky Seascapes
Let’s also not forget the landscape photography genres that have been transformed with the introduction of long-exposure photography techniques. Rising smoke and thickening fog on a mountainside, flowing rivers, raging waves, and dancing waterfalls, are some of the best images that this genre has captured through the years.
You can add to this collection by exploring the great outdoors and capturing the movements and patterns that these natural elements can offer.
7. Light Paintings and Patterns
Light painting, light performance art, and light drawing are all made possible using basic time lapse techniques. Set up your tripod, leave your shutter open for a longer period, and start drawing or painting patterns using light sticks, flash bombs, and other sources. Don’t hesitate to use different colors and light intensities! It will add more texture and depth to your images.
8. Smoke Bombs and Smoke Art
Smoke bomb photography is one of the emerging styles of commercial photography, especially when taking portrait photos of product models. Depending on how you use them, these props can deliver cool and awesome effects to your portraits. Some photographers even use this equipment for Halloween-themed portraits and other creative photography ideas.
Using long exposure tricks, you can take advantage of the creative clouds and colors that your smoke bombs produce. You can even just focus on smoke as your primary subject and contribute to the emerging genre of Smoke Photography.
Just like how waterdrop photographers focus on droplets and splashes of clear or colored water, smoke photography (also known as smoke art photography) as a genre relies on chance, luck, and imagination! Smoke art photography can be done indoors or outdoors, too! Just make sure you have the proper lighting equipment to help emphasize the unique patterns and flow of your subject.
Getting Started on Long Exposure Photography
We provided you with the definition, camera equipment information, and subject ideas to help you get started on long-exposure photography. Hopefully, we have also inspired you to think of more unique ways to take advantage of this camera technique.
While your creativity and imagination can help you capture unique long exposure images, you shouldn’t also take for granted how pairing your camera with the right gadgets can up your game in this genre.
We’ve introduced how MIOPS and its Smart+ model can conveniently deliver spectacular long-exposure images for beginners and professionals alike. This gadget, however, can cover more and help you take on some of the most advanced and challenging photography techniques today, especially lightning photography.
Charm is a writer and a visual artist. Her drive to share ideas and stories is evident in her background in communication arts and language studies. Years of professional experience in content creation have given her a broad proficiency with the process of engaging online communities. An appreciation for multiple languages and cultures drives her to seek out experiences and capture these moments through her writing, digital art, and photography.
[star star="825"]
]]>
https://www.miops.com/blogs/news/astrophotography-for-beginners-essential-tips-for-capturing-the-night-sky2024-01-05T12:28:22+03:002025-04-18T09:00:36+03:00Astrophotography for Beginners: Essential Tips for Capturing the Night SkyERKAN YIGITERDive into astrophotography with our guide, 'Astrophotography for Beginners: Essential Tips for Capturing the Night Sky with Your DSLR or Mirrorless Camera'. Perfect for beginners, it shows you how to take amazing pictures of the night sky, from setting your camera right for star trails to picking the best gear for long exposure shots. Get ready to turn your star-gazing hobby into beautiful photos.
]]>
This guide specifically targets enthusiasts beginning their journey into night sky photography. Whether you're wielding a DSLR or a mirrorless camera, this article will navigate you through the essentials of astrophotography. From understanding the types to mastering camera settings and choosing the right gear, we've got you covered.
Introduction to Astrophotography, Long Exposure and Star Trail Photography
Astrophotography is all about taking pictures of space objects like the moon and stars, and special sky events like meteor showers. When you capture a big part of the sky full of stars, that's astrophotography too. Popular types of this photography include creating star trails and photographing the Milky Way.
For long exposure photography, which is key in astrophotography, you need to keep the camera's shutter open longer than you usually would. While a one or two-second exposure might be enough for indoor photography, it won't work for capturing the night sky. Astrophotographers often start with exposures of five to ten seconds to try different settings.
Standard exposures can range from 30 seconds to 15 minutes, depending on how faint the object is and the lens you're using. This is where devices like the MIOPS Smart+ camera trigger come in handy. It lets you control the exposure time precisely, ensuring you capture the beauty of the night sky without any shake from manually pressing the shutter button.
For those new to this hobby, remember that it requires patience and a good grasp of photography techniques to get that stunning shot regardless of your camera setup. The time and effort you put into this photography type are worth it as the results can be truly spectacular.
Challenges of Photographing the Night Sky
Photographing the night sky with a DSLR or mirrorless camera is more accessible now than ever. Modern cameras excel at high ISO settings, crucial for capturing the stunning details of the night sky.
Before you start shooting, it's essential to know your location and what you want to capture. This foresight is especially important. You'll want to avoid any unwanted elements like tree branches or city lights in your composition.
Planning is key, and tools like the Sun Moon Expert Photo Planner app are invaluable. They help ensure that features like the Milky Way complement your foreground elements perfectly, enhancing your star trails and long exposure shots.
Getting your camera settings right is crucial in long exposure night photography. Adjusting the aperture, shutter speed, ISO, and white balance is vital to capturing the perfect shot. These settings depend on the lighting, your subject, and how much blur or noise you want in your image.
Using the appropriate camera accessories can significantly enhance your photography experience. They help improve your shots and keep your camera stable – a must for capturing clear star trails. Safety is also a priority when shooting at night, as you may encounter wildlife, theft, or bad weather.
Composition is another challenge. Finding a strong focal point, framing your scene effectively, and adding drama are all part of the creative process in this photography. Post-processing is the final step, where you can fine-tune your images, adjusting for graininess, color balance, and exposure.
To summarize, successful photos requires thorough planning and preparation. Know your equipment, location, and the shot you aim to capture. Envision, plan, and then execute to capture the breathtaking beauty of the night sky, be it star trails or long-exposure celestial scenes.
Types of Astrophotography
Astrophotography is a fascinating and challenging genre of photography that captures the celestial wonders of the night sky. For beginners with a DSLR or mirrorless camera, a good start is photographing the Moon, star trails, and even some basic deep-space objects.
Wide-field Astrophotography
This involves using a wide-angle lens to capture vast sections of the night sky, often including a landscape feature. It’s a great way to showcase the grandeur of the Milky Way, the glow of the aurora, or the mesmerizing paths of star trails with our planet. Beginners often use a DSLR camera with a wide-angle lens for this kind of photography to take pictures of starry skies or star trails over landscapes.
Deep-sky Astrophotography
This advanced form targets faint and distant objects in the night sky, like nebulae, stars, and galaxies. The aim is to bring out the intricate details and colors of these distant celestial bodies, invisible to the naked eye. It requires more specialized equipment, including a telescope, a camera capable of long exposures, and a tracking mount to follow the sky's motion.
Solar, Lunar, and Planetary Astrophotography
This type focuses on capturing the sun, moon, and planets within our solar system. The objective is to detail features like sunspots, lunar craters, planetary rings, and moons. While telescopes are commonly used for these shots, a DSLR camera with a super-telephoto lens can also yield impressive results.
Time-lapse and Star Trails
An extension of wide-field, this involves taking multiple images of the night sky over time, and then merging them into a video or a single composite image. The goal is to showcase the sky's motion, like the stars' rotation, the moon's movements, or a comet’s journey. The same technique is used to create captivating star trail images, illustrating the Earth's rotation relative to the stars.
Milky Way Long Exposure Photography
This type focuses on capturing our home galaxy, the Milky Way. Light pollution can make it challenging to see its details, so astrophotographers often seek out remote, dark locations. Essential gear includes a wide-angle lens, a tracking mount for long exposures, and a camera capable of such exposures.
Milky Way long exposure photography is particularly awe-inspiring, showing the vast beauty of our galaxy. With the right equipment and technique, stunning images can be captured, even without tracking.
Remember, tools like the MIOPS Smart+ camera trigger can greatly assist in capturing these types of images, especially for long exposure and time-lapse photography. They allow for precise control and stability, essential for the clear, detailed images.
Essential Gear for Astrophotography
The best equipment depends on your budget and what's available to you. While smartphone cameras are improving rapidly, a DSLR camera with interchangeable lenses is more suitable. A DSLR with strong low-light capabilities is ideal. Full-frame sensor cameras are preferable for their larger sensor area to capture more light, but crop sensor cameras can also achieve good results.
When choosing a DSLR or mirrorless camera and capturing star trails, factors like sensor size, resolution, noise performance, battery life, and lens compatibility are important.
For lenses, start with what you have, like an 18-55mm kit lens. If you have faster lenses like a 14-24mm f/2.8 or primes like a 24mm f/1.4, those are excellent choices too.
A tripod is essential for all types of night sky photography. Since you'll be keeping the camera steady for several seconds to minutes, a sturdy tripod, ideally with a ball head, is crucial.
The MIOPS Smart+ allows comprehensive remote control through a smartphone app, managing shutter speed, shot intervals, and more. With this device, managing the shutter, aperture, and exposure values becomes effortless, making it a game-changer for capturing star trails and long exposures.
Planning Your Astrophotography Shoot
When planning your photography session, tackling light pollution is a key challenge. For clear, detailed images of the night sky, you'll need to find a dark sky area, far from the bright lights of the city.
A big part of shoot planning is knowing exactly where in the sky your subject will be and how it fits into your composition. The night sky is in constant motion, with the position of stars and the Milky Way changing throughout the year. Knowing where your celestial subject will be at the time of your shoot is crucial. To assist with this, smartphone apps like the Sun Moon Expert Photo Planner are invaluable.
Incorporating the Sun Moon Expert app into your photography process can significantly enhance your results. Here’s a quick rundown:
Dream: Visualize the scene you want to capture. It could be anything from a landscape silhouette against a sunset to the Milky Way arching across the sky.
Plan: Use the Sun Moon Expert app to determine the perfect time for your envisioned shot. The app provides detailed information on sun and moon positions, Milky Way alignments, and more.
Capture: Armed with this data, head out to your chosen location, set up your gear, and capture that magical moment.
In astrophotography, where precision is key, tools like the Sun Moon Expert app are crucial. They bridge the gap between missing a shot and capturing a stunning image. With the ability to track celestial bodies accurately and plan comprehensively, you’re well-equipped to turn your photography dreams into reality.
Camera Settings for Astrophotography
In astrophotography, where you're capturing objects in low light, understanding and adjusting your camera settings is key. The two main factors controlling your exposure are shutter speed and aperture. In this photography type, you'll mostly be working with long exposures.
Shutter Speed
Shutter speed refers to the duration for which your camera's shutter remains open to allow light to hit the sensor. For astrophotography, a longer shutter speed is necessary. However, the longer the shutter is open, the more you'll capture star trails due to Earth's rotation.
If you want to avoid star trails in wide-field astrophotos, it's important to know how long to expose before trails appear. The Star Trail Calculator or the 500 Rule/NPF Calculator in the Sun Moon Expert app can help determine the right shutter speed for your shots.
ISO
ISO measures your camera sensor's sensitivity to light. Higher ISO settings make your image brighter but can also increase graininess. In astrophotography, a balance is needed — a high enough ISO to capture faint celestial objects without adding too much noise. Typically, ISO settings between 400-1600 work well, but you can go higher if necessary and correct some of the noise in post-processing.
White Balance
White balance removes color casts to give you neutral whites in your images. It's crucial in astrophotography to manually set white balance to capture the true colors of stars and planets. While the daylight setting (around 5200K) is a common choice, night sky images often require cooler settings in the 3200-4800K range. Experiment with these settings to see what works best for your images.
Summary of Settings for Astrophotography
Capture your images in RAW format to ensure the greatest flexibility in post-processing editing. Set your focus to Manual. White Balance: Start with the daylight setting and adjust as needed (around 3200-4800K). Aperture: Use the widest setting possible for your lens. Shutter Speed: Use the Sun Moon Expert 500 Rule/NPF Rule calculator to find the ideal setting based on your focal length. ISO: Adjust between 400-12800 based on your histogram.
Use the MIOPS Smart+ remote to trigger the shutter. This tool is especially helpful for long exposure shots, as it minimizes camera shake and allows precise control over your exposure times.
By mastering these settings and utilizing tools like the MIOPS Smart+ and the Sun Moon Expert app, you can significantly enhance your experience, capturing stunning images of the night sky.
Practical Tips for Successful Astrophotography
Here are some practical tips:
Choose the Right Camera and Lens: Use a camera that excels in low light conditions, like a DSLR or mirrorless camera. For lenses, wide-angle ones are great for capturing expansive sky scenes like the Milky Way, while telephoto lenses are ideal for zooming in on specific celestial objects.
Sturdy Tripod is a Must: A solid tripod is crucial to avoid camera shake and blur. Make sure it’s well-positioned and stable before you start shooting. Any movement during a long exposure will disrupt your image.
Pre-Plan Your Shoot: Research and plan when and where to shoot your chosen subject, whether it's the Milky Way, the moon, or planets. Certain times of the year offer better visibility for different celestial objects.
Camera Settings: Switch your camera to manual mode for both exposure and focus. Opt for a fast aperture (between f/2.8 and f/4), a high ISO (ranging from 400 to 1600 or higher), and a long shutter speed (15-30 seconds or more). Utilize the rule of 500 to prevent star trails.
Shoot in RAW: This format preserves the most detail and color in your images, giving you more flexibility in post-processing. Use the histogram to ensure you’re not losing details in the highlights or shadows.
Focus Manually: Use manual focus to ensure sharp images and employ a remote shutter release or self-timer to prevent camera vibrations. For precise focusing, use live view and zoom in on a bright star or distant light.
Post-Processing: Edit your images to enhance colors, contrast, sharpness, and reduce noise. Programs like Photoshop, Lightroom, or Aperture offer extensive editing capabilities, particularly beneficial when working with RAW files.
Remember, tools like the MIOPS Smart+ trigger can greatly enhance your experience, especially when it comes to managing long exposures. It minimizes the risk of camera shake and allows precise control, ensuring sharp, clear images of the night sky.
In conclusion, astrophotography offers an awe-inspiring gateway into the wonders of the night sky, blending the art of photography with the majesty of celestial phenomena. By equipping yourself with the right gear, understanding the crucial camera settings, and employing practical tips, you can capture breathtaking images of the cosmos.
Whether you're photographing the Milky Way, chasing star trails, or capturing long exposures of distant celestial bodies, remember that patience and practice are your best allies. Tools like the MIOPS Smart+ trigger and the Photo Expert app can significantly elevate your experience, providing the precision and control needed for stunning photography. So, venture out under the starry sky, embrace the challenges, and immortalize the beauty of the universe through your lens.
[star star="628"]
]]>
https://www.miops.com/blogs/news/how-does-long-exposure-photography-work2024-01-02T14:00:00+03:002025-04-18T09:06:26+03:00How Does Long Exposure Photography Work?Onur Celik
This technique shines especially bright in night photography, allowing photographers to snap breathtaking shots with effects that look out of this world. Long exposure can change a scene in ways our eyes just can't see on their own, making the invisible, visible.
Curious about how long exposure photography brings these stunning images to life? Keep reading to find out more.
Long exposure photography often leaves people amazed, making those who don't know much about photography think it's all done with Photoshop magic. Have you ever wondered if it's actually possible to catch those cool light trails from cars without some kind of digital trickery? Well, it turns out, with the right gear and a bit of know-how, capturing such incredible sights is entirely doable.
This technique shines especially bright in night photography, allowing photographers to snap breathtaking shots with effects that look out of this world. It can change a scene in ways our eyes just can't see on their own, making the invisible, visible.
Curious about how long exposure photography brings these stunning images to life? Keep reading to find out more.
What Exactly is Long Exposure Photography?
Long exposure, or what some call slow shutter photography, is all about using a slower shutter speed. This allows the camera to take in more of the scene over a longer period of time, capturing movements and effects that we normally can't see with just our eyes.
Using this method, photographers can make still objects look sharp and detailed, while anything moving in the scene gets a dreamy, blurred effect. Think of those pictures where the sea looks misty and magical around sharp rocks, or the sky is streaked with star trails – those are classic examples of long exposure shots.
Purpose and Effect
The primary purpose of this photography is to blur moving elements while keeping stationary objects sharp and in focus. This technique is often used to convey a sense of motion or to smooth out dynamic elements, such as water or clouds, creating a serene and almost surreal effect. It can also turn lights in motion, like car headlights or stars, into beautiful streaks across the image.
Common Subjects
This photography technique is versatile and can be applied to a wide range of subjects. Popular subjects include landscapes, cityscapes, and night scenes. Specific examples include:
Waterfalls and rivers: The moving water becomes silky and smooth.
Seas and oceans: Waves and water get a misty appearance, contrasting with static objects like rocks.
Stars and the night sky: Capturing star trails or the Milky Way.
Urban settings: Blurring the movement of vehicles to create light trails on roads.
How To Do It
It involves taking photos over a much longer period than your camera's default settings suggest. Instead of the quick snaps usually taken at speeds like 1/50th of a second or faster, you'll be letting the shutter stay open for half a second or more. This slower pace is what creates those magical, extended-moment effects.
To achieve this, you'll need to switch your camera to Manual mode. This gives you full control over the shutter speed, allowing you to set it for the long durations required for long exposure shots. If you're not yet comfortable with Manual mode, stepping away from Auto mode is a good start. It's worth taking some time to explore and understand the various settings available on your camera, beyond the basics. This knowledge is crucial for mastering long exposure photography and unlocking a whole new world of photographic possibilities.
If Manual mode feels a bit daunting, don't worry! You can still explore this photography using semi-manual or priority modes. Here's how you can adjust key settings:
Aperture Priority: Aim to set your aperture between f/8 and f/16. The right setting depends on how much light is in your scene and how long you want your exposure to be.
Shutter Speed: You might need the shutter to stay open for at least 10 seconds, sometimes even longer. Again, this will vary based on the lighting conditions of your scene.
ISO: Keep your ISO as low as possible to avoid noise in your photos. ISO 100 is typically a good starting point, ensuring clear and crisp images.
To dive into the world of long exposure photography, you'll need a few key pieces of equipment. Here's a basic rundown to get you started:
Camera: Naturally, your camera is the most essential piece of equipment. You don't necessarily need a DSLR; many advanced point-and-shoot cameras come equipped with a Shutter Priority mode, making them suitable for these shots.
Tripod: A sturdy tripod is crucial for long exposure photography. It ensures your camera stays perfectly still during the extended exposure times. Make sure to invest in a reliable tripod that can withstand slight movements or breezes without budging.
Miops Smart+: To avoid camera shake from pressing the shutter button, consider using a camera remote like the Miops Smart+. This device acts as a remote shutter release, enabling you to take pictures without having to touch the camera. The Miops Smart+ camera remote not only minimizes the risk of blurry images but also offers advanced features that can enhance your photography experience. The Miops Smart+ is versatile, supporting various photography techniques including time-lapse, HDR, remote shooting, and of course, long exposure.
Filter Holder: If you're planning to use square filters — essential for some lenses that can't accommodate round filters — a filter holder will be necessary. It's advisable to set up your ND filters and filter holder before initiating the shutter, to ensure everything is in place for that perfect shot.
Getting the Perfect Long Exposure Photos
To nail those breathtaking shots, your gear is crucial, but so are other elements like your chosen subject, the timing of your shoot, and even the weather. Here are some straightforward tips to help you capture stunning long exposure images:
Pick Your Subject Wisely: Long exposure works wonders with scenes where you can contrast moving elements with static ones. City lights, flowing landscapes, and the dynamic sea are perfect subjects to start with.
Watch the Weather: Believe it or not, a bit of wind and some clouds can be your best friends for this photography. They add movement and drama to the sky. Always check the weather forecast before planning your shoot to ensure conditions are on your side.
Scout Your Location Early: Take a day to visit your chosen spot before the actual shoot. This is crucial for finding the ideal place to set up your tripod, especially in dim light situations. Use this time to imagine your shots and figure out the best composition.
Timing is Everything: The soft light of early morning or late evening is gold for long exposure photography, reducing the need for ND filters and letting you play more with natural conditions for creative effects.
Keep It Clean: A long exposure means your camera's shutter is open for a while, so any dust on your lens or filter could spoil your shot. A quick clean before you start and between shots can make a huge difference, saving you the headache of fixing things later in editing.
Remember, this photography type is as much about patience and preparation as it is about technique. With these tips in hand, you're well on your way to capturing those dreamy, motion-blurred images that long exposure is famous for.
Inspirational Examples of Long Exposure Photography
This technique can transform ordinary scenes into breathtaking images. To inspire you and spark your creativity, let's explore a few examples of how this technique can be applied across different subjects:
Cityscapes at Night: Imagine a bustling city at night, where the lights of moving cars blur into glowing rivers of color against the sharp, still outlines of buildings. These shots capture the vibrant energy of city life in a way that feels almost magical.
Waterfalls and Rivers: By using a slow shutter speed, water in motion becomes a silky, smooth cascade. The contrast between the soft water and the sharp, stationary rocks or surrounding landscape creates a serene and dreamy effect that's utterly captivating.
Star Trails: When photographing the night sky over a long period, stars appear as light trails circling the sky, painting patterns of time and motion. This technique showcases the beauty of the cosmos in a way that feels both vast and intimate.
Seascapes: Long exposure can make the ocean look like a misty, ethereal plane, with waves appearing as soft fog around rocks or piers. The calmness of the water contrasts beautifully with the solidity of the landscape, offering a peaceful and surreal perspective.
Light Painting: This fun and creative technique involves moving a light source in front of the camera. The result is a photograph where light trails form dynamic shapes and patterns, limited only by your imagination.
These examples are just the beginning. Long exposure photography opens up endless possibilities for capturing the world in unique and surprising ways. Whether you're drawn to the calmness of a mist-covered lake at dawn or the frenetic energy of a city at rush hour, it can add a layer of depth and intrigue to your images that transcends the ordinary. Let these examples inspire you to experiment with time and motion in your photography, creating your own stunning, long-exposure masterpieces.
More from MIOPS
Long exposure photography is one of the techniques that will allow you to create those ethereal shots that most people find heavenly. The production may be tedious, but once the final output comes out, you will see that it is worth it.
For more information, tricks and tips on how to improve your photography skills and creativity, feel free to read our blog. You can also check our shop and discover other amazing products that will help you take your photography to the next level.
[faq q1="what is long exposure?" a1="This technique lets the photographer capture the motionless objects vividly, while the moving elements are blurred." q2="What Equipment to Bring for long exposure shots?" a2="The following list contains the basic tools and gadgets that you need in order to achieve your long exposure photography goals." q3="How long exposure is Done?" a3="The long exposure technique is basically about engaging in a longer shooting duration than the standard time set by your camera’s photometer."]
[star star="528"]
]]>
https://www.miops.com/blogs/news/how-to-take-the-extraordinary-lightning-photos2023-12-26T09:30:00+03:002025-04-18T09:07:16+03:00Useful Tips For Photographing Stunning Lightning BoltsOnur Celik
How to use MIOPS to take photos of lightning and how to make your lightning photos extraordinary.
Lightning is a breathtaking display of nature's power, often seen during rainstorms or thunderstorms. Despite its stunning appearance, lightning is incredibly dangerous. The area around a lightning strike can heat up to 27,000 degrees Celsius, making it six times hotter than the sun's surface. Moreover, a single lightning bolt can carry up to one billion volts of electricity. This immense energy highlights the awe-inspiring yet hazardous nature of lightning, captivating photographers and nature enthusiasts alike. Capturing the beauty of lightning through photography requires skill and caution, offering a thrilling challenge for those eager to document this spectacular natural event.
Capturing lightning strikes in a photo can be a tough task. Lightning is unpredictable and incredibly fast, making it difficult to know when and where it will strike next. However, with the right equipment, such as the MIOPS Smart+ lightning trigger, you can increase your chances of success. The MIOPS Smart+ is designed specifically for this challenge, helping photographers catch the beauty of lightning strikes as they happen. This tool senses the sudden changes in light that lightning produces and triggers your camera to take a photo at just the right moment, ensuring you never miss the action.
Whether you're a seasoned pro or just starting out, the MIOPS Smart+ lightning trigger can be a game-changer for capturing stunning lightning photographs.
In this high-speed photography tutorial, we'll first talk about how to use MIOPS Smart+ to take photos of lightning, then see how to make our photos extraordinary. Please note that shooting lightning can be dangerous so safety is important, stay safe. This is the first article about high speed photography without flash.
Okay, let’s talk about how to use MIOPS Smart+lightning trigger for capturing pictures of lightning. First, we need to find a location that an open sky and has interesting foreground elements, like high-rise buildings, mountains, or trees. Photos with only lightning in the sky are much less interesting than those with a foreground that provides depth and perspective. Scout two to three locations in advance and also keep an eye on the weather so you can be there well in advance.
Gear required
First, you need a DSLR camera or any other camera that can be controlled remotely. For this type of photography, using a wide angle lens is best as it has a large field of view, capturing a more substantial portion of the sky where lightning may strike. A tripod is also a must, and make sure you have something to cover yourself and your camera to protect it from the rain.
Camera and trigger settings
Fix your camera on a tripod and set the frame, making sure you have interesting elements in your frame. Now focus on the foreground and take a shot, which we will use later.
Now bring out the MIOPS Smart+ and attach it to your camera. Set it to the "Lightning" mode and the sensitivity to about 95%. Set your camera to manual mode, the ISO to 200, aperture somewhere between f/8 – f/11 and shutter speed to 1/125. The shutter speed in this scenario doesn't make a difference as the lightning strike is for a very short burst of time. Finally, don't forget to set your lens the manual focus.
Shooting
Once everything is setup, start your MIOPS Smart+ trigger and wait for lightning to strike. As soon as lightning strikes, your camera should take a picture. If it's not, increase the sensitivity of the trigger.
When your camera takes the first shot, check it, and make changes to your camera settings accordingly. If it's too dark, increase the ISO or change the aperture to open it wider. If it's overexposed, decrease the ISO or narrow the aperture. Changing the shutter speed won't make any difference. Make sure these shots have only lightning, and the rest of the frame should be totally dark.
Once you are satisfied with the exposure, leave the camera and let it take 10-12 shots. If you want to take more shots using different angles or with another foreground element, repeat the same process, and take one foreground shot and 10-12 other shots.
Making your lightning photos extraordinary
Once back home, it's time to have a hot coffee. After warming up with your coffee, download all the images on your computer - it's time to merge your images and make them extraordinary. We are going to use Photoshop® for this. If you don't have Photoshop®, you can download a trial version from their website.
Open your foreground image (remember the first shot with foreground elements in focus). Now open your 5-6 lightning best shots lightning photos. Select these shots, copy and paste on your foreground shot one by one.
You should now have one file with one foreground layer and 5-6 lightning layers. Close all other files - we don't need them anymore. Now look at your layer palette at the right side, you'll find all the layers there. If it's not there, click on Windows at the top menu and open it by clicking on Layers.
Now it's time to hide all layers except the foreground layer. Select the layer that is just above the foreground layer and unhide it - (i.e., make it visible). Change its blending mode to "Lighten" and reduce its opacity between 50-70%. When you do this, only the lighting will be visible, and the rest of the frame will be hidden automatically. Repeat this process with all the layers, and voilà, you have an image with lots of lightning flashes. At this point, you'll probably be thinking, "Oh my God, it's the same picture I saw on the internet and always wanted to shoot!"
Once you are satisfied with your picture, merge all the layers, and export your image. Now share it all over the internet and get ready to receive thousands of likes and comments. Don't forget to share them here too!
In conclusion, the challenge of capturing the raw beauty and power of lightning strikes is made significantly easier with the MIOPS Smart+ lightning trigger. This innovative device ensures that photographers, regardless of skill level, can seize the moment lightning illuminates the sky, without relying on luck or perfect timing.
By automating the capture process with precise, lightning-fast triggers, it opens up new possibilities for stunning photography. Whether you're fascinated by the science of storms or simply captivated by their beauty, equipping yourself with the right tools like the MIOPS Smart+ can transform your lightning photography from a game of chance to an art form.
Ramakant Sharda is an author, iOS App publisher, passionate photographer and a MIOPS Ambassador based in the beautiful “Pink City” of India, known as Jaipur. His work has been published in various magazines, newspapers, and blogs. He has published three Coffee Table Books, he writes about photography and also teaches photography in his workshops. Check out his website http://ClickManic.com to see the masterpieces created by him or download his free app for iPhone and iPad “30 Days to an Ace Photographer“.
[faq q1="how to make extraordinary lightning photos?" a1="You should now have one file with one foreground layer and 5-6 lightning layers. Close all other files - we don't need them anymore." q2="how to shoot lightning photos with camera trigger?" a2="Once everything is setup, start your MIOPS trigger and wait for lightning to strike. As soon as lightning strikes, your camera should take a picture. If it's not, increase the sensitivity of the trigger." q3="which gears are need gor lightning photography?" a3="First, you need a DSLR camera or any other camera that can be controlled remotely. For this type of photography, using a wide angle lens is best as it has a large field of view"]
[star star="587"]
]]>
https://www.miops.com/blogs/news/11-tips-to-create-incredible-light-graffiti-photos2023-11-02T10:30:00+03:002025-04-18T09:05:41+03:0011 Tips to Create Incredible Light Painting PhotosOnur Celik
Are you amused by how light painting photos are created? Do you also want to learn this technique to add some new tricks to your photography skills?
]]>
Are you amused by how light graffiti photos are created? Do you also want to learn this technique to add some new tricks to your photography skills to capture light trails with painting on the air? Well, as long as you have the passion to master it, you will certainly be able to produce your own light graffiti masterpieces.
First of all, what is light graffiti? More commonly known as light painting, this kind of photography requires drawing some shapes in the air using a light source and applying long exposure to capture the formed images. This art is actually one of the most fun types of night photography which allows you to play around with your photos using colorful or attractive lights.
Light graffiti works by shooting in an extremely dark location, meaning there is a very low light involved. During this time, the sensor of your camera is like a blank canvas. Now, using your light source, you will draw or paint on where you desire the exposure to be. The common light sources used are a flashlight, torch, fire, sparkler, and light stick.
What Do You Need for Painting with Light?
Aside from the light source, there are other requirements for capturing light graffiti. They are the following:
A camera set with a high shutter speed
A tripod that will keep your camera in a fixed and stable position
Low ISO (preferably 100) to get better results
Depending on the lighting, the exposure time must be 10 to 30 seconds
An ND filter in case of high lighting frequency
Aperture needs to remain closed to avoid overexposure of your images
Tips to Create Incredible Light Graffiti Photos
To help you to capture amazing light graffiti photos, you can try these tips on your own. They are usually done by professional photographers who are into night photography:
1. Look for the darkest location
The lower the light involved is, the more effective your light graffiti will be. You will be able to produce stronger light images. For this reason, you should better go to a place out of the city, like wood or beach.
2. Plan ahead
To keep your trials-and-errors to the minimal, it is better to preplan your shoot. Preplan the place, the shapes you want to create, the light source/s to use, and the final output you envision. You should also decide on how long the exposure will be and the direction of your ‘painting with light’.
3. Experiment on using different light sources
The more colorful your images are, the more incredible the effects will be. That is why it is advisable that you try different light sources. This will keep your pictures from being flat and plain-looking.
4. Try dimmable light sources
The exposure you get from light graffiti or light trails depends a lot on light intensity. For this reason, you better select dimmable light sources. For better results, you have to vary the light intensity according to what you desire to see in order for all parts of your images receive the perfect amount of light.
5. Do not use flashlights with hotspots
A hotspot is that circle of light that you see in the middle of the flashlight beam. If you use a flashlight with a hotspot, you will be having a hard time adjusting the light beams for the finer details in the image. If you cannot afford to buy a flashlight without a hotspot, you can be resourceful by putting a wax paper or tissue paper over the flashlight lens to reduce the hotspot.
6. Vary the exposure times
If you are planning to come up with complicated patterns, you need exposure for at least 10 seconds. For light graffiti that uses more than one color, you need at least 20 seconds. You can also use the bulb mode in long exposure photography.
Yes, the more light sources you use, the more creative your output will be. However, avoid putting too many images in one frame because it will appear cluttered. You need to have a focus point in a single frame so you can set your lens to manual focus. The simpler your image is, the more professional looking it will be.
8. Take as many shots as possible
In order to get the best light painting images, light painters take multiple shots. Taking as many shots as possible will allow you to take care of each photo part separately. This is necessary when creating light graffiti photos.
9. Use a camera trigger system
It is not wise to manually press the release button of your shutter to make the shutter open while the camera is mounted on a tripod. This can result in movements that will cause your images to be blurry. To avoid this, it is best to use a camera trigger. MIOPS Smart Camera Trigger will allow you to take shots remotely. This is manageable by using a mobile app, meaning you can release the shutter by just using your phone.
10. Use flash if you have a model
Yes, you can use a model in light graffiti, as long as that person is willing to stand or sit still for the long exposure shots. If you have a model, then you can integrate a flash. For best results, you need to incorporate strobist to light graffiti to freeze your subject.
11. Use other night photography techniques
To make sure that you get the best outcome for your light graffiti, do not forget to include other night photography methods. There are many techniques that can help you achieve your desired outputs, such as Long Exposure Noise Reduction (LENR) and Mirror Lock-up.
More Ideas About Night Photography
Night photography is one of the most fascinating genres of photography. Those who are not knowledgeable about this type may think the images are just the products of Photoshop editing. However, people admire such pictures more once they find out how they are created through long exposure using light sources.
If you want to learn more about long exposure and the other techniques that are involved in night photography, you can browse MIOPS photography blog. Aside from light graffiti, there are other interesting topics about night photography that you would surely not want to miss.
[faq q1="what is light painting photography?" a1="First of all, what is light graffiti? More commonly known as light painting, this kind of photography requires drawing some shapes in the air using a light source and applying long exposure to capture the formed images." q2="What do You Need for light painting photography?" a2="aside from the light source, there are other requirements for capturing light graffiti. They are the following" q3="what are the night photography techniques?" a3="To make sure that you get the best outcome for your light graffiti, do not forget to include other night photography methods."]
[star star="789"]
]]>
https://www.miops.com/blogs/news/what-is-a-lightning-trigger-and-why-you-need-it2023-11-01T10:00:00+03:002025-04-18T09:06:47+03:00What is a Lightning Trigger and Why You Need It?Erkan YigiterMore]]>
Lightning triggers are quickly becoming essential tools for photographers of all levels, from hobbyists capturing their first storm to professionals refining their high-speed photography portfolio. While many are familiar with their basic functions, the full benefits of owning a lightning trigger are still a revelation to some.
So, what is a lightning trigger? In simple terms, it's a device that connects to your camera and automatically triggers the shutter when it detects a lightning strike. This means you can capture lightning photographs with precision and ease, without the guesswork or constant manual clicking.
But why do you need a lightning trigger in your camera gear? The answer lies in the unique nature of lightning photography. Capturing the fleeting beauty of a lightning strike requires not just good timing but impeccable timing—something that's nearly impossible to achieve manually. A lightning trigger does the hard work for you, sensing the lightning bolt's initial flash and capturing the moment perfectly, every time.
Whether you're just starting out in lightning photography or looking to capture more consistent and striking images, understanding the role of a lightning trigger is the first step. This article will dive deeper into what a lightning trigger is and explore the reasons it's becoming an essential part of modern photography gear.
1. What is a Lightning Trigger?
A lightning trigger is a handy gadget you can add to your camera setup. Its main job is to help you catch those quick flashes of lightning without the fear of missing out on a great photo. This device comes packed with special features aimed specifically at snapping lightning photos.
Think of it as an additional piece for your photography kit. Some lightning triggers work on their own, while others can be operated remotely. The best part? They’re made to work with lots of different camera brands, so you won't have to worry about compatibility issues.
At the heart of a lightning trigger is its built-in lightning sensor, the key component that allows it to detect lightning strikes. This advanced sensor is what sets modern lightning triggers apart from previous models, providing the precision needed to capture lightning at the right moment. The sensor is finely tuned to pick up even the slightest flash of lightning, ensuring that the trigger can respond instantly.
Beyond helping you capture stunning lightning photos, this technology also doubles as a safety feature, alerting you to nearby lightning storms, which is crucial for photographers who find themselves in potentially dangerous situations while chasing the perfect shot.
A lightning trigger directly attaches to your camera, linking up with the camera's shutter system to act as an alternative way to activate the shutter. Designed to be sleek and lightweight, it integrates seamlessly with your camera, essentially becoming part of it.
This direct connection enables the trigger to precisely manage the camera's functions necessary for capturing lightning, ensuring that when nature puts on a show, your setup is ready to capture every electrifying moment without missing a beat.
4. Capturing Lightning with Precision
Lightning strikes are incredibly fast, often lasting just a fraction of a second. Capturing such fleeting moments using only your camera's manual shutter can be nearly impossible, as human reflexes aren't quick enough to catch them, and the camera's shutter speed needs to be set just right.
That's where the lightning trigger comes into play. It automatically sets off your camera's shutter the moment it detects a lightning flash. What's more, it gives you the flexibility to adjust the number of shots taken per second. This means you can tailor your setup to ensure you don't just capture a lightning strike, but you capture it with the precision and frequency that best suits the scene you're trying to photograph.
5. Timing Your Shots to Perfection
A lightning trigger's capabilities go beyond simply sensing a lightning strike and snapping a photo. If you're using a smart trigger, you'll have access to even more advanced features. One such feature is a timer that allows you to set a delay on the trigger's activation relative to the detected lightning flash.
This timing feature is incredibly useful for capturing sequences of multiple lightning strikes, giving you the control to capture each one with precision. Moreover, it opens up creative possibilities for your lightning photography, allowing you to experiment with and replicate specific timing settings for future shoots. Simply save your preferred settings on the device, and they'll be ready for you whenever the next storm rolls in, ensuring you can consistently create breathtaking lightning images.
6. Specialized Lightning Mode for Enhanced Functionality
A lightning trigger isn't just a one-trick pony; it's a versatile tool capable of more than just capturing lightning. Many high-speed camera triggers, designed for lightning photography, are also equipped to handle a variety of other photography styles, such as high-speed events, HDR (High Dynamic Range) imaging, and time-lapse photography.
These triggers often come with a specialized "Lightning Mode" tailored specifically for lightning photography. This mode includes a suite of features and functions optimized for snapping the perfect lightning shots. The customization within Lightning Mode is designed to meet the unique challenges of capturing lightning, incorporating many of the functionalities we've discussed, like precise timing and sensitivity adjustments. Whether you're aiming to capture the raw power of a thunderstorm or the delicate dance of lightning across the sky, Lightning Mode equips you with the right tools to do so effectively.
Conclusion: Unleashing the Power of Lightning Photography
In wrapping up, the introduction of lightning triggers to the photography world has been nothing short of revolutionary, especially for those passionate about capturing the fleeting beauty of lightning. These devices, with their ability to attach directly to cameras, offer a bridge between the unpredictable spectacle of lightning and the photographer's desire to capture it. From the crucial light sensor that detects the initial flash to the specialized Lightning Mode that fine-tunes the shooting experience, lightning triggers are designed to enhance the capabilities of photographers at all levels.
The ability to automatically trigger the camera’s shutter in response to lightning, adjust the timing of shots, and utilize a device compatible with various camera brands opens up a world of possibilities. Whether it's the raw intensity of a storm or the serene beauty of a distant bolt, a lightning trigger ensures you're equipped to capture these moments with precision and creativity.
For anyone looking to dive into the exciting realm of lightning photography, a lightning trigger is an indispensable tool. It not only simplifies the technical challenges but also amplifies the potential for stunning, once-in-a-lifetime shots. As we continue to push the boundaries of what's possible in photography, the lightning trigger stands out as a testament to the incredible synergy between technology and the natural world.
[faq q1="what is a lightning trigger?" a1="Lightning triggers have become a must-have for all photographers. This is true especially for assisting amateur and professionals in their high-speed photo sessions" q2="what are the must have features of a lightning trigger?" a2="A Light Sensor is important so that a lightning trigger can do what it does best: detect lightning bursts." q3="what is lightning mode in a camera trigger?" a3="A lightning trigger can be a trigger that is capable of accomplishing other feats. For example, high-speed trigger devices are also lightning triggers."]
[star star="620"]
]]>
https://www.miops.com/blogs/news/the-big-panoramic-photography-potential-of-capsule-pro2023-10-09T09:42:02+03:002025-04-18T09:00:37+03:00The BIG Panoramic Photography Potential of CAPSULE PROERKAN YIGITER
The following article is not just a quick review, because in the past six months, in addition to detailed testing, I also had the opportunity to discover all the panoramic photography potential of the CAPSULE PRO with individual developments.
]]>
The following article is not just a quick review, because in the past six months, in addition to detailed testing, I also had the opportunity to discover all the panoramic photography potential of the CAPSULE PRO with individual developments.
Since I have been engaged in panoramic photography, I have been interested in automated panoramic heads. I have looked at almost every product available on the market, and the idea of a unique design also crossed my mind. I had several motorized panoramic heads, but there was always too much compromise. I've been looking for a lightweight, modular, and easy-to-use product ever since.
This is why I paid attention to motorized time-lapse rotators, which can easily be used to build an automated panoramic head. At the end of 2022, I bought a Capsule360 to test my vision with a traditional panoramic head. After that, I contacted MIOPS that I would like to write a more serious article about the new Capsule Pro in terms of panoramic photography. The company supported my idea and sent me two new Capsule Pro and a MIOPS L-bracket Pro in early 2023.
[capsulepro]
Basically, an automated panoramic head requires only two motorized rotators (Pan & Tilt) and an L-bracket. However, since the main profile of these products is more time-lapse and other video content, their panoramic head accessory is difficult to meet the expectations of a professional panoramic photographer.
In the picture above you can see three different types of MIOPS L-bracket, their shortcomings are as follows:
stability and accuracy (bent thin, unbraced L-shaped plates bend from the weight of the photographic equipment, resonate when moving and taking pictures)
their customization is limited, so they cannot be calibrated for every camera+lens set
full 180° vertical rotation is not possible with larger camera and lens combinations.
the landscape orientation of the camera position is necessary in many cases, but it increases the length of the power arms on the L-bracket and thus also the load on the motors. This is one of the reasons why portrait orientation is more common during panoramic photography.
Regardless of all this, MIOPS L-bracket Pro works great for time-lapse shots and videos, as well as for shooting simple panoramas. A lightweight accessory with good mounting and fastening mechanics for two-axis movement.
In my opinion, when it comes to panoramic photography, there is much greater potential in Capsule Pro. This, however, requires a more well-thought-out L-bracket, which is structurally closer to the design of traditional panoramic heads.
Since there are quite a few simple and modular L-plates on the Internet that I also have, I started building from them in the first place. The image below shows the very first version.
Although it worked quite well, I was not entirely satisfied with it. I started studying the MIOPS L-bracket Pro, because placing the Tilt motor on the other side was a really good idea:
I wanted to transfer this solution into my version of L-bracket, but this required more serious planning and manufacturing. Finally, the following custom-made parts were added to my improved panoramic head:
In this case, the Tilt arm is just a simple macro rail, which has also got some modifications. Of course, there are other panoramic heads that contain such macro rails, but in this case I only chose them because of their simplicity and thinness.
After the production of special accessories, let's see what components my panoramic head for Capsule Pro consists of. Of course this is only one concept among many, and it’s also just a quick presentation. Within this line, it is possible to design a completely new product or to expand the function of an already existing product with only a few additional components.
Since the rotating part taken from the MIOPS L-bracket has been placed on top of the vertical Arca Swiss Plate, the Tilt Capsule Pro is a little higher than necessary. This is of course useful in many cases, but it would still be better to create a shorter or adjustable version.
Let's see how the panoramic head looks with some photographic equipment. The picture below shows a combination of a Nikon D5100 type DSLR camera body and a Nikkor AF 85mm f1.8D lens.
This version supports portrait-oriented camera mounting in this form, but a landscape-oriented MIOPS component can also be easily connected to this design.
This type of panoramic head construction has the following advantages:
The head can be adjusted in the direction of both axes, so the nodal point can be calibrated for many more camera+lens combinations within certain limits.
Stability and accuracy
The possibility of making a full spherical panorama
It can be disassembled quickly and easily, so it takes up less space for storage and transport.
In portrait position, the camera puts less strain on the Tilt motor, leaving more power for movement.
Now let's see the practical examples, because in the last six months I managed to test the panoramic skills of the Capsule Pro in really special locations.
1.) Main Hall of the Town Hall - Győr (Hungary)
Depending on the conditions and the amount of images, a panorama can even be taken with some manual panoramic head. However, if the camera is located at a height that is difficult to reach, the use of an automated head is already indispensable. When creating high-resolution, so-called gigapixel panoramas, especially in the case of interior spaces, it is necessary to position the camera vertically in the center of the space too. Without that, it’s almost impossible to adjust the focus in all directions properly.
Panorama size: 48.000 x 24.000 pixel (full 360° x 180° spherical type)
The MIOPS Capsule Pro starts the horizontal rotation between two positions with a slight acceleration and ends with the same amount of deceleration. This is extremely useful in order to minimize the vibrations caused by the movement of the panoramic head, as this way the images will be sharp even with slower shutter speeds.
With the Capsule Pro, it’s possible to use Exposure bracketing to create HDR panoramas. The desired bracketing values and the continuous shooting mode must be set on the camera. In the MIOPS application, you only need to make sure that the exposure time is set to a value that covers the duration of recording the entire bracketing series.
Click on the picture to view the end result
2.) Library of ELTE - Budapest (Hungary)
The size of gigapixel panoramas can be increased by the resolution of the cameras and the focal length of the lens. Of course, the combination of sensor size and crop factor can also influence how many images can be taken with the same lens to create a complete spherical panorama. With a bigger camera sensor, we can save time due to fewer photos, but in this case we either increase the focal length of the lens or the resolution of the camera to compensate for the lack of a crop factor.
In the huge interior of ELTE's (Eötvös Loránd University) library, the angle of view of the 50mm prime lens worked perfectly. With a higher resolution full-frame camera, fewer images could have been used to create an even higher resolution panorama.
Panorama size: 70.000 x 35.000 pixel (full 360° x 180° spherical)
One Capsule Pro weighs 458g, while in my case the entire panoramic structure including the two rotators was 1700g. With these values, the automated panoramic head of MIOPS is considered a rather lightweight device, as it can be loaded with a camera system of up to 2000g when weighted to the center. These parameters allow precise panoramic photography at heights of up to 10 meters when using a sufficiently stable high tripod.
Click on the picture to view the end result
3.) Hungarian Parliament at night - Budapest
There are times when we don't need to capture the full 360-degree panoramic coverage. In case a larger building is the subject of the selected panorama, it’s worth taking photos from a distance to minimize distortion due to the angle of view of the matched panorama.
Camera position and panoramic angle of view
In this case, in the panorama menu of the MIOPS application, the area to be recorded must be narrowed down by setting the starting (A) and ending (B) points. If we only use one Capsule Pro, we only have the option of horizontal movement, but with two rotators we can already calibrate for two-axis shooting.
Technical details of photography:
Camera: Nikon D5100 (16MP) - Sensor: Crop
Lens: Nikon AF 85mm f/1.8D - Focal Length: 85
Camera orientation (Layout): Portrait
Aperture: f11
Shutter Speed: 3s
ISO: 100
Total shooting directions: 20
10 column and 2 row - Overlap: 30%
Total shooting time: about 3min
Panorama size: 27.243 x 15.325 pixel
4.) Pappas Auto Showroom - Budapest (Hungary)
For virtual tours, it is usually not necessary to create gigapixel spherical panoramas consisting of many photos. Moreover, the most common and fastest method does not even require a two-axis panoramic head, since a 360-degree photo can be combined from up to four images with a circular fisheye lens. With so few images, it may seem almost unnecessary to automate the process of panoramic photography.
However, accuracy and speed are always very important factors. The Showroom of Pappas Auto contained a lot of reflective surfaces, so before each exposure the photographer had to hide and then return to the camera again due to the manual rotation of the panoramic head. The single Capsule Pro used during the photography made the job very easy, and the bracketing image sequences were completed perfectly.
Technical details of photography:
Camera: Nikon D850 (45MP) - Sensor: Full Frame
Lens: Nikon AF Fisheye 10.5mm f/2.8G ED (shaved hood) - Focal Length: 10*
One panorama size: 13.000 x 6.500 pixel (full 360° x 180° spherical)
* The value of the focal length in the MIOPS application was a bit tricky in this case, since I used a modified cropped fisheye lens on a full frame camera. The program can only calculate with the factory data, so it offers 6 shooting positions for a Focal Length value of 10. This is not bad, but a 360-degree panorama can be stitched from 4 images with this lens too. If we reduce the value of Focal Length to 5, we will already have the number of desired photography directions.
In such special cases, it is worth experimenting with individual settings.
Click on the picture to view the end result
5.) White Raven Skybar - Budapest (Hungary)
There are special locations that have a wonderful panorama in all directions. These are the points in the world that are the best choice for creating a gigapixel panorama. The White Raven Skybar on the roof of the Hilton hotel in Budapest, is exactly such a place, as it is surrounded by tourist attractions such as the Fisherman's Bastion or the Matthias Church.
Since this contains the most shooting directions of all the panoramas in this article (352 pieces), I tested the accuracy of the Capsule Pro’s using a unique scaling method. Because the so-called Papywizard panorama shooting code, which gives the position of each image, is always very helpful for the stitching softwares to create gigapixel panoramas, consisting of many images. However, this code (XML file) only works properly, if the automatic head accurately performs the specified 360-degree horizontal and 180-degree vertical rotation. During the scaling test, it was revealed that even when photographing the entire sphere, it managed to keep the exact positional values along both axes.
Technical details of photography:
Camera: Nikon D850 (45MP) - Sensor: Full Frame
Lens: Nikon AF 85mm f/1.8D - Focal Length: 85
Camera orientation (Layout): Portrait
Camera height: 7m
Aperture: f14
Shutter Speed: 1/1000s
ISO: 500
Total shooting directions: 352
32 column and 11 row - Overlap: 30%
Total shooting time: about 32min
Panorama size: 122.500 x 61.250 pixel (full 360° x 180° spherical)
Despite the summer heat, there was no overheating on the Capsule Pros, even though the devices were in the sun for several hours, and I ran the half-hour panorama program twice.
Another big positive of the Capsule Pro is the battery life. This gigapixel panorama sequence consisting of more than three hundred images consumed only 8% of the available battery power.
Click on the picture to view the end result
Summary
Even the Capsule360 had great potential for panoramic photography, and the Pro, with its more powerful motor and higher battery capacity, could definitely provide a serious alternative for those looking for a versatile yet simple product.
I think the Capsule Pro really has the potential to be taken seriously by the panorama photographers, even though it's a time-lapse specific product. Of course, there is still room for improvement in terms of hardware and software, but its versatile potential is simply undeniable.
I would like to thank MIOPS for making their products available to me and for being completely open to new ideas and technical suggestions.
Last but not least, I would like to thank my dear wife, who contributed to the success of panoramic photography with her devoted patience and professional assistance.
About the Author
An adept 3D Artist and Photographer, Attila Farkas (Facebook: @photoreal360) harbors a deep passion for spherical panorama photography and the creation of virtual tours. Every day, he's driven by the goal to craft something beautiful, to master a new skill, and to persistently tackle challenges, even if they seem insurmountable.
In his profession, Attila frequently faces situations that challenge his expertise. While he relishes the triumph of finding a solution, he finds equal, if not greater, joy in sharing his amassed knowledge with others. This is the very reason for the existence of this blog. If Attila Farkas has managed to simplify the task for even one individual, he believes his effort has been worthwhile.
[star star="834"]
]]>
https://www.miops.com/blogs/news/how-to-shoot-motion-photographs-at-night-with-slower-shutter-speed2023-10-03T16:30:00+03:002025-04-18T09:03:45+03:00How to Shoot Motion Photographs At Night With Slower Shutter SpeedOnur Celik
Night is an incredible motive for street photography. Cityscapes are lit with a myriad of interesting and colorful light sources, such as lampposts, neon signs, store windows, car lights, and bare bulbs. People dress in their favorite outfits to go out. Bland scenes by day can suddenly turn ominous and fascinating at night. Here are some recommendations for capturing those shots:
Slow down your shutter speed
The reason for movement blur is simply that the amount of time that the shutter of a camera is open is long enough to allow your camera’s image sensor to ‘see’ the movement of your subject.
During the day, you will typically use shutter speeds that are a small fraction of a second. At night, however, the camera will use shutter speeds that are longer than one second – sometimes significantly longer. Think of it this way: because it is dark, the camera needs a longer period of time to gather light for proper exposure.
The shutter will now be open for a longer period of time, so the camera needs to be held steady or the picture will move during the exposure process, causing your image to be blurry. That is why a tripod is required equipment at night. You can leave the shutter open as long as you want, as long as the camera is steady and does not move at all.
Tripod + Shutter release
There are two ways to get a feeling of movement in your images – have your subject move or have your camera move (or both).
In this type of shot, you need to do everything that you can to keep your camera perfectly still or in addition to the blur from the subject, you’ll find that the whole frame looks like it’s moving as a result of using long shutter speed. Whether it be by using a tripod or have your camera sitting on some other still object you’ll want to ensure that camera is perfectly still.
A remote shutter release will avoid vibrancies that will result in blurred images during long-exposures. MIOPS Smart+ will allow you to set the desired time of exposition and we recommend, having 30 seconds as a starting point.
Aperture
The aperture is the opening in the lens that lets light into the camera. The size of the aperture determines the amount of light being let into the camera for given shutter speed, and it also affects the depth of field.
For the most part, there is no difference between how you will use the aperture at night versus how you use it during the day. The only difference is that the camera will struggle to get enough light for proper exposure, so a small aperture will often require ridiculously long shutter speeds. In addition, the background is usually black, so you don’t need to worry as much about achieving a wide depth of field.
ISO
ISO is a measurement of the sensitivity to light of your digital sensor. Higher ISO values make your digital sensor more sensitive to light and thereby allow you to use a shorter shutter speed or a smaller aperture.
Using higher ISOs will result in more digital noise in your pictures. Since dark areas of your picture tend to show more digital noise than lighter areas, it is often a problem with night photos. Therefore, resist the temptation to crank up the ISO at night if you can help it.
Since you will be using a tripod, you can usually avoid the need to use a high ISO or set to the minimum, such as 50 or the default, 100. However, in those cases where you cannot use a tripod or you have a moving subject, you will need to increase the ISO.
Try shutter priority mode
One of the most important settings in photographing an image that emphasizes movement is the shutter speed. Even small changes in shutter speed will have a big impact upon your shot – so you want to shoot in a mode that gives you full control over it.
This means either switching your camera into full Manual Mode or Shutter Priority Mode. Shutter Priority Mode is a mode that allows you to set your shutter speed and where the camera chooses other settings (like Aperture) to ensure the shot is well exposed. It’s a very handy mode to play with as it ensures you get the movement effect that you’re after but also generally well-exposed shots.
The other option is to go with Manual mode if you feel more confident in getting the aperture/shutter speed balance right.
Manuel Delgado is an award-winning photographer with a specialization in travel and documentary photography. He writes for Contrastly and is a Mentor for NGO Photographers Alliance, having led workshops in Africa with a focus on ethical and humanitarian photography. His work has been exhibited in Europe and the Americas.
Driven by an innate curiosity for his surroundings, Manuel´s process is mainly focused on capturing people in their natural environment; translating through his lens the subtle threads of daily life that are shared across cultures, borders, and races. Depicting people from diverse backgrounds, his work is united by a shared aesthetic that serves to tell each individual’s story. Manuel is currently living in Düsseldorf, Germany.
[faq q1="How to Shoot Motion Photos At Night?" a1="The reason for movement blur is simply that the amount of time that the shutter of a camera is open is long enough to allow your camera’s image sensor to ‘see’ the movement of your subject." q2="what is iso in photography?" a2="ISO is a measurement of the sensitivity to light of your digital sensor. Higher ISO values make your digital sensor more sensitive to light and thereby allow you to use a shorter shutter speed or a smaller aperture." q3="what is shutter priority mode?" a3="One of the most important settings in photographing an image that emphasizes movement is the shutter speed."]


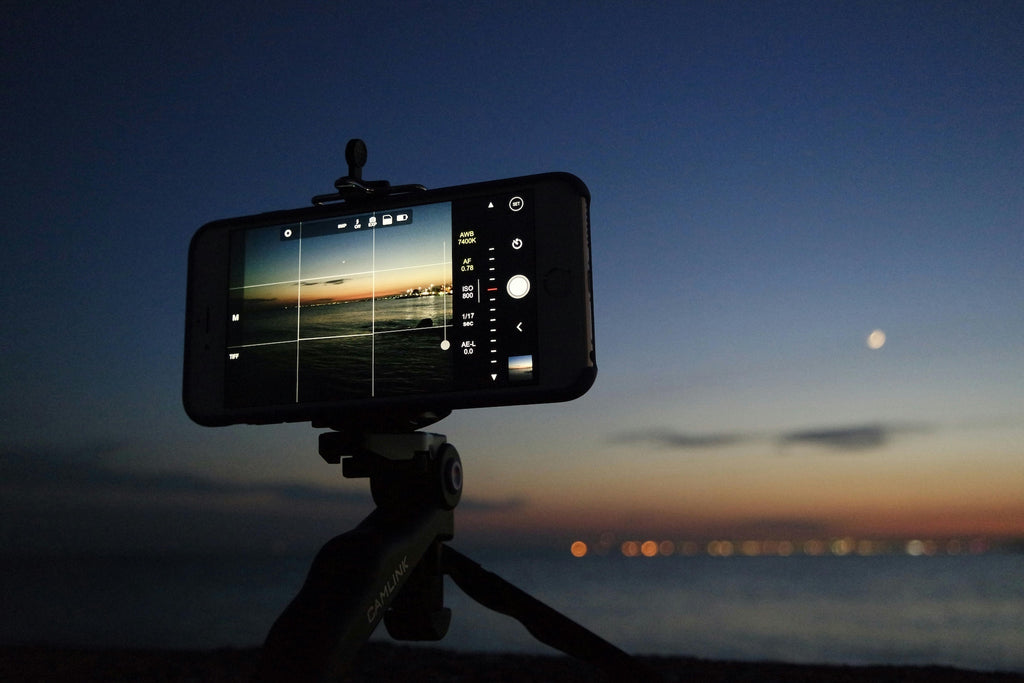


 Twilight


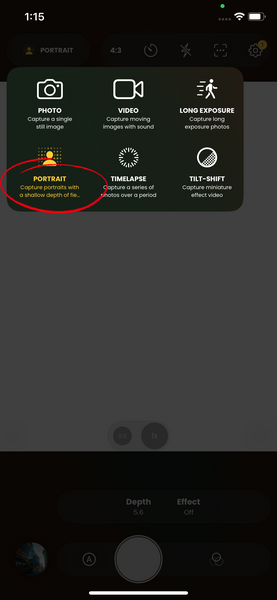


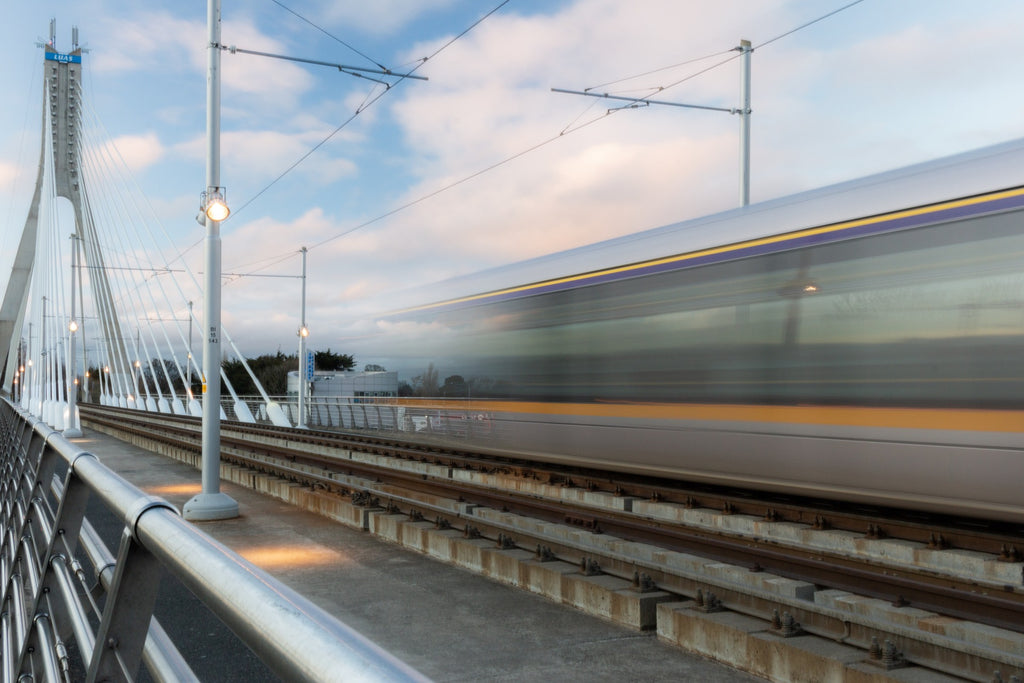
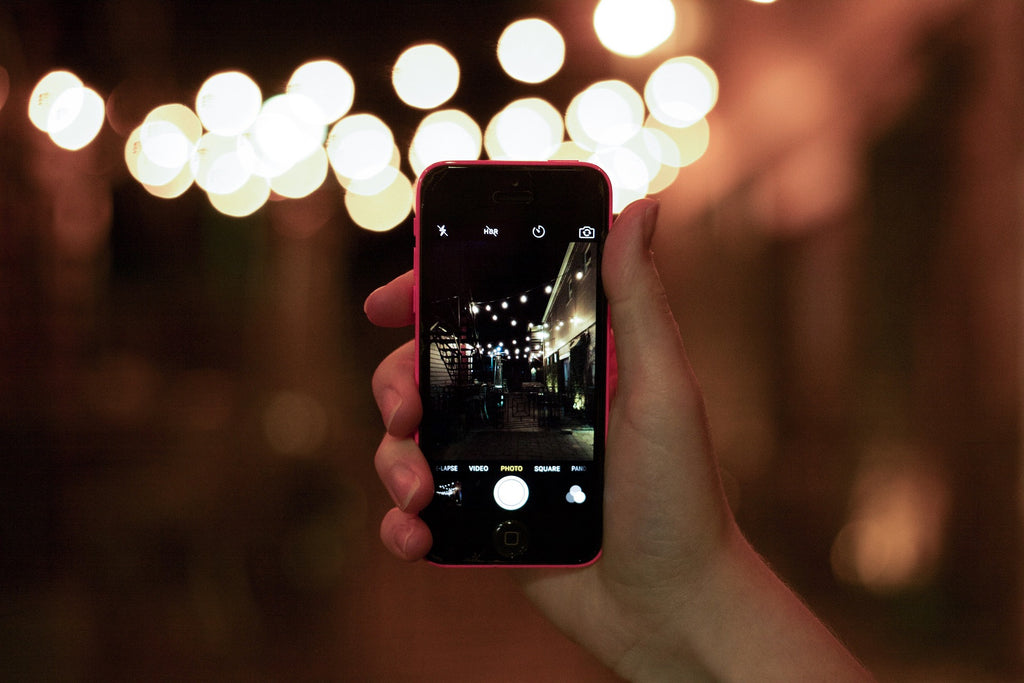

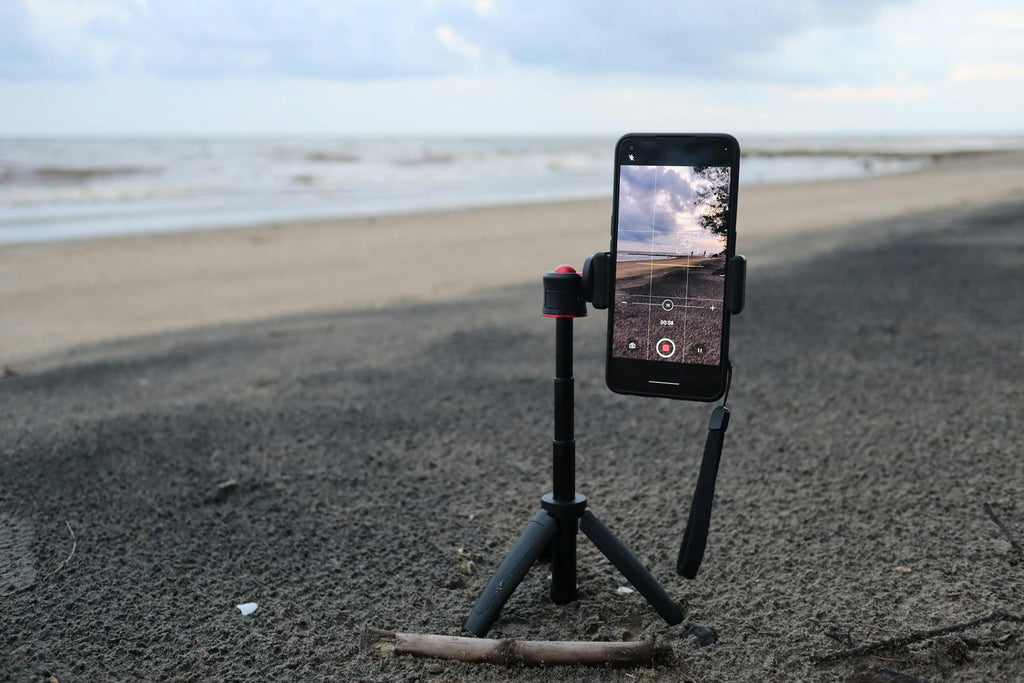
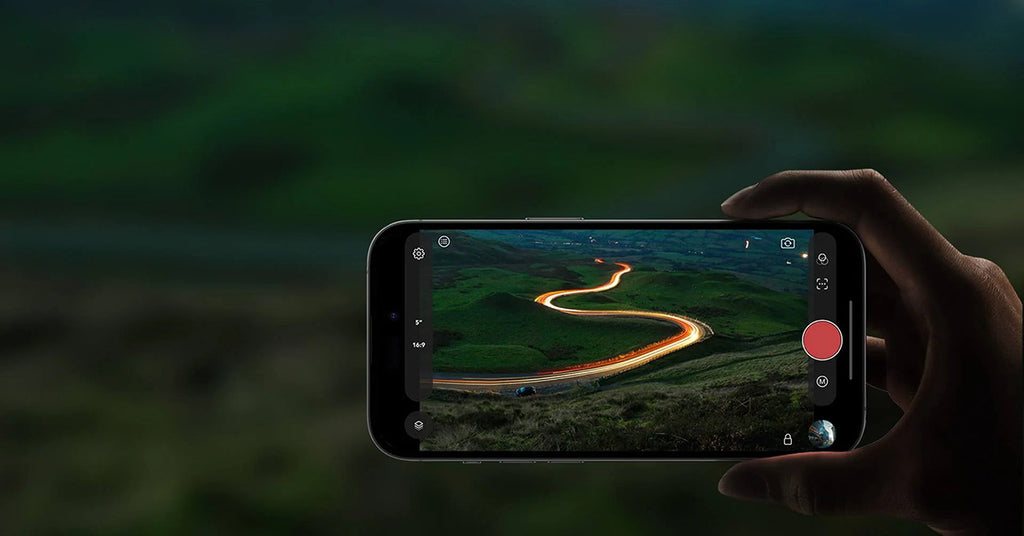
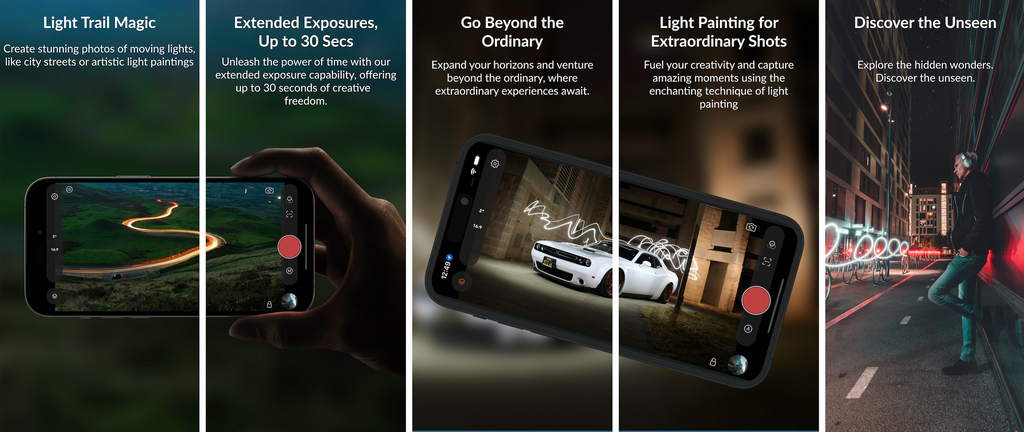


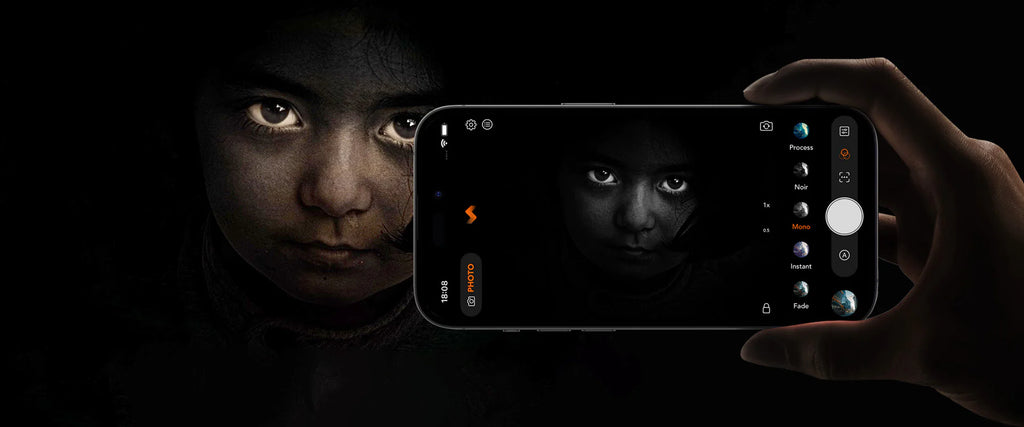

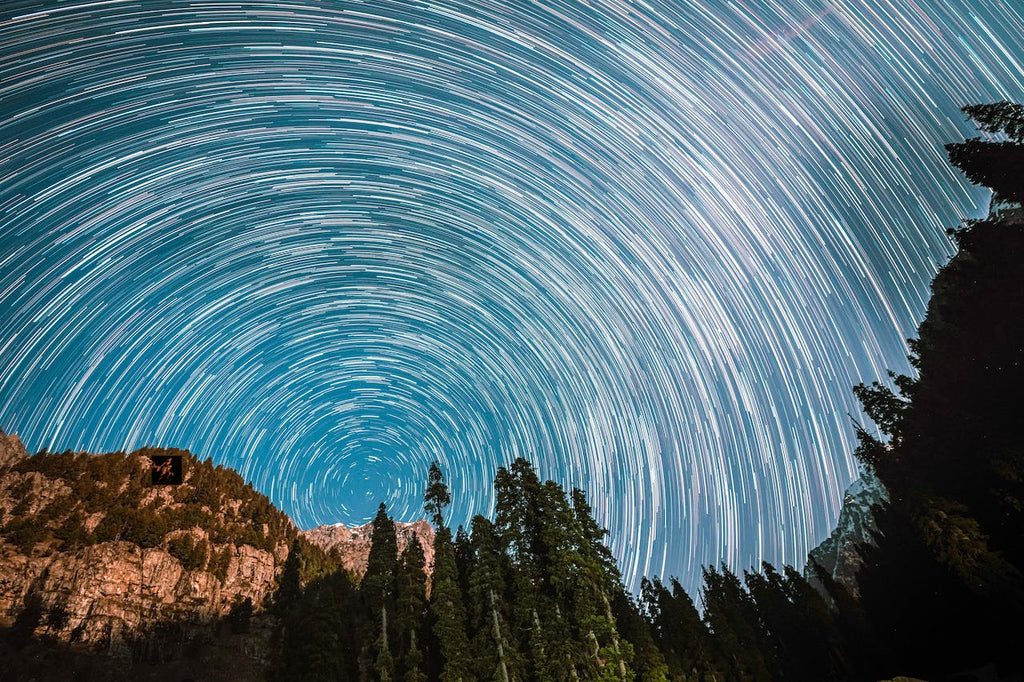


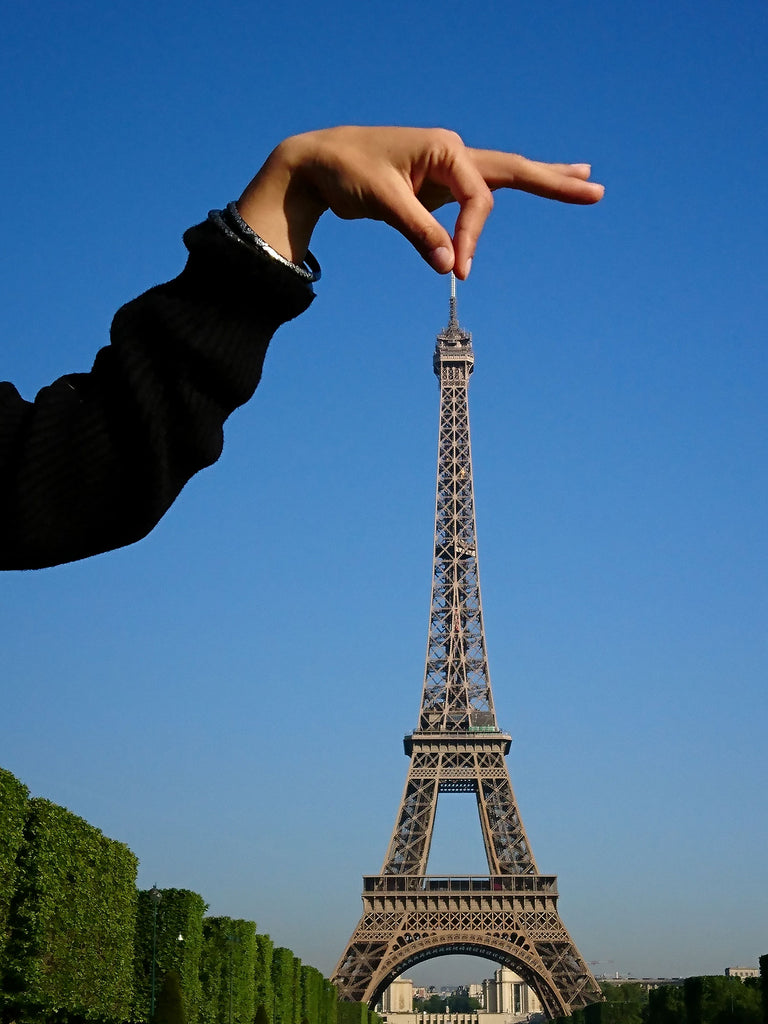
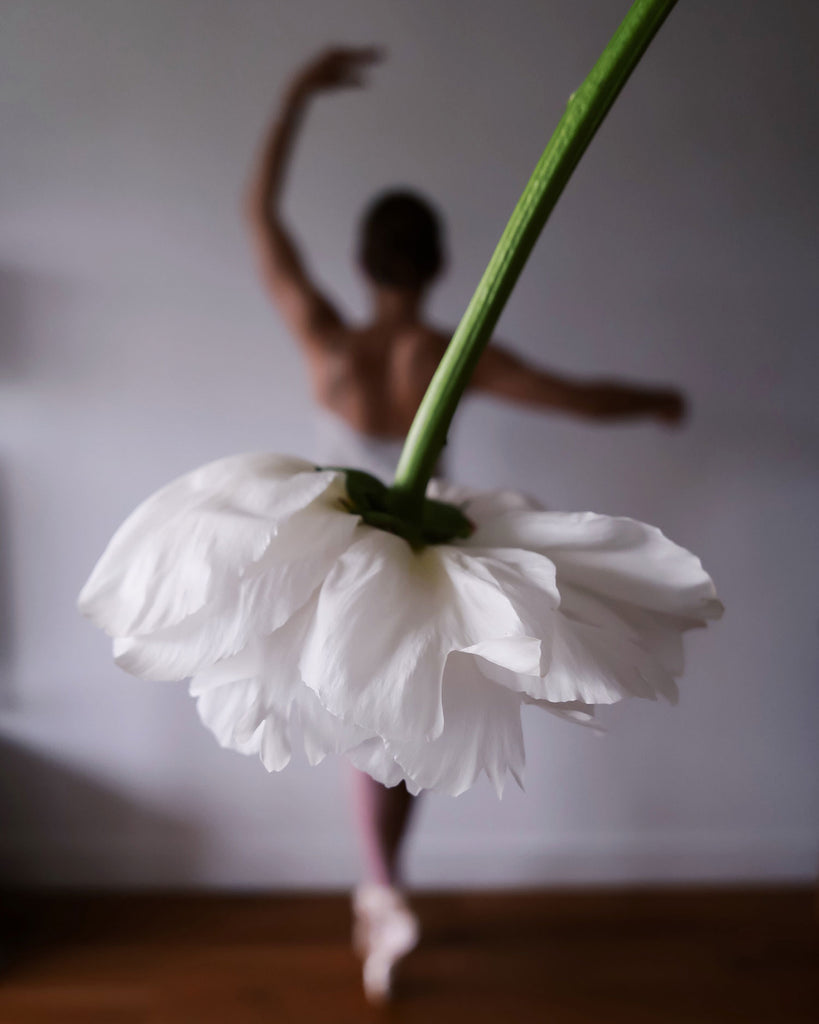

 *Prepare for Lightning, https://www.wunderground.com/prepare/lightning
 *2021 U.S. Lightning Report Recording, https://www.earthnetworks.com/