


Most of you have already heard about timelapse photography, and I am sure some of you have already tried it. Basically, in timelapse, we take multiple shots during a time interval and combine the sequence of images to turn it into a movie. The final movie seems like time is moving very fast. With timelapse, you can show the movement of a few hours in a few seconds of the movie.
In time-lapse, usually, the exposure is constant, and you need not change the exposure between shots. But when you are trying to capture a timelapse during sunrise or sunset, the light changes dramatically from golden the hour to the blue hour, to complete darkness. You can't take the entire sequence with the same exposure. You need to change the exposure either manually or using some external device.
If you are trying to change the exposure manually, there are two problems. First, you need to do all the calculations and change settings after every shot. Second, on the camera, you can make changes only in one-third (1/3) stops at a time. If your time-lapse shoot time is one hour and the light changes a total of three stops in between, and you are taking a picture every five seconds, let's do the math.
In one hour, you'll take 720 shots, and you need to change the exposure only 3 stops. With a camera limitation of one-third stop, you can change exposure value only 9 times, but actually need to do it 720 times for a smooth transition. The solution to this problem is to use an external device to control the exposure.
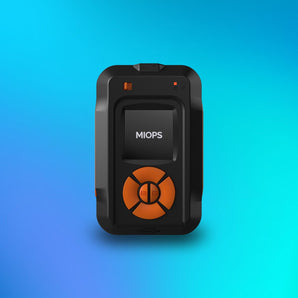
MIOPS Smart+ is such a device that can do it for you. You set our camera to bulb mode and let MIOPS Smart+ control the exposure, hence the term "Bulb Ramping Timelapse." So, let's see how to shoot a bulb ramping timelapse.
1. Find the perfect location:
The first step is to find a perfect location to create the time-lapse. The best time to shoot bulb ramping timelapse is either at sunrise or sunset because at that time, light changes and show different hues of colors. So, find a place where you can add the sun and sky in your video. You can use Google Earth to find the location. An app like "PhotoPills" can show you exactly where the sun will set and also the time of the golden hour, blue hour, and complete dark.
If you are shooting at a beach, sometimes it's hard to reach the location, so pack light. Take only the required gear like a camera body, a wide lens, lightweight but sturdy tripod, extra batteries, and your MIOPS Smart. Wear comfortable clothes and sports shoes.
2. Camera Setup:
Fix your camera on a tripod, compose your frame and focus manually.
3. Camera settings:
Set the camera to bulb mode, set ISO to 200, aperture to around f/8 for deeper depth of field. Make sure your camera is on single drive mode, and you are shooting in RAW. Shooting in RAW is important because if you need to change exposure in post-processing, you can do it easily.
Here you need to remember one thing: if you have a moving subject like water or moving clouds or vehicles in your frame, you need to keep a high shutter speed, so increase the ISO accordingly.
4. MIOPS Smart+ settings:
Now connect your MIOPS Smart+ to your camera, open the MIOPS Mobile App, and choose the Bulb Ramping Timelapse option. Here you need to set four parameters: First, the interval between each shot, second, the initial exposure, third, the final exposure, and lastly, the number of shots. You can set the Interval value between 13 milliseconds to 100 hours. You can set the frame number up to 99999.
To know the interval between shots, and the number of frames to take, let's do the math. Let's assume that you want to make a 10 seconds movie at 24 frames per second. So you need a total of 240 frames (24 fps x 10 seconds). Now use the "PhotoPills" app to find out the duration of your shoot. Let's say you'll need to shoot for one-hour.
Take impossible photos by turning your camera into a high-speed capture device!
MIOPS SMART+
Time Interval = Event or Recording Time in seconds / (Length of movie x frame per seconds)
1 hour / 10 seconds x 24
3600 seconds / 240 = 15 seconds
So you need to set a 15-second interval between each shot. If your exposure time is long, you need to consider this in this calculation too. Let's say your initial exposure time is one second, and the final time is 5 seconds, in this example, the average is 3 seconds, and your interval time would be 12 seconds instead of 15.

It's better to check the initial and final exposure values on the previous day of the shoot to avoid guesswork on shoot day.
Things to remember:
1. Camera clicks are in 3:2 aspect ratio, but videos have a 16:9 ratio. So a little bit of the frame will be cut from the top and the bottom in the final movie. Make sure you don't have any important elements there.

2. Make sure you don't place the horizon in the center of the frame. The horizon should be in the top one-third or bottom one-third of the frame. If your horizon is at the top one-third, make sure you have some interesting elements in the foreground.
3. Take the shots one stop underexposed so you won't have blown highlights. You can recover shadows in post-processing easily.
4. Check your camera screen regularly, if the photo is too dark or too bright, change camera setting accordingly. You can only change the ISO because the MIOPS Smart controls the shutter speed, and if you change the aperture, it'll affect the depth of field. That's why we set ISO to 200 initially.
5. If you want to create a timelapse with motion, use the MIPOS Capsule360. It not only gives you the option to create rotating timelapse but also controls your camera for bulb ramping.
So let's create some bulb ramping timelapses and add a new gem to your portfolio..
Related Article: 10 Timelapse Photography Tips Every Photographer Should Know
Related Article: High Speed Photography Explore Site
About the Author
Ramakant Sharda is an author, iOS App publisher, passionate photographer and a MIOPS Ambassador based in the beautiful “Pink City” of India, known as Jaipur. His work has been published in various magazines, newspapers, and blogs. He has published three Coffee Table Books, he writes about photography and also teaches photography in his workshops. Check out his website http://ClickManic.com to see the masterpieces created by him or download his free app for iPhone and iPad “30 Days to an Ace Photographer“.