Great timing and a bit of luck are important to photograph the most stunning stop-motion images in splash photography. You can have a chance to improve your photography skills and make the process more fun.
Photographing milk splashes and creating the perfect milk splash image isn’t as difficult as you would think. With some practice and the right equipment, you can take perfect splashing milk photographs that you can be really proud of.
Must-Have Gear for Photographing Milk Splashes
- High-Quality Digital Camera
- Macro Lens
- Flashgun
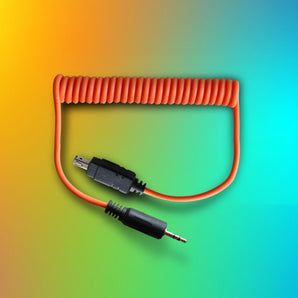
- Remote Shutter or Camera Trigger (MIOPS Smart+)
- A Light Source
- Plain Surface / Backdrop
- A Camera Tripod
- Laser
- Milk, container, and any object (We used a spoon and a strawberry)
- Holder
- Paper towels to wipe up the splashes
Camera Settings:
Camera: Canon EOS 6D
Flash: Canon Speedlite 600EX II-RT
Lens: Canon FD 100mm Macro Lens
Aperture: f/4
ISO: 800
Shutter Speed: 2,0sec
Tripod: Manfrotto MK190XPRO3-3W

MIOPS Smart+ Settings:
Mode: Laser
Delay: 170ms
Nozzle and milk surface distance: 15-20cm
Tips for Capturing the Most Creative Photos of Milk Splashes and Droplets:
- Decide your backdrop before the shooting
- Create your setup
- Consider your composition
- Use the most appropriate gear settings
- Utilize your camera’s high-speed flash sync
- Try to use autofocus
- Keep the shots steady and take multiple shots
When you take a milk splash photo you should configure your camera to shoot in milliseconds. You can prefer a lower quality camera like compact digital cameras or smartphones. They will also capture the water in the movement but the final image would be blurry. So we advise you to use a high-quality digital camera like Canon EOS 6D.
In order to produce the best results, it’s a good idea to use a macro lens. Any professional camera lens can do this but if you really want to produce the best results, try to use a true macro lens. A macro lens will provide you to have sharp close-up shots from a shorter distance. You can capture the most perfect milk droplets with the help of it.
Having a remote shutter or camera trigger is another important thing. In addition, using the fastest shutter speed, delaying the shutter automatically after a few seconds with a remote trigger like MIOPS Smart+ will help you to minimize internal vibrations and get more sharp images.
Keep that in mind, using an external and natural light source and flashgun will provide you to add more depth and dimension to your subject.
You will also need a plain-colored surface or backdrop to make the viewers focus on the splash and droplets. We preferred a dark background that milk splashes easily stand out.
Shutter priority mode can be selected as this kind of photography doesn’t need completely manual controls. When you choose this mode your camera will select the most suitable aperture for the shot.

1/1000 of a second or faster shutter speed will effectively freeze a tiny milk droplet in the air, but a slightly slower shutter speed of 1/250 usually works great for bigger liquid splashes.
If you want to plan to use a controllable light source you might want to use Manual Mode. In this case, you need to match the fast shutter speed with an aperture between f/4 to f/8, that is wide enough to smoothen out the surrounding surface and sharpen the focus on a tiny droplet.

MIOPS SMART+
Take impossible photos by turning your camera into a high-speed capture device!
For the bigger splashes apertures like f/14 would be good as you aim to get a sharp focus in a larger area. You need to use the ISO that can support your aperture and shutter settings.
You’ll definitely need a tripod so you won’t have to hold your camera besides a remote shutter like Smart+. You need both hands to use to activate the remote trigger and whatever you will be dropping into the milk or the liquid to create the splash and droplets to photograph.
We preferred to use Manfrotto for this photoshoot. If you got one you can use it or you can check out the link to buy the most suitable one.

A Tasteful Strawberry and Milk Combination: Perfect Milk Splash Photography is Here!
When all the setups were ready we dropped a strawberry into the spoon full of milk. With the horizontal movement of the strawberry, the laser mode of Smart+ was triggered. Then the flash had activated and triggered MIOPS Smart+ for us to capture the perfect milk splash photography. Take a look at the final footage and tell us what you think!
Watch the how to shoot video to get a better opinion:
Now it's your turn to shoot the best milk splash photo!
Macro photography is a vast area full of possibilities. If you love to create new things and especially into water drop photography you can create your own splash set up and shoot the best photographs. Don’t forget to share them with the #miopstrigger hashtag on Instagram and share your experiences with us!


