Ever seen those pictures where the stars streak across the sky in a big arc? Or maybe the whole sky looked like it was spinning? What you saw were star trails.
The streaks were light left behind on the sensor or film from the star as it traveled across the sky in front of an open camera shutter. What actually is being recorded are stationary stars and the rotation of the earth that makes them spin. Do you want to take similar images?
What do you need?
- A camera capable of shooting in “Bulb” mode
- Sturdy tripod
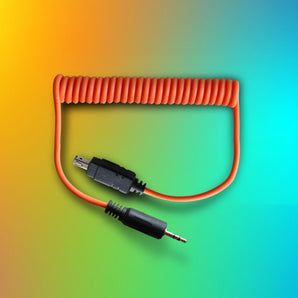
- Remote shutter release
- Wide-angle lens
- However, do not hesitate to experiment with longer lenses like the 50mm, 85mm or the 135mm as they can tell a different story.
- Headlamp
- Some extra warm clothing
Where to go?
Before we get into the method of actually shooting, there are a few things you need to take care of first, namely, finding stars, and finding a clear sky.
Firstly, you want to get as far away from light sources as you can. Obviously, you don't want to photograph star trails under a cloudy sky, but other atmospheric filters can interfere with your night photography – light pollution, air pollution and humidity being the top annoyances. Use the map below to check the light pollution on your area.

MIOPS SMART+
Take impossible photos by turning your camera into a high-speed capture device!
Click here to view the light pollution near you.
Once you find yourself a nice dark corner of the world, the next thing you need to be aware of is how clear the skies will be, this includes the current moon phase. You want to choose a night with the least amount of moonlight, as this will make the stars appear much brighter and you will get the best long exposure star photographs.

Shooting
Once you are on location and the gear is ready to go, you can set up your composition. If possible, go one night ahead of time and locate Polaris, the north star and point your DSLR camera in that direction. If you can manage to get Polaris in the frame, all the stars will circle around it.
If Polaris is not in the frame, the stars will appear to travel in a semi-circle. If you can’t go a day ahead of time, use your compass and try to get as much sky in the frame as possible.
Remember once you have set the correct focus to turn your auto-focus off, so your camera does not attempt to re-focus at night. Also, your image stabilization should be off anytime your camera is on a tripod.
Also, make sure you turn your in-camera noise reduction off because it will require an additional 30 seconds after you make your exposure to do the noise reduction and you will end up with little gaps in your trails.
Here is a list of settings you would need to use at several common apertures to get a 30 second exposure (try longer exposure values to get longer star trails):
- f/1.4 and ISO400 = 30s
- f/2.8 and ISO1600 = 30s
- f/4.0 and ISO3200 = 30s
- f/5.6 and ISO6400 = 30s

Composition
If you are including foreground objects in your star trail photography, make sure that they are in focus. If you are using a wide-angle lens the foreground object and the stars will probably both be in focus even at a very wide aperture.
Single-shot vs Stacking
For shooting options, one could choose to do it all in one shot or shoot multiple shots and “stack” them after the fact of using computer software. The images described at the beginning are the result of shooting multiple images and stacking them yields much nicer images than those done all in one shot.
Stacking and processing
This can be the most exciting part of the whole experience since you finally get to see what you have created!
There are many different post-processing applications available such as Star Trails for Windows and Mac, ImageStacker, StarStaX, and DeepSkyStacker – these will automatically throw all your images together and produce a stunning star trail.

Related Article: Night Photography: How to Shoot Stunning Light Trails
About The Author Manuel Delgado:
Manuel Delgado is an award-winning photographer with a specialization in travel and documentary photography. He writes for Contrastly and is a Mentor for NGO Photographers Alliance, having led workshops in Africa with a focus on ethical and humanitarian photography. His work has been exhibited in Europe and the Americas.
Driven by an innate curiosity for his surroundings, Manuel´s process is mainly focused on capturing people in their natural environment; translating through his lens the subtle threads of daily life that are shared across cultures, borders, and races. Depicting people from diverse backgrounds, his work is united by a shared aesthetic that serves to tell each individual’s story. Manuel is currently living in Düsseldorf, Germany.


