


IT Manager by day, occasional author and passionate amateur photographer by night, David Chesterfield regularly pushes the boundaries of light painting and water drop photography in his work. Based in Brisbane, Australia, his images have received publication in numerous books and magazines, and earned him invites to lead workshops at several prestigious events.
In this latest entry to the MIOPS interview series, he kindly shares some of the stories and techniques behind his favorite creations…

For anyone unfamiliar with your work David, how would you describe what you do?
I dabble in all things photography, macro, landscapes, astrophotography, HDR, weddings, studio and portraits, but my two real passions are light painting, and water drop photography. That takes me from one extreme to the other – from long exposures of up to 8 minutes duration to high-speed exposures that are anything from 1/19,000 to 1/32,000 second.
Light painting is best described as the artistic technique of moving a light source to selectively illuminate parts of the subject or scene that a camera is recording. Generally, these images are captured using long exposures.
My splash photography has evolved over the years as technology has changed. My first water drop images were made using a very crude setup, and had to be taken in a dark room. I would then drop my roll of film into the lab and wait 3 to 5 days before being able to see what I had created. It is a very different world today, with digital cameras and technology like MIOPS SPLASH opening up endless possibilities.
How did you first get started in photography?
I have been interested and actively involved in photography for a very long time. I was given my first 35mm camera in 1973 at the age of 12. It was a lovely Ricoh rangefinder and served me until I purchased my first SLR in 1982. I purchased my first DSLR in 2006 – and have had 5 or so since then. Today I am shooting with two different cameras – a Sony A77II SLT digital camera, and a mirrorless Olympus OM-D EM5II. They each have their own strengths depending upon the subject and conditions.
How did your interest in light painting and splash photography develop?
I dabbled in light painting in the late 1980’s, but nothing really memorable came of it. My interest was peaked again in 2015 when I won a Pixelstick in a photography competition. The Pixelstick was fun for a while, but I quickly lost interest until 2016 when I discovered The Ball of Light tool. I had been looking at Orbs on websites like Flickr and was always fascinated. I received my Ball of Light and then the process of spinning an acceptable orb began – 12 months later and I was starting to spin consistent orbs. I really loved that challenge, and the thrill of getting a technical spin right drove me on.
Today I own a myriad of tools – swords, flutes, wands, fibre optics, whips, blades, led wands, and more. Some are homemade, and others are available commercially. Then there are the torches – all light painters become obsessed with torches, and I am no exception. I have too many to list, but each has a purpose and their own unique properties that I will use in my images.

As for splash photography, that has been an obsession ever since I saw a copy of ‘A study of Splashes’ by A.M. Worthington in 1981. I was amazed at the photo’s he achieved in the very early 1900’s and absolutely had to try them. In 1982 I built both a timber stand and a photogate electrical circuit to do just that!
Basically, a drop of milk was released and would pass through a photosensor which would trigger a flash on a variable delay. Once setup all lights had to be out, the camera shutter opened on BULB mode, and a drop released. I would fine tune the delay between each drop hoping to catch something interesting like a Worthington jet or a crown. The next day the file would be dropped into the lab to be processed and the waiting game began. Between three and five days later I would get to see what I had achieved – quite often there would be a disappointment and nothing worth showing, but just occasionally there would be something magical there.
Over the years I built a number of different rigs to try and improve my captures. Each had improvements over its predecessor. Some had autofocus circuits and camera triggers, but in every case, they relied on a drop of liquid being manually released and passing through a photogate. It was still a very hit and miss affair, with no guarantee of getting usable images in any session.
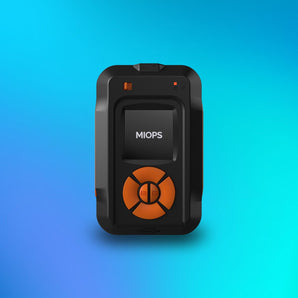
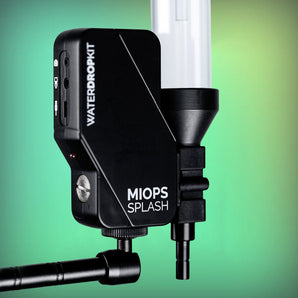
In 2014, I acquired a commercial water drop kit, far more sophisticated than anything I had used before. This kit had a solenoid that allowed multiple drops to be coordinated such that collisions formed. This served me well until 2018 when MIOPS released their trigger. The MIOPS trigger is a nicely made, compact unit that is easy to set up and easy to transport. Its big advantage over the setup I had been using is that it is smartphone controlled – less wires and more precise tweaking of the various settings.
Disclaimer, I made minor modifications to my MIOPS SPLASH to enable it to work effectively with the liquids that I like to use. It worked well straight out of the box with milk or water, but when I added thickeners etc. I found things did not go as planned. Removing the nozzle, and throwing away the fibre washer, then replacing the nozzle with a brass one fitted with a little plumbers thread tape to ensure a good seal did the trick, and my ensuing results are what I expect.
I like working with clear water, but as you have by now guessed, not everything is as it seems. I thicken the water with methylcellulose, which you can buy from craft stores. This slows down the reaction time when a collision occurs and helps to create the different shapes you see in my images. I also use a surfactant that I bring in from Canada in the drop liquid to make it more elastic, and dishwasher rinses aid in the catch tray liquid. I have experimented over the years with all sorts of liquids, but this is my favourite combination.
What’s have been your proudest moments as a photographer so far?
There are three that immediately spring to mind:
1. Late last year I was approached by the team behind the BLUR festival – 3 days of photographic demonstrations, lectures and hands-on sessions held in my home city of Brisbane Australia. They asked me to run a hands-on booth for them demonstrating light painting techniques.
I went and met with them over coffee to discuss what was possible, and came away running three booths! Two light painting and one waterdrop booth.
Despite the nerves (How do you run three booths concurrently? What was I thinking?), it all went very well! I got to work with some amazing creatives – Hairdressers, make up artists, dancers, models and actors. A number of whom I have had the opportunity to collaborate with since. This is when I started to add the human element to my light painting images.

2. One of the models from BLUR festival was involved in a celebrity bridal makeup master class and asked me to do some bridal light painting after the session finished. We did some studio images until the sun went down and then headed out to do some location shots at a local lookout. They worked out really well!
3. I was approached by a world-renowned light painting legend Denis Smith to help run workshops in Brisbane. We did two nights underground in an old convict built water reservoir, It was a huge success and again I got to meet and work with some wonderful creatives.

What would your dream photo shoot be?
That is easy – light painting under a full moon on Kangaroo Island with Denis Smith and the Adelaide crew.
What MIOPS products do you own, and what photographic challenges do they allow you to overcome?
- MIOPS Splash – the smartphone control makes fine adjustments very easy – something my previous water drop kit can’t match. I like to shoot in a reasonably well-lit room, and the camera control mechanism allows me to do that.
- MIOPS Mobile Dongle – I love this device for my light painting images, though my use is unconventional. I mount my phone on my tripod, under my camera facing me. This allows me to check that the exposure starts and all is well. I use the old TriggerTrap application on my phone and my watch to trigger the camera – this means I don’t have to deal with the light from the phone in my images. It works very well, but I am hoping MIOPS develop a smartwatch interface similar to Triggertrap, so that I can use everything natively.
-
MIOPS Mobile Remote – I use this in a number of ways.
- If I am light painting in the studio, or trying out a new tool I will set it to time-lapse mode, and take any number of sequential images.
- I also use it for HDR as it really simplifies the process of getting the exposures right in the shortest possible timeframe.
- When I am shooting with a group, and want someone to trigger my camera, I will use this as it is so simple. I can simply set and forget it, and know that I will still get the images I am after.
Talk us through the setup you used for one of your favourite images.
My bridal light painting series:
In both the bridal shots I have used the following basic setup. Single 600 w/s monobloc with a large softbox to one side – in these cases to camera right. The biggest difference between studio and location shoots is really the distance I can have between the model and the actual light. On a location shoot, I will usually add the grid to the front of my softbox to contain a light spill.
I mount my phone below the light on the light stand, and trigger the camera from there. Once the flash fires I know I have 8 seconds (generally) to run in and create my light painting before the shutter closes.
I rarely use rear-curtain sync, as invariably I end up in the image when the flash fires.
What are the next projects you want to work on with your MIOPS gear?
Right now I am building a barn-door tracker for astrophotography, so some long exposure timelapse is definitely being planned. I am also considering purchasing a MIOPS Smart before our summer storms season starts, as I have a great location in mind for some lightning shots!
What advice would you give to anyone wanting to start capturing their own light painting images?
Start small – personally I’d buy the Universal connector from Light Painting Brushes – that allows you to connect a torch to a myriad of tools. One of my most used tools is a simple bubble wand that I picked up in a local toy store for .50c – simple empty the bubble liquid and rinse it out, push into the universal adapter and attach a torch. Simple as that! A table tennis ball with the universal adapter can also make a great light writer. Be creative, try a few things – you’ll be amazed at what actually works.

MIOPS SMART+
Take impossible photos by turning your camera into a high-speed capture device!
My second piece of advice is to buy a torch with a variable power output, as you will need to vary brightness depending on the scene and your vision for the image you are creating. Some of the torches I use:
- Thorfire TK15s
- Convoy S2+ in a variety of colour temperatures
- Klarus XT11s
- Klarus XT11GT
- Led Lenser P7QC (Multi Coloured Torches)
There are many, many more suitable for light painting – just make sure the head fits into whatever adapter you are using
Some of my favourite commercial tools are:
- The Ball of Light, by Denis Smith. Sturdy and well made, this tool has interchangeable heads that allow you to create orbs of different colours and textures.
- Lightblades and the Kyo system by Canadian light painter Patrick Rochon. These are awesome, very flexible and adaptable.
- Light Swords by Light Painting Brushes.

What have you learned from your experience shooting water droplet shots?
So much:
Lighting:
I like to work with clear water which presents multiple challenges – due to reflections you cannot light the splash directly, instead, I tend to light the background which is normally a sheet of A4 paper that I have printed a gradient or colour onto, then let the light bounce back to light the splash.
My lighting setup has evolved substantially over the years. My initial setup used a single Speedlight mounted off camera.
A few years ago I moved to 2 x Yongnuo YN-560-IV speedlight triggered wirelessly by the camera. This allowed for the good spread of light at very low power. Low power = fast flash duration. 2 speedlights soon became 4 speedlights, and the spread of light even better. The problem with this setup is the number of batteries needed to keep things running. I also had to take images at a fairly slow rate to prevent over-heating and ghosting – where on flash would trigger slightly later than the others.
Recent advances in studio strobe lighting mean that a number of units are available with unprecedented flash duration times. I was sceptical when I did my setup for the BLUR festival, and I had a single monobloc studio strobe for the waterdrops. After a short review of the menu, I found a setting for ‘freeze’ giving me a flash duration of 1/20,000 second. Certainly fast enough for what I was needing.
Earlier this year I moved to a single Jinbei HD610 monobloc strobe, which I use for all my water drop and a lot of my light painting images. It gives me a flash duration of 1/19,000 second and is battery powered, so using it on location for light painting is a breeze.
Liquids and their properties:
Milk is good for starting out with drops. It has a higher viscosity than water, making it easier to catch a well-formed umbrella splash. When photographing milk drops you need to aim your flash units directly at the drops.
Water is harder to work with because it has a lower viscosity and flows very quickly. Water is at it’s most dense at 4 degrees Celcius, so I use ice cubes in the Mariotte Siphon, and chilled water in the drop receptacle. When photographing water-drops you do not light the water directly, but light the background, and reflected light will light the splash. I prefer water personally, though I do shoot both.
Additives:
Additives can be used to change the way your chosen liquid behaves. As an example, I usually use a drop or two of dishwasher rinse-aid in the catch receptacle. This reduces the surface tension and allows me to get the long Worthington jets that I like.
I use Methylcellulose to thicken the water, this slows down the reaction time and allows me to catch the different shapes. To add elasticity I use Nature Clean All Purpose lotion that I bring in from Canada. I also use “Dettol Power & Pure” kitchen cleaner in the drop tank at times, along with a teaspoon of glycerine. This allows me to create the parasol type splashes.
A lot of people use Guar Gum or Xanthan gum to thicken the drops. This also slows down the reaction, and produces interesting shapes.
Other additives people have used include: Sugar syrup, Fabric Softener, Corn Syrup, various liquid soaps and cleaning products.
Experiment and have fun.
You can enjoy more of David’s work here:
Flickr: https://www.flickr.com/photos/david-chesterfield/
Instagram: https://www.instagram.com/dchester1001/
Facebook photography page: https://www.facebook.com/DavidChesterfieldPhotography/
Related article: How to Make Light Painting Orbs