The way the stars ‘move’ across the sky as the earth rotates makes the night sky excellent for time-lapses. A night sky time-lapse shows the progression of the stars throughout the night. The process is condensed from several hours into a few seconds.
These types of video clips can be produced by any of us if we have the right equipment. However, this technique does differ from shooting a time-lapse during the day time, so here are a few guidelines to assist you.

What you will need
First of all, let’s take a look at the sort of equipment needed in order to proceed. You will require:
- A stable tripod
- Intervalometer
- Any camera that can shoot in BULB mode
- Short focal length lens (from 14mm to 30mm)
- Long-lasting battery for the camera (spares or external source of power)
- A good clear sky
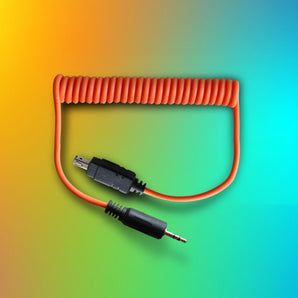
- MIOPS Smart+ or RemotePlus

MIOPS SMART+
Take impossible photos by turning your camera into a high-speed capture device!
Planning is essential
Planning for a night sky time lapse means anticipating what the night sky will look like. Scout out a location that’s dark. Light pollution will leave you seeing fewer stars if any at all. Next, you need to watch the weather. You won’t see the stars if the night is cloudy. Second, anticipate where the stars are and how they will move.

Finally, plan how long you want your time-lapse to be. Do you want a three-second time-lapse? Five seconds? 10? Longer? Should your time-lapse cover an hour? Eight hours? You’ll need to know both how long you want the camera to keep shooting and how long you want the resulting video to be.
To calculate the length of the time-lapse, you need to first choose the frame rate. A time-lapse will typically either be 60 fps, 30 fps, or 24 fps. Each frame rate indicates how many still photos are in one second of the video. A 60-fps video will have 60 photos in one second, a 30 fps will have 30 photos in one second.
Settings
The creation of an astronomical time-lapse is carried out using the manual settings of the camera, so you must disable any automatic mechanism which could be active (autofocus, Auto ISO, exposure time, aperture, etc.) You need to have complete control over your camera, so set the ISO sensitivity to 800, 1600, or higher ISO speeds, choose JPEG format, set the shutter speed to BULB, and get to the maximum lens aperture.

We cannot use the autofocus during night shots as is not sensitive enough and accurate, so we have to proceed with some tentative guesses at what will work well. Try setting it to infinity.
After this step, we can choose the exposure time, which is perhaps the most important parameter to be set for a good result.
The sky begins to darken immediately after sunset, however, it reaches the minimum brightness approximately a couple of hours later, so if we want to have a real dark night time-lapse, then we have to wait for a short time.
Finding the best exposure time can take a few tries at different times: let’s start with a 15-second exposure, then try 20, 30, 45, and 60. Depending on the “quality” of the sky, light pollution, and the ISO sensitivity of the camera you will get a different result: there is no exact rule to follow, unfortunately.
Take a test shot
Time lapses require hours for a single video. You don’t want to spend hours shooting a time-lapse only to realize that it is out of focus or overexposed. With the camera settings locked in, take a test shot.

Relax and enjoy the ride
With the camera settings dialed in and the time-lapse options set, start the time-lapse using the shutter button. Now, you just sit back and wait. Make sure your camera is in a safe place if you choose to walk away from it. Avoid the risk of the tripod tipping or someone snatching your camera. Don’t make any changes that could affect the exposure, like pointing a flashlight in the scene. Do not touch the tripod or camera until the time-lapse is complete.
Manuel Delgado is an award-winning photographer with a specialization in travel and documentary photography. He writes for Contrastly and is a Mentor for NGO Photographers Alliance, having led workshops in Africa with a focus on ethical and humanitarian photography. His work has been exhibited in Europe and the Americas.
Driven by an innate curiosity for his surroundings, Manuel´s process is mainly focused on capturing people in their natural environment; translating through his lens the subtle threads of daily life that are shared across cultures, borders, and races. Depicting people from diverse backgrounds, his work is united by a shared aesthetic that serves to tell each individual’s story. Manuel is currently living in Düsseldorf, Germany.
Manuel Delgado Instagram Profile


