Night is an incredible motive for street photography. Cityscapes are lit with a myriad of interesting and colorful light sources, such as lampposts, neon signs, store windows, car lights, and bare bulbs. People dress in their favorite outfits to go out. Bland scenes by day can suddenly turn ominous and fascinating at night. Here are some recommendations for capturing those shots:
Slow down your shutter speed
The reason for movement blur is simply that the amount of time that the shutter of a camera is open is long enough to allow your camera’s image sensor to ‘see’ the movement of your subject.
During the day, you will typically use shutter speeds that are a small fraction of a second. At night, however, the camera will use shutter speeds that are longer than one second – sometimes significantly longer. Think of it this way: because it is dark, the camera needs a longer period of time to gather light for proper exposure.

The shutter will now be open for a longer period of time, so the camera needs to be held steady or the picture will move during the exposure process, causing your image to be blurry. That is why a tripod is required equipment at night. You can leave the shutter open as long as you want, as long as the camera is steady and does not move at all.
Tripod + Shutter release
There are two ways to get a feeling of movement in your images – have your subject move or have your camera move (or both).
In this type of shot, you need to do everything that you can to keep your camera perfectly still or in addition to the blur from the subject, you’ll find that the whole frame looks like it’s moving as a result of using long shutter speed. Whether it be by using a tripod or have your camera sitting on some other still object you’ll want to ensure that camera is perfectly still.
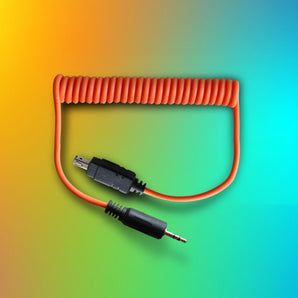
A remote shutter release will avoid vibrancies that will result in blurred images during long-exposures. MIOPS Smart+ will allow you to set the desired time of exposition and we recommend, having 30 seconds as a starting point.

Aperture
The aperture is the opening in the lens that lets light into the camera. The size of the aperture determines the amount of light being let into the camera for given shutter speed, and it also affects the depth of field.
For the most part, there is no difference between how you will use the aperture at night versus how you use it during the day. The only difference is that the camera will struggle to get enough light for proper exposure, so a small aperture will often require ridiculously long shutter speeds. In addition, the background is usually black, so you don’t need to worry as much about achieving a wide depth of field.

ISO
ISO is a measurement of the sensitivity to light of your digital sensor. Higher ISO values make your digital sensor more sensitive to light and thereby allow you to use a shorter shutter speed or a smaller aperture.
Using higher ISOs will result in more digital noise in your pictures. Since dark areas of your picture tend to show more digital noise than lighter areas, it is often a problem with night photos. Therefore, resist the temptation to crank up the ISO at night if you can help it.
Since you will be using a tripod, you can usually avoid the need to use a high ISO or set to the minimum, such as 50 or the default, 100. However, in those cases where you cannot use a tripod or you have a moving subject, you will need to increase the ISO.
Try shutter priority mode
One of the most important settings in photographing an image that emphasizes movement is the shutter speed. Even small changes in shutter speed will have a big impact upon your shot – so you want to shoot in a mode that gives you full control over it.
This means either switching your camera into full Manual Mode or Shutter Priority Mode. Shutter Priority Mode is a mode that allows you to set your shutter speed and where the camera chooses other settings (like Aperture) to ensure the shot is well exposed. It’s a very handy mode to play with as it ensures you get the movement effect that you’re after but also generally well-exposed shots.
The other option is to go with Manual mode if you feel more confident in getting the aperture/shutter speed balance right.
Related Article: Night Photography, How to Shoot Stunning Light Trails
About The Author Manuel Delgado:
Manuel Delgado is an award-winning photographer with a specialization in travel and documentary photography. He writes for Contrastly and is a Mentor for NGO Photographers Alliance, having led workshops in Africa with a focus on ethical and humanitarian photography. His work has been exhibited in Europe and the Americas.
Driven by an innate curiosity for his surroundings, Manuel´s process is mainly focused on capturing people in their natural environment; translating through his lens the subtle threads of daily life that are shared across cultures, borders, and races. Depicting people from diverse backgrounds, his work is united by a shared aesthetic that serves to tell each individual’s story. Manuel is currently living in Düsseldorf, Germany.
Manuel Delgado Instagram Profile


