Many photographers today, want to know how to take macro pictures, thanks to a growing number of beautiful images online of small plants, animals, and insects. Macro photography is not always easy, especially for beginners, but it is one of the most rewarding genres of photography you can do. Besides developing the skills to capture these images, it is also important having the necessary equipment. Focus stacking could be achieved manually, but also through an automated rail.

What is Macro Photography?
While there are many technical definitions of what makes a macro, the simplest explanation is as follows: Macro photography is the art of making tiny things look big. You can do this by getting very close to your subject, or by getting a telephoto lens and zooming way in.
The proper macro photography definition is an image whose subject is reproduced to at least 1:1. That means that the image on the camera sensor or film plate is the same size, or even bigger, than the real-life subject.
Depth of Field for Close-Up Photos
For non-macro photography, your subject won’t be especially close to your camera – maybe 5 or 6 meters, or even as far away as the horizon. At these distances, a normal aperture of f/8 or f/11 typically will render a sharp scene from front to back (aside from extreme telephoto shots, since telephotos have less depth of field).
Macro photography is different. When you take close-up photos, you naturally end up with very little depth of field, even at small aperture values. At 1:1 magnification, your depth of field may be so thin that you can’t get a fly’s head and feet both to appear sharp at the same time, even though they are just millimeters apart! At magnifications greater than life-size, depth of field is very small, so you need a large number of images combined together to get everything into sharpness.

Focus Stacking
Focus stacking is similar in principle to HDR. However, with focus stacking, images are captured with different focus points, and later combined in software, to create an image with more DOF than would be possible with a single exposure. Landscape and macro photography are two genres of photography that benefit most from using this procedure. Be warned – calm winds and reasonably stationary objects are a must!
Automated Focus Stacking vs. Macro Rail
The problem with a macro focus rail is that it doesn’t do anything to combat the biggest complication in the technique: human error. With a macro focusing rail, the photographer has to physically touch the rail (which is connected to the camera) introducing the possibility of camera movement or misalignment. It also relies on the photographer’s estimate of how far to turn the knob between each shot. The process is very commonly, inprecise, and slow.
A macro focus rail has a motor and is controlled remotely. This eliminates much of the human error that was mentioned earlier. Through this device, the photographer programs the starting point, stopping point, and decides how many images are going to be captured between those two points. The unit automatically splits up the distance into equal movements and does all the work for you. The setup is completely customizable. Unfortunately, most of the automated focus rails are expensive and there are not many options in the market.

Using MIOPS Capsule Slider as an Automated Focus Stacking Rail
Yes, this is another use that you can give to the Capsule Slider. Here are some tips to start playing around:
- Mount the Capsule Slider onto your tripod and in front of your subject
- Mount the camera onto the Capsule Slider
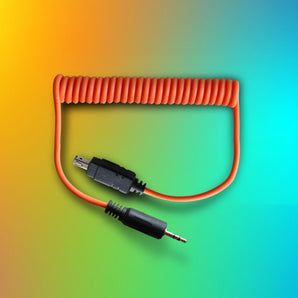
- Connect the devices together through the cable
- Power-on both devices
- Open MIOPS app on your mobile device, connect the device and choose focus stacking mode from the menu
- Set the camera to Bulb mode
- Start configuring the settings in the app´s menu:
- Move the camera to the start point and press “next”
- Select the movement direction, “left” or “right” and press “finish”
- Frame parameter will select the number of photos to be taken
- The exposure parameter defines the exposure value of each shot
- The interval parameter is the time that passes between each photo
- The step parameter is the distance between each shot
- Press “start” to begin shooting through the Capsule Slider

Related Article: Complete Guide for Capturing Breathtaking Water Drop Photographs
About The Author Manuel Delgado:
Manuel Delgado is an award-winning photographer with a specialization in travel and documentary photography. He writes for Contrastly and is a Mentor for NGO Photographers Alliance, having led workshops in Africa with a focus on ethical and humanitarian photography. His work has been exhibited in Europe and the Americas.
Driven by an innate curiosity for his surroundings, Manuel´s process is mainly focused on capturing people in their natural environment; translating through his lens the subtle threads of daily life that are shared across cultures, borders, and races. Depicting people from diverse backgrounds, his work is united by a shared aesthetic that serves to tell each individual’s story. Manuel is currently living in Düsseldorf, Germany.
Manuel Delgado Instagram Profile


