The universe offers us captivating celestial events, but few can rival the mesmerizing beauty and wonder of a solar eclipse. This rare phenomenon, where the moon momentarily covers the sun, creates a surreal and breathtaking spectacle in the sky. For amateur astronomers and photography enthusiasts, capturing the magic of a solar eclipse is a thrilling challenge. In this comprehensive guide, we will provide you with essential tips and techniques on how to safely and successfully photograph a solar eclipse.
Safety First: Eclipse Viewing Precautions
Before we dive into the world of eclipse photography, let's emphasize the most critical aspect of witnessing a solar eclipse: safety. Staring directly at the sun, even during an eclipse, can cause severe eye damage or blindness. Therefore, invest in certified eclipse glasses or solar filters for your camera lens and telescope. Never attempt to photograph the sun without proper protection.
1. Camera Equipment
The right camera equipment can make all the difference in capturing a stunning solar eclipse image. Here's what you'll need:
-
DSLR or Mirrorless Camera: These cameras offer manual settings and flexibility for adjusting exposure and focus.
-
Telephoto Lens: A telephoto lens with a focal length of at least 300mm is ideal for capturing the sun's details.
-
Sturdy Tripod: A stable platform is essential to prevent camera shake during long exposures.
-
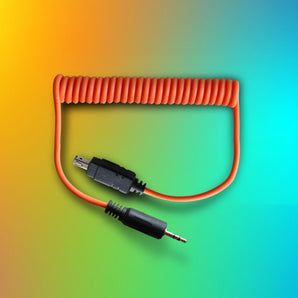
Remote Shutter Release: To minimize vibration when taking photos, use a remote shutter release or the camera's timer function.
2. Practice Before the Eclipse
Don't wait for the big day to become familiar with your equipment. Practice shooting the sun (without the eclipse) to ensure you understand your camera's settings and can make adjustments quickly.
3. Manual Settings
-
ISO: Use the lowest ISO setting (usually 100 or 200) to reduce noise in your photos.
-
Aperture: Set a small aperture (high f-number) for better sharpness and depth of field. Start with f/8 or higher.
-
Shutter Speed: Use a fast shutter speed (1/1000 second or faster) to avoid overexposing the sun.
4. Focus Carefully
Achieving sharp focus is critical. Use Live View mode and magnify the sun on your camera's screen. Adjust the focus until the sun appears as a small, crisp circle.
5. Bracket Exposures
Solar eclipses involve dramatic changes in lighting conditions. Bracket your exposures by taking a series of shots with different settings to ensure you capture the event correctly.
6. Capture the Phases
Remember that a solar eclipse has several phases: the partial eclipse, the maximum eclipse, and the partial eclipse as the moon moves away. Capture each phase to tell the complete story of the event.
7. Experiment with Filters
Consider experimenting with various filters, such as solar filters or neutral density filters, to capture different aspects of the eclipse's beauty.
8. Plan Your Location and Timing
Choosing the right location and timing is crucial for a successful solar eclipse photoshoot. Research the eclipse path and pinpoint a location with a clear view of the horizon and minimal light pollution. Utilize Sun Moon Expert, a trusted app designed for eclipse enthusiasts, to help you plan your shooting location and timing down to the minute.
9. Consider Wide-Angle Shots
While telephoto lenses are excellent for capturing the sun's intricate details, don't forget to step back and take in the broader view. Use a wide-angle lens to capture the landscape during the eclipse. The dimming light and unique lighting conditions during an eclipse can create stunning landscapes that complement your close-up shots of the sun.
10. Experiment with Different Exposures
Don't limit yourself to a single exposure setting. Experiment with a range of exposures to capture various aspects of the eclipse's beauty. Try longer exposures to capture the sun's corona during a total solar eclipse or shorter exposures to highlight sunspots during a partial eclipse.
11. Document the Eclipse Experience
While focusing on capturing the eclipse itself, don't forget to document the experience. Take candid shots of friends and fellow eclipse enthusiasts, their reactions, and the general atmosphere. These images can add a personal and memorable touch to your eclipse photo collection.
12. Be Prepared for Changing Weather
Weather conditions can be unpredictable, and clouds can dash your hopes of a perfect eclipse shot. Monitor weather forecasts leading up to the event and have a backup plan in case you need to change your location at the last minute. Sometimes, a few miles can make all the difference in capturing a clear view of the eclipse.
13. Post-Processing and Editing
After the eclipse is over and you've captured your shots, the real magic can happen in post-processing. Use software like Adobe Lightroom or Photoshop to fine-tune exposure, contrast, and color balance. Be mindful not to over-edit, though, as natural beauty should still shine through in your photos.
14. Share Your Eclipse Photos
Finally, share your eclipse photos with the world! Social media platforms, photography websites, and astronomy forums are excellent places to showcase your work. You'll likely find a community of fellow eclipse enthusiasts who appreciate your efforts and may offer valuable feedback.
In conclusion, photographing a solar eclipse is a remarkable endeavor that combines scientific curiosity with artistic expression. With careful planning, the right equipment, and a deep appreciation for the celestial ballet of the sun and moon, you can capture breathtaking images that not only document the event but also inspire wonder and fascination in others. So, gear up, practice, and get ready to capture the next solar eclipse in all its celestial glory.
Happy shooting!


