Panorama photography is a powerful technique that involves capturing multiple pictures of a subject and stitching them together using software to create a highly detailed, high-resolution image. Instead of taking a single shot, you capture a series of pictures and combine them into a panorama. While a standard 360 panorama typically involves one row of images (resulting in a very long final image), a multi-row panorama allows you to create images with a standard aspect ratio like 2:3 or 3:4. In this guide, we’ll explore how to shoot multi-row panoramas, including tips for creating gigapixel photo and capturing tiny details like people’s faces.

Why Shoot Multi-Row Panoramas?
1.Large Prints: If you want to create large prints with incredible detail, a single 20 or 50-megapixel shot won’t suffice. A multi-row panorama allows you to achieve the resolution needed for high-resolution images and large prints.
2.Aspect Ratio: Single-row panoramas are often much longer in length compared to width. If you want a square or 2:3 ratio, multi-row shooting is the way to go.

3.No Wide-Angle Lens: Don’t have a wide-angle lens? No problem! A multi-row panorama can mimic the effect of a wide-angle lens, allowing you to capture expansive scenes.
4.Spherical Panoramas: To create a 360x180-degree spherical panorama, you’ll need to shoot a multi-row.
What You Need for Multi-Row Panoramas
1. Camera and Lens
-
-
Use a DSLR or mirrorless camera with a lens. The lens choice is crucial:
-
For gigapixel panoramas, use a longer lens to capture more detail.
-
For smaller panoramas, a medium lens like 35mm or 50mm works well. These lenses cover more area, requiring fewer shots and resulting in a smaller final image.
-
-
2. Tripod
-
-
A sturdy tripod is essential to keep your camera stable during shooting. It ensures consistency across all frames, especially when panning.
-
3. Optional: Automatic Device
-
-
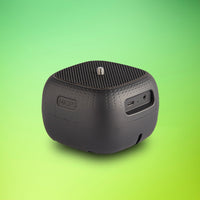
While you can shoot manually, using an automatic device like the MIOPS CapsulePRO makes the process easier and more precise. It handles panning and tilting for you, ensuring accurate overlaps and consistent results.
-
Versatile pan and tilt head for time-lapse, multi row panorama, 360 product photography and videography.
MIOPS CAPSULEPRO
 Camera Settings for Multi-Row Panoramas
-
Level Your Camera: Mount your camera on a tripod and ensure it’s perfectly level. Use a bubble leveler to avoid a tilted horizon.
-
Focus and Exposure:
-
Focus manually on a point between the foreground and background.
-
Use aperture priority mode with the lowest ISO, an aperture of f/11 to f/16, and a fixed white balance (e.g., daylight). This ensures consistent exposure and colors across all shots.
-
-
Switch to Manual Mode:
-
After taking a few test shots, note the shutter speed. If it varies, calculate the average.
-
Switch to manual mode and set the aperture and shutter speed to match your test shots.
-
-
Turn Off Image Stabilization: If your lens has image stabilization or vibration reduction, turn it off to avoid inconsistencies.

Workflow for Shooting Multi-Row Panoramas
Manual Shooting
-
Plan Your Rows: Decide how many rows and columns of images you need. For example, you might shoot 3 rows of 9 images each.
-
Overlap Shots: Ensure each image overlaps with the next by 30%-40%. This overlap is crucial for seamless stitching.
-
Shoot Row by Row:
-
Start with the top row, panning left to right.
-
Move down to the next row, ensuring it overlaps with the row above.
-
Repeat for all rows.
-


Using MIOPS CapsulePRO
-
Set Up the Device: Mount your camera on the CapsulePRO and configure the settings:
-
Set the angle of view (e.g., 180° horizontally and 90° vertically).
-
Adjust the overlap percentage to 35%.
-
Specify whether you’re using a full-frame or crop sensor camera and the camera’s orientation (vertical or horizontal).
-
-
Start Shooting: Tap “Start,” and the CapsulePRO will automatically capture the required images with precise overlaps.


Tips for Perfect Multi-Row Panoramas
-
Shoot in RAW: RAW files retain more detail and allow for easier correction of exposure or white balance errors during post-processing.
-
Shoot Quickly: If lighting conditions are changing (e.g., during sunset), work fast to minimize differences between shots.
-
Use AI Tools: Enhance your shot with machine learning technology tools like Topaz Labs’ Gigapixel AI for upscaling and Sharpen AI for refining focus. Many tools offer a free trial, so you can test them before committing.
-
Experiment with Formats: Try creating 360 photos, virtual tours, or even gigapixel panoramas for unique projects.
Post-Processing Your Panorama
-
Stitch the Images: Use software like Adobe Lightroom, Photoshop, or specialized tools to stitch your images together.
-
Enhance with AI: Tools like Gigapixel AI can upscale your shot, while Sharpen AI can correct any slightly out-of-focus areas.
-
Adjust Exposure and Color: Fine-tune the final image to ensure a cohesive look.
Why Use Multi-Row Panoramas?
-
High-Resolution Images: Perfect for large prints or gigapixel panoramas.
-
Flexible Aspect Ratios: Achieve standard ratios like 2:3 or 3:4.
-
Immersive Experiences: Create 360 photos, virtual tours, or spherical panoramas.
-
No Wide-Angle Lens Needed: Mimic the effect of a wide-angle lens with multi-row shooting.
Ready to Get Started?
Whether you’re shooting manually or using a device like the MIOPS CapsulePRO, multi-row panoramas open up a world of creative possibilities. Combine this technique with AI tools like Gigapixel AI and Sharpen AI to create stunning, high-resolution images that stand out. Start experimenting today and push the boundaries of traditional photography!
Related Article: The Ultimate Guide To Shoot Stunning Panorama


