



The Short Answer
You don't need a safari, a permanent hide, or an expensive telephoto lens to get a striking wildlife photo in your own garden. What you actually need is a camera trigger, set up closer to the action than you could ever stand without spooking the animal off. Aim a laser beam across a path something already uses and the camera fires the second it's crossed. Put a sound trigger near a feeder or a log and it fires the moment a bird lands or a squirrel scrabbles across it. Give local wildlife a few days to get used to a simple hide before you put your camera inside it, pre focus manually on the spot you expect the action, shoot around f/5.6 and 1/500 sec with Auto ISO, and fine tune the trigger's sensitivity and delay in the MIOPS app until you're landing the shot instead of an empty frame.
There's a persistent idea that decent wildlife photography means a safari, a trip to the rainforest, or days camped out at a nature reserve somewhere. Most of the time it doesn't. Plenty of well known wildlife photographers have built entire portfolios around whatever shows up in their own back garden or wanders past the kitchen window most evenings. An ordinary garden can produce a striking photo, and what makes that possible usually has nothing to do with a longer lens or a pricier camera body. It comes down to one accessory: a camera trigger.
Most people assume gear is what stands between them and a shot like that. In practice it's proximity and timing, and a trigger deals with both without you spending a fortune on glass. This guide covers why most attempts at garden wildlife photography fall flat, how a trigger changes that, the setup and camera settings that actually work, and the mistakes that quietly empty a memory card even when everything looked right going in.
Why Most People Never Get the Shot
Ask around and the reasons people fail at this tend to cluster into three. Working out which one is holding you back tells you exactly what to fix.
Your Presence Is the Problem
Garden animals work off a flight distance, roughly the gap they need before they register you as a threat. Stand at that distance with a camera and the shot's already gone, because the animal is now watching you instead of getting on with whatever it was doing. Move closer to compensate and it either backs off further or leaves altogether. A trigger takes you out of the equation. The camera sits somewhere you'd never be able to stand yourself, and you work from a distance, or from inside the house.
You're Never There at the Right Moment
Foxes, badgers, and hedgehogs do most of their moving around at dawn, dusk, and through the night. Birds feed in short bursts you can miss if you look away for thirty seconds. Squirrels move fast and rarely repeat themselves. Sitting outside for hours hoping something turns up while you happen to be watching isn't realistic for most people, and it's why so many sessions end with nothing on the card. A trigger just watches, all the time, so the camera's ready whether or not you are.
You're Solving the Wrong Problem With Gear
A lot of photographers assume that without a serious telephoto and a flagship body, there's no chance of getting close to something skittish. That assumption sends people shopping for the wrong thing. Once a trigger lets you put the camera right where the animal already goes, a standard kit lens has plenty of reach for a close, detailed shot. Distance was always the real constraint, not the lens.
A Related Assumption: Isn't a Trail Camera Enough?
Same gear instinct, different product. Trail cameras and phone based motion apps are cheap, everywhere, and marketed for exactly this. They're good for one thing in particular: figuring out what's actually visiting your garden. Leave one running for a week and you'll usually work out whether it's a fox, a badger, or the neighbor's cat, and roughly what time it shows up.
Where they fall down is the same place a cheap lens does, image quality and control. Most run a small sensor, a fixed wide lens, and infrared flash at night, which gets you evidence but rarely a photo you'd want to print or enter into a competition. A dedicated trigger wired into your own camera keeps your sensor, your lens, your aperture, and your composition exactly how you want them. The sensible order is trail camera or motion app first, for a week or two of scouting, then bring in a proper trigger and your main camera once you know exactly where and when to point it.
What a Camera Trigger Actually Changes
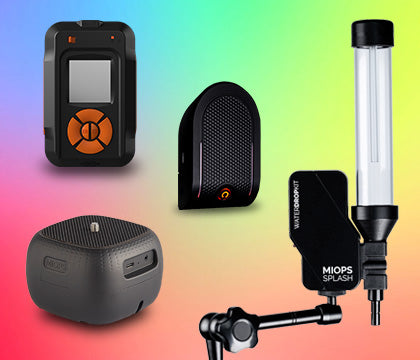
A trigger fires your camera remotely, which means you can put it exactly where animals already go rather than wherever you can stand without being spotted. Because the camera's closer, even a wide or standard lens gives you the kind of close, detailed framing that would otherwise need expensive glass and a much longer working distance. With something like the MIOPS Smart+, you don't even have to be near your gear. It watches for sound or a broken laser beam and fires the shutter the instant it detects one, day or night.
Meet the Trigger: MIOPS Smart+ for Garden Wildlife
The Smart+ is a multi mode trigger, and three of its modes map pretty directly onto how garden wildlife behaves. If you're still weighing up options, our guide to what makes a good camera trigger covers the wider criteria beyond just this use case.
Laser Mode: Catching Animals on a Path
Think you've found a badger or fox route along the fence line, or through a gap in the hedge? Aim a laser beam across it. Every time something breaks the beam, Smart+ fires the shutter, so you get a precisely timed shot without sitting there guessing when it'll pass. We've got a full laser trigger photography guide if you want to get more out of this mode beyond wildlife.
Sound Mode: Catching Movement and Action
Got a spot where squirrels launch off a fence, or a bird table that gets a lot of traffic? Set Smart+ to trigger on sound, add a short delay, and start catching the moment of landing or takeoff. It works well for anything that makes a distinct noise on arrival, a woodpecker on bark, a bird landing on a feeder, that sort of thing. For the mechanics behind it, see how a sound activated camera trigger works.
Remote Mode: When You Want to Stay in Control
Sometimes you can see the animal but don't want to be anywhere near the camera. Smart+ can also be fired manually from your phone, so you can watch from a window or a hide and trigger the shutter the moment the behavior looks right, without your presence near the camera giving anything away.
Machen Sie nahezu unmögliche Fotos, indem Sie Ihre Kamera in ein Hochgeschwindigkeitsaufnahmegerät verwandeln!MIOPS Smart Trigger ist ein vielseitiger Kameraauslöser in...

Smart+ Multi-Mode Camera Trigger | Lightning, Sound, Laser and Timelapse
How to Set Up Your Garden for a Trigger Shot
Start with a spot animals already use: a branch birds like to land on, a patch of grass rabbits keep coming back to, a worn path along the fence. Working with a spot wildlife has already picked gets you results a lot faster than guessing and hoping. Our wildlife photography tips post has more on reading a location before you commit gear to it.
-
Pick your lens on purpose. Because the trigger lets you sit closer than usual, a wider lens often gives a more dramatic, immersive shot than a long telephoto would.
-
Play with angle. Camera low with a wide lens exaggerates scale. Camera at the animal's eye level feels a lot more intimate.
-
Build a simple hide. Branches, logs, and foliage around the equipment, with a few days for local wildlife to get used to it before the camera goes in. That way you're not leaving expensive gear out for hours hoping something shows up.
-
Use food sparingly. A small, consistent amount in the right spot keeps subjects lingering where you want them in frame, but don't overdo it, or you risk changing how the animal normally feeds.
-
Get it on a tripod, properly secured. Camera shake ruins an otherwise perfectly timed shot, and a light setup can shift in wind or when something brushes past it.
Camera Settings for Garden Wildlife
Once the camera's locked down on a tripod, here's where to start before you arm the trigger:
-
Focus: switch to manual and pre focus on the distance you expect the subject, a bird table, a branch, a log. Autofocus hunts in low light at dawn, dusk, and night, and you'll miss the shot waiting for it to lock.
-
Mode: manual shooting mode, so exposure doesn't drift between frames.
-
Aperture: around f/5.6. Sharp on the subject, soft enough behind it that the background doesn't distract.
-
Shutter speed: 1/500 sec is fast enough to freeze most garden wildlife mid action, a bird taking off, a squirrel mid leap.
-
ISO: Auto. You won't be adjusting it in real time, so let the camera compensate as light shifts, the sun going behind a cloud, dusk creeping in.
Fine Tuning Timing With the MIOPS App
Once the camera's set, the last job is dialing in the trigger itself using the free MIOPS app on iOS or Android. In laser mode that means setting how sensitive the beam detection is, so a falling leaf doesn't fire the shutter but a fox does, reliably. In sound mode it's the volume threshold and a short delay, so you catch the subject in frame rather than the split second before it arrives. You can also set how many frames fire per trigger and the gap between them, so you end up with a setup that reliably gets the shot rather than one that gets lucky once.
Common Mistakes and Why They Happen
Blurry frames on a locked tripod usually mean autofocus got left on in low light. Switch to manual and check it visually before you walk away, not just once at the start of the session.
Empty frames with an armed trigger usually mean the laser beam or sound zone wasn't lined up with where the action actually happens. If you can hear animals around but nothing's firing, move the beam or the sound zone closer to the exact spot, not just the general area.
False triggers from wind, rain, or blowing leaves mean the sensitivity is set too high. Back off the laser sensitivity a touch, or raise the sound threshold, and test it with a stick or a clap before leaving it unattended overnight.
Washed out or heavily backlit shots usually mean the camera's pointed toward a light source, low morning sun through a gap in the hedge, say. Reposition so the light falls across the subject instead of straight into the lens.
A Note on Respecting Wildlife While You Shoot
None of this is worth doing at the animal's expense. Keep a reasonable distance even with the trigger doing the close work for you, and treat any sign of stress, freezing, retreating, repeatedly checking the camera, as a cue to back off rather than push closer. Keep equipment away from nests, dens, and burrows. Disturbing certain species there isn't just bad practice, it can be a criminal offense under UK wildlife protection law. If you're using food to draw a subject into frame, keep it small and in line with what the species would naturally find, rather than turning it into a meal it starts depending on. You don't have to give up the shot for any of this. It just means building the setup around how the animal already behaves, instead of trying to get it to perform for the camera.
Frequently Asked Questions
What is the best camera trigger for garden wildlife photography?
The MIOPS Smart+ suits garden wildlife well because it covers laser and sound triggering plus manual smartphone control, so the camera can fire on its own the moment an animal is in frame, day or night.
How does a laser trigger work for wildlife photos?
A laser beam gets aimed across a path the animal already uses. Cross it, break the beam, and the trigger fires the shutter automatically, with precise timing and no need for you to be there.
Do I need an expensive telephoto lens to photograph garden wildlife?
Not really. Since the trigger lets you put the camera much closer than you could stand yourself, a standard or wide kit lens is usually enough for a close, detailed shot.
What camera settings work best for close up garden wildlife shots?
Start with manual focus pre set to where you expect the subject, manual shooting mode, an aperture around f/5.6, a shutter speed near 1/500 sec, and Auto ISO to ride out changing light.
Is a trail camera enough, or do I need a dedicated trigger?
A trail camera is a decent scouting tool for working out what visits and when. For a photo you'd actually want to keep, a dedicated trigger on your own camera gives you far more control over lens, aperture, and composition than a trail camera's fixed lens and small sensor can.
How do I avoid disturbing wildlife while using a trigger?
Keep your distance even though the camera is doing the close work, stay away from nests and dens, go easy on food if you use it at all, and treat any sign of stress as a reason to back off rather than get closer.
Keep Exploring
Related reading: 11 Tips for Stunning Wildlife Photography
Related reading: How Does a Sound Activated Camera Trigger Work?
Related reading: Laser Trigger Photography Tips
Sources
MIOPS Smart+ product page: trigger modes, sensitivity settings, and compatible camera list:
https://www.miops.com/products/smart
MIOPS: 11 Tips for Stunning Wildlife Photography:
https://www.miops.com/blogs/news/11-tips-for-stunning-wildlife-photography
MIOPS: How Does a Sound Activated Camera Trigger Work:
https://www.miops.com/blogs/news/how-does-a-sound-activated-camera-trigger-work
RSPB: How to Record Wildlife, an action you can take to protect nature. Covers UK legal protection around nests and disturbance:
https://www.rspb.org.uk/helping-nature/what-you-can-do/planning-for-nature-toolkit/how-to-gather-the-facts/how-to-record-wildlife
World Nomads: How to Photograph Wildlife Without Causing It Harm, Graeme Green's field guide on distance, baiting, and disturbance:
https://www.worldnomads.com/create/learn/photography/how-to-photograph-wildlife-ethically