



The Short Answer
A water drop crown forms and collapses in under 5 milliseconds, faster than any human reflex can time reliably, which is why a dedicated kit rather than an eyedropper and a stopwatch is what actually gets you the shot. Mount the MIOPS Splash on a stand about 25cm above your water surface, connect it directly to your camera and an off camera flash with the included cables, and set your camera to manual mode: f/11 to f/16, ISO 100, and a shutter speed matched to your flash's sync speed, usually around 1/200 sec. Use a macro lens or extension tubes and focus manually on the drop zone. Sync the Splash to the free MIOPS app over Bluetooth, and start with something like a 25ms first drop, a 50ms second drop with an 80ms delay, and a camera trigger delay around 60 to 65ms, then adjust from there since every camera and every liquid behaves slightly differently.
Water drop photography has a reputation for being difficult, and honestly, it is, but not for the reasons most beginners assume. It isn't about owning a top tier camera or an expensive macro lens. It's about timing a moment that's over before you could ever react to it by hand, and about controlling enough variables, drop size, delay, lighting, focus, that the results are repeatable rather than a lucky accident once every fifty tries.
This guide walks through the physics and composition principles behind a strong water drop shot, the full setup with the MIOPS Splash kit, the camera settings that pair with it, starting timing values to experiment from, and the mistakes that quietly ruin an otherwise well set up shot.
Why Water Drop Photography Is Harder Than It Looks
The Moment You're Chasing Lasts Milliseconds
A water drop crown, the ring shaped splash that forms when a falling drop hits a liquid surface, forms and collapses in under 5 milliseconds. Human reaction time, from seeing something happen to actually pressing a button, is around 200 to 250 milliseconds on a good day. That gap isn't a skill problem you can practice your way out of. It's a hardware problem, and the fix is a device that can fire faster than you can blink, then let you dial in exactly which millisecond of the sequence you want to capture.
Manual Triggering Never Repeats the Same Shot Twice
The classic beginner method, an eyedropper and a full cup, technically works, in the sense that water does eventually fall and eventually splash. What it doesn't give you is control. Every drop height, size, and timing is slightly different from the last, so even when you get a decent frame, you have no reliable way to get it again on purpose. A kit that lets you set drop size and delay in milliseconds turns water drop photography from a game of chance into something you can actually iterate on.
Lighting and Composition Get Skipped
It's easy to get so focused on the timing problem that lighting becomes an afterthought. Water drops are close to transparent, which means how you light them, and what's behind them, matters as much as the timing. A plain background and a single on camera flash produces a flat, forgettable image even when the timing is perfect.
The Physics and Craft of a Water Drop Shot
Before you touch a single setting, it helps to understand what's actually happening in that split second, since the physics explains almost every creative choice that follows. None of this depends on your trigger method, an eyedropper or a dedicated kit.
How a Crown Actually Forms
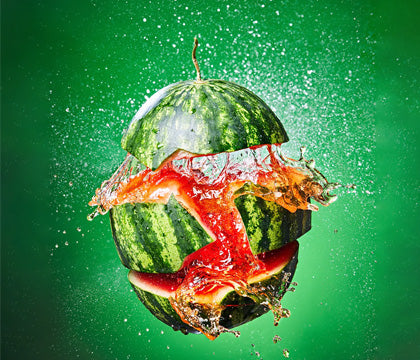
When a drop hits a liquid surface, it doesn't just disappear into it. The impact pushes the surface down and out, and surface tension pulls that displaced liquid back up into a ring shape almost immediately, the 'crown' you see in classic water drop shots. That crown rises, holds its shape for a few milliseconds, then collapses back down under gravity. If a second drop lands while the crown is still rising, it collides with it and throws liquid upward in a column, which is where collision and pillar shots come from. Understanding that sequence, impact, crown, collapse, is what lets you time a shot on purpose instead of guessing.
Composition Principles That Apply to Any Setup
A technically frozen drop with no thought given to composition still reads as a snapshot rather than a photograph. A few principles hold regardless of your gear:
-
Fill the frame deliberately. Crop in tight enough that the crown or collision is the clear subject, with just enough surrounding space to give it room to breathe.
-
Use color contrast, not just color. A bright drop against a dark, muted background reads far more dramatically than two competing bright tones fighting for attention.
-
Keep the water line level. It sounds minor, but a tilted water surface is one of the fastest ways to make an otherwise great shot look accidental.
-
Leave negative space above the splash. A crown or collision reaching upward needs room in the frame to feel like it's still in motion, not boxed in.
Reading Light Like a Water Drop Photographer
Water is close to transparent, so light passes through it rather than just bouncing off it, which changes how you should think about lighting here compared to most subjects. Backlighting, a main light source behind or beside the drop rather than in front of it, tends to produce the most striking results, since light traveling through the water is what makes it glow. Front lighting flattens a drop into a dull gray blob. Hard light, a small, direct source, gives crisp specular highlights along the water's edge, usually what you want. Soft, diffused light gives a gentler look but can make the drop harder to distinguish from its background. Neither is wrong, but backlit and hard is the reliable starting point if you're not sure where to begin.
What You Need: The MIOPS Splash Kit Setup
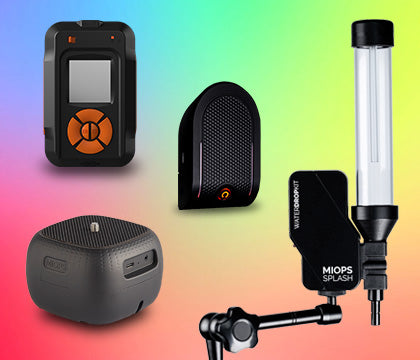
The Splash Pro Pack ships with the Splash unit itself, a holder, a camera cable, a PC sync flash cable, and a 2 meter extension cable, so there's nothing else to buy to get started beyond a camera, a flash, and something to catch the water in. Unlike some MIOPS devices, Splash doesn't need a separate trigger like the Smart+ paired with it. It connects directly to your camera and flash and is controlled entirely from your phone.
-
Mounting: screw the Splash onto its holder, attach it to a light stand or tripod, and check it's sitting level. Measure so the nozzle sits roughly 25cm above the surface the drops will land in, a cup, a tray, or a small basin all work.
-
Camera and lens: any DSLR or mirrorless camera works. A macro lens gives the best close focusing distance, but extension tubes on a mid range or telephoto lens are a workable substitute if you don't own one.
-
Lighting: off camera flash is strongly recommended over your camera's built in flash, since flash duration, not shutter speed, is what actually freezes the drop. Two flashguns positioned either side of the splash zone, aimed at a white backdrop, gives you even lighting and room to get creative with colored gels.
-
Support: a solid tripod for the camera. At close focusing distances, even small amounts of camera shake show up clearly in the final frame.
Camera Settings for Water Drop Photography
Once your gear is mounted and leveled, these starting settings work for most setups:
-
Aperture: f/11 to f/16. A narrow aperture keeps enough of the drop in focus given how close you're shooting, and it also helps control exposure since the flash is doing the real work of freezing motion.
-
ISO: 100, to keep noise as low as possible. You don't need a higher ISO since the flash provides the light.
-
Shutter speed: match your flash's sync speed, commonly around 1/200 sec. The shutter speed itself isn't freezing the drop, the brief flash pulse is, so the shutter just needs to be open when the flash fires.
-
Flash power: start low, around 1/16 power on each flash, and adjust up or down until your exposure looks right. Lower flash power also means a shorter flash duration, which freezes fast motion more cleanly.
Syncing the Splash Kit With the App
Download the MIOPS app from the App Store or Google Play, and turn on Bluetooth to connect it to your Splash unit. From the app you control drop size in milliseconds, how many drops fire in a sequence, up to four, and the delay between each one, plus the delay between the drop and your camera's trigger. Because cameras all fire at slightly different speeds, it's worth adjusting that camera trigger delay specifically for your setup rather than assuming a value that worked for someone else's gear will work identically for yours.
Getting the Timing Right: Starting Settings to Try
Timing is where most of the creative control lives, and it's worth treating as a starting point to experiment from rather than a fixed recipe. For a classic disc shaped crown, these values are a reasonable place to begin:
-
Drop 1: 25ms size
-
Drop 2: 50ms size, with an 80ms delay after the first
-
Camera trigger delay: 60 to 65ms
The difference between a clean crown and a full on collision shot, where a second drop lands directly on the rising splash from the first, can be as little as 20 milliseconds of delay. Small, deliberate adjustments, changing one variable at a time and reviewing the result, will get you there faster than guessing at several settings at once.
Creative Variables Worth Experimenting With
Once the basic sequence is working reliably, a few variables open up a lot of creative range without requiring any new gear.
-
Water additives: milk, cream, and glycerin all change the viscosity of the liquid, which changes how the crown forms and how long it holds its shape before collapsing. Thicker liquids tend to produce taller, more dramatic crowns.
-
Color: food dye in the water below, in the drop itself, or both, produces striking results, especially with a backlit setup where the color reads clearly against the light.
-
Focus technique: place a chopstick or similar thin object exactly where the drops are landing, let a couple of drops fall on it, then switch to live view, zoom in digitally, and adjust focus manually until it's tack sharp. Autofocus tends to grab the nearest edge of the object rather than its center, which leaves the middle of your actual drop slightly soft.
-
Cleanliness: use a tray inside a larger tray to catch overflow without making a mess of your shooting surface, and skim or replace the water regularly. Dust, stray hairs, and old bubbles on the water's surface show up clearly in a close up, backlit shot.
Backdrop and Lighting Choices That Change the Whole Shot
The setup behind the drop matters as much as the timing in front of the lens, and it's the part beginners tend to leave until last.
-
Backdrop color: a plain white backdrop lit from behind or the side is the most flexible starting point, since it reflects whatever color you put in front of it. Colored card or fabric works too, but limits you to that one color for the session.
-
Gels on your flash: taping a colored gel over each flashgun lets you tint the backdrop without touching the backdrop itself, so you can run through several color options in the same session just by swapping gels.
-
Flash position: placing both flashguns behind or to the side of the drop, aimed at the backdrop rather than directly at the water, produces a backlit look where the drop and splash appear to glow, which tends to read as more dramatic than flat, front lit water.
-
Distance from backdrop: keep some space between the water and the backdrop itself. Too close and the backdrop light spills onto the water's surface unevenly, too far and you lose brightness. A foot or two of separation is a reasonable starting point to adjust from.
Can You Skip the Kit and Just Use an Eyedropper?
Sure, and plenty of people start there. An eyedropper and a full glass will eventually produce a splash, and if you're just testing whether you enjoy this kind of photography before spending on gear, it's a reasonable place to begin. What you'll run into quickly is the same problem covered above: no two drops fall quite the same way, so you can't deliberately recreate a shot you liked, and you'll burn through far more attempts trying to time the camera trigger by hand than you would letting the Splash handle drop size, delay, and camera timing in milliseconds. Think of the eyedropper method as a way to confirm you like the genre, and a kit as what turns it into something you can actually get consistently good at.

Splash Pro Pack | Water Drop Photography Kit
Controls every drop and your equipment with great precision to capture the perfect splash.
Common Mistakes and Why They Happen
A hazy or dirty looking water surface in an otherwise sharp shot almost always means dust, stray hairs, or leftover bubbles on the water. Skim the surface or change the water between sessions, especially once you start adding dye or thickening agents.
Soft focus on the drop itself, even with everything else looking sharp, usually means autofocus grabbed a point slightly in front of or behind the actual drop zone. Switch to manual focus and verify visually using live view rather than trusting autofocus at this working distance.
A clogged nozzle after switching liquids usually means residue from a thicker paint or dye was left in the valve. Splash's valve is designed to come apart for cleaning, so disassemble and rinse it thoroughly any time you change liquids, particularly after anything thicker than plain water.
Inconsistent results with identical settings usually comes down to temperature, humidity, or air movement changing between sessions, all of which affect how a drop falls and splashes even when your app settings haven't changed. Treat small variance as part of the process rather than a sign something's wrong, and use it to your advantage by shooting more frames than you think you need.
Frequently Asked Questions
Do I need a flash for water drop photography?
An external flash is strongly recommended. Flash duration of 1/10,000 sec or faster is what actually freezes the drop, not your camera's shutter speed. The Splash Pro Pack includes a PC sync flash cable so you can connect a compatible flash directly, and an entry level speedlight works well.
What camera do I need for water drop photography?
Splash works with a wide range of DSLR and mirrorless cameras. Check MIOPS's camera compatibility tool before buying if you're unsure, and their support team can confirm compatibility ahead of purchase.
How long does it take to get a good water drop shot?
Most photographers land a clean crown shot in their first session. Expect a short learning curve of one or two sessions while you dial in liquid ratios, drop height, and timing delays for your specific setup, after which the process becomes quick and repeatable.
Can I use liquids other than water?
Yes. Milk, cream, juice, and food colored solutions all work well and produce different crown shapes and textures. Clean the valve thoroughly between liquids since it's designed to be taken apart for exactly this.
What camera settings should I use for water drop photography?
Start with an aperture of f/11 to f/16, ISO 100, and a shutter speed matched to your flash's sync speed, typically around 1/200 sec. Manual focus on the drop zone, verified in live view, matters more than any single exposure setting.
Can I do water drop photography without a dedicated trigger kit?
You can attempt it with an eyedropper and manual timing, but a crown forms and collapses in under 5 milliseconds, which is faster than a human can reliably react to. A kit that controls drop size and delay in milliseconds is what makes the results repeatable rather than accidental.
What's the difference between a crown shot and a collision shot?
A crown shot is the ring of splash that rises when a single drop hits the surface. A collision shot happens when a second drop is timed to land directly on that rising crown, creating a more dramatic, layered splash. The difference between the two often comes down to as little as 20 milliseconds of delay between drops, which is exactly the kind of precision a millisecond based trigger is built for.
Keep Exploring
Related reading: Water Drop Photography Explore Page
Related reading: What Is the Best Camera Trigger
Sources
MIOPS Splash Pro Pack product page: crown timing, kit contents, camera compatibility, and official FAQ answers on flash, camera, and liquid requirements:
https://www.miops.com/products/splash-pro-pack
MIOPS: Water Drop Photography explore page:
https://www.miops.com/pages/water-drop-photography