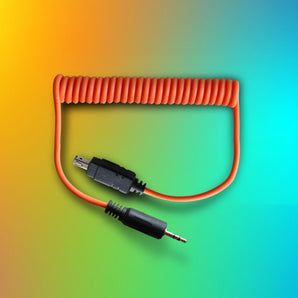
Hummingbirds are among the fastest birds in the world, beating their wings up to 80 times per second. Capturing them in crisp, sharp detail is a challenge for even experienced photographers. With the MIOPS Smart+ in laser mode, you can precisely trigger your camera to capture every wingbeat and feeding moment with incredible accuracy. This guide will show you how to set up your equipment, optimize your camera settings, and create breathtaking hummingbird images.
Why Use MIOPS Smart+ Laser Mode for Hummingbirds?
Traditional photography struggles with fast-moving subjects like hummingbirds. The MIOPS Smart+ laser mode detects interruptions in a laser beam and triggers your camera instantly, ensuring you never miss a critical moment. Key benefits include:
- Precision timing for high-speed subjects
- Hands-free operation for natural bird behavior
- Integration with flashes for perfect lighting
- Multiple triggers per second for rapid sequences
Step 1: Setting Up Your Shooting Area
- Choose a feeder or flower area that hummingbirds frequent.
- Position the MIOPS Smart+ laser across the feeding path where the bird will cross.
- Ensure your camera and laser are securely mounted on a tripod to avoid movement.
- Use a neutral or scenic background to make the birds stand out.
Step 2: Camera Settings
- Shutter Speed: 1/2000s or faster to freeze wing motion
- Aperture: f/5.6–f/8 for sufficient depth of field
- ISO: 400–800 depending on light conditions
- Focus: Pre-focus on the area where the bird will enter
- Flash: Use external flashes synchronized with MIOPS Smart+ to illuminate the bird without motion blur

Step 3: Positioning the Laser Trigger
- Place the laser beam where the bird will fly through — often just in front of the feeder or hovering point.
- Adjust the sensitivity so minor movements (like the hummingbird’s wings) don’t trigger prematurely.
- Test the trigger with small objects to ensure timing accuracy.
Step 4: Lighting and Flash Setup
- Position two or more flashes around the subject for even lighting.
- Connect the flashes to MIOPS Smart+ so they fire simultaneously with the camera.
- Use softboxes or diffusers to avoid harsh shadows.
Step 5: Capturing the Perfect Shot
- Observe the birds to learn their feeding habits.
- Take multiple shots; high-speed sequences may be necessary.
- Adjust laser position, camera focus, or flash power as needed for optimal results.
- Experiment with different backgrounds, angles, and feeder setups.
Step 6: Post-Processing
- Crop to highlight the bird and remove distractions.
- Adjust exposure, contrast, and saturation to make colors pop.
- Sharpen wings and details while maintaining natural appearance.
- Batch-edit multiple frames for a cohesive sequence.
Additional Tips
- Use colored feeders or flowers to attract hummingbirds faster.
- Photograph early morning or late afternoon for soft natural light.
- Keep the area quiet to avoid scaring the birds.
- Combine MIOPS Smart+ with high frame rate cameras for even more precise captures.
See MIOPS Smart+ in Action
For a practical demonstration of using the MIOPS Smart+ laser mode in hummingbird photography, check out the following video:
Conclusion
Hummingbird photography is one of the most rewarding high-speed photography challenges. With the MIOPS Smart+ in laser mode, you can capture every wingbeat and feeding moment with perfect timing, creating stunning, detailed images. By carefully planning your setup, optimizing camera settings, and leveraging precise triggers, you’ll bring the beauty of these tiny, fast-moving birds into sharp focus, all from the comfort of your backyard or home studio.


