


Lightning photography is a very interesting subject for many photographers. Lightning is a very powerful electrical discharge that happened during a thunderstorm. Sometimes it happens between clouds and sometimes lighting goes from cloud to ground. Around 60 to 100 lightning bolts strike on our planet every second. Skyscrapers like Empire State building get hit by lightning as many as 500 times a year.
Most of the photographer take lightning during the night as it’s very tough to take at daytime because you can’t keep your shutter open for a long time. In the night it’s dark so if you have to open your shutter for 15-20 seconds, you won’t have any problem but in the day time, we can’t open our shutter for even one second.

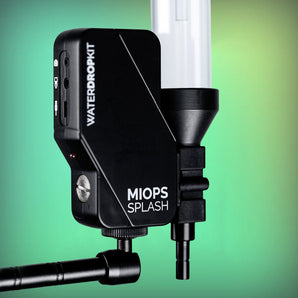
Buy with today’s technology it’s now easier to click lightning during day time. We have a lightning trigger like MIOPS Smart that can trigger the shutter for us at the perfect moment. If you add lightning with a beautiful landscape, it could become an extraordinary picture. Let’s talk about how to shoot lightning in the day time.

Equipment: You need a DSLR camera and a lens, Wide angle lens is better as we have no idea where lightning will strike and if we have a wide lens, there would be more chances that it’ll be within the frame. Next, you need a solid tripod because during the storm there will be heavy winds and light tripod can fall down and damage your expensive gears. If you are not using lightning trigger you also need a shutter release cable.
There are some Apps that can give you the weather forecast and storm alerts. It’s better to use them to know in advance and plan accordingly.

Camera Settings: First mount your camera on a tripod and manually focus to infinity. Lighting happened in friction of second and your camera can’t focus and click in such a short period.
1. ISO: Set ISO to 100 because we don’t want grains in our picture.
2. Aperture: Set Aperture to f/11 or f/16 because we will take the shot in low shutter speed and we also want foreground in focus too.

3. Shutter Speed: Set the shutter speed to at least 1/4 second to capture full duration of lightning. A light flash can last from 20 milliseconds to 1/4 second and to capture it entirely, we need to set the lower shutter speed. If you need to use a neutral density filter, use that.
4. MIOPS Smart: If you are using MIOPS Smart lightning trigger, set it to the lightning mode and set sensitivity around 95-99.

Workflow: If you are using MIOPS Smart, you don’t need to do anything, whenever lightning will strike, it’ll automatically click the picture. You can enjoy the view and look out for the next frame.
If you don’t have a lightning trigger, you need to do everything manually. In that case, attach the shutter release cable to your camera and click a picture every second. Whenever lightning strike between your exposure, you’ll get a picture. You have to waste lots of clicks to get good shots.

MIOPS SMART+
Take impossible photos by turning your camera into a high-speed capture device!
You can also invest in wireless remote for your camera and click from some distance. Tripod is made of metal and when you are in open area between the storm, it can act as a lightning rod and attract lightning strike, so it’s better to stand away from it.

Things to remember: Here are some points you need to take care while shooting lightning.
1. Be Safe: Always be safe because if lightning strike near you it can be very dangerous even deadly. Never risk your life for a photograph, always shoot from inside a building or inside your car. You can Google the lightning safety tips and follow them or you can see it here: https://www.weather.gov/safety/lightning.
The second reason you want to shoot from inside that no one wants to drench there expensive equipment and damage it. One more thing to remember is that stay away from using an umbrella as it can also attract lighting strike.

2. Foreground: Find an interesting foreground because if your frame only has lightning, it won’t look good. A good element in foreground like a mountain or skyscrapers are must in the picture. It’s better to find locations in advance where you are safe as well as have a good view. When you have a storm alert, you can reach there and start shooting. Make sure you don’t have distracting elements like electric wires or poles in your frame.
3. Horizon: You need to remember two things about the horizon. First, it should be straight and second, never place your horizon in the dead center of the frame, the ratio between your sky and ground should be 60-40 or 70-30 but never keep it at 50-50.

4. Review Photos: Review your photos after 4-5 clicks. If it’s underexposed or overexposed, change the settings accordingly. If the focus is not proper, focus again.
5. Stacking: If you want to get some exceptional shots, take multiple photos of lightning without moving the camera and stack them using image processing software. For details about how to do so, check the following article: How to Take the Extraordinary Lightning Photos.
Related Article: How to Take the Extraordinary Lightning Photos
Related Article: Lightning Explore Site
About the Author
Ramakant Sharda is an author, iOS App publisher, passionate photographer and a MIOPS Ambassador based in the beautiful “Pink City” of India, known as Jaipur. His work has been published in various magazines, newspapers, and blogs. He has published three Coffee Table Books, he writes about photography and also teaches photography in his workshops. Check out his website http://ClickManic.com to see the masterpieces created by him or download his free app for iPhone and iPad “30 Days to an Ace Photographer“.