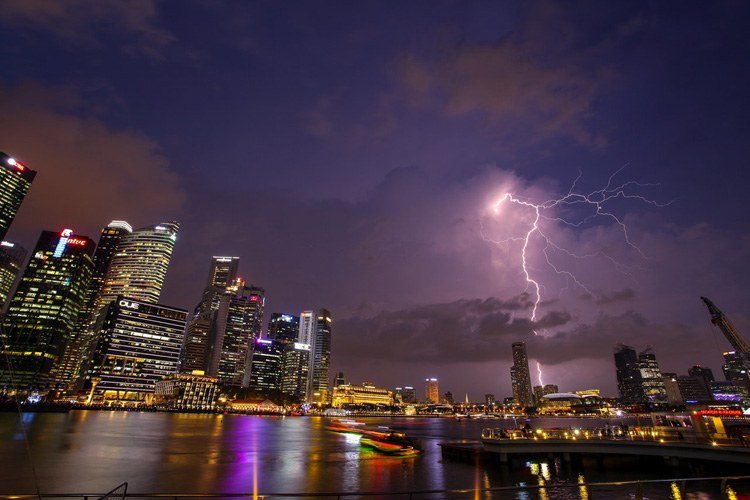
Have you ever looked at a spectacular lightning photo and wished you could capture something similar? If so, you should know that it isn’t as difficult as you might think. There are two basic methods, and both require some basic camera skills, a bit of planning and some precautions to protect yourself and your equipment. This article will give you a good overview of both and some thoughts about creativity.
What You Need to Know First
Before you embark on your quest for the perfect lightning shot, there’s one thing you need to understand implicitly: Lightning is dangerous. Let’s look at a few facts from the US National Weather Service and the National Oceanic and Atmospheric Administration about those dazzling displays you’re trying to capture:
• Approximately 2,000 people are killed by lightning every year.
• Survivors of lightning strikes often suffer permanent injuries or brain damage.
• Lightning bolts typically carry 4,000 to 120,00 volts at 5,000 to 200,000 amps.
• The temperature of a lightning bolt can reach 50,000 degrees Fahrenheit.
• Lightning has been known to arc 10 miles or more away from the storm that generated it.
• Lightning can and does strike twice or more in the same place.
That’s far from a complete list, but it should start to make you realize that standing outside taking pictures of a thunderstorm isn’t the safest thing in the world to do. Doing so when you and the ground are wet, and holding onto a tripod is even less safe.

The ideal location to photograph lightning would be indoors, away from windows and anything electric. That’s not a very practical way to get great photos. In reality, you’ll probably be putting yourself at risk if you want to get good lightning shots. The point is to realize the danger and do everything you can to minimize the risk.
Remember, too, that you’ll need to protect your gear from the weather. Even if it’s not raining, things like blowing dust can damage your camera and/or lenses. Be prepared with a simple and inexpensive rain cover and keep your lens cap on until you’re ready to shoot.
Method 1: The “Old School” Way
Okay, now that I’ve given you some reasons NOT to do this, I know that you, like me, are going to do it anyway. That being the case, let’s look at the first way to capture lightning photos. This is the way it’s been done since it was first successfully accomplished in the 1800’s.
The basic procedure is to frame and focus your camera on an active area, lock the shutter open and wait for the lightning to strike. Because the flashes will be extremely bright, they’ll be detected very well on film or your sensor. It’s like light painting with nature handling the flashlight!

As you can imagine, your results will be somewhat “hit or miss”. To make sure that you get the best results when you do capture one or more strikes, you’ll want to prepare things correctly. Following the procedure I’m about to outline will help maximize your chances of success.
1. Use a camera that has a Bulb (B) shutter setting and a manual (M) exposure setting. Most modern DSLR and mirrorless cameras will have both of these features.
2. Use a cable release or remote shutter release.
3. Mount your camera on a tripod.
4. Turn the autofocus and image stabilization OFF on your lens.
5. Select manual exposure. Lightning strikes will confuse your camera’s exposure meter.
6. Set your aperture to about f/8. Many tutorials will recommend shooting at the maximum aperture setting. There are three good reasons not to do so:
a. The brightness of the lightning may completely “blow out” the frame, especially if you capture more than one strike.
b. Flashes may occur closer or farther away than the point you’re focused on. A smaller aperture will increase the depth of field, so it’s more likely the lightning will be in focus.
c. All lenses exhibit some diffraction effects at their widest and narrowest aperture settings. These effects will cause a loss of sharpness in your images.
7. Use the lowest ISO setting available on your camera to avoid noise in the dark areas.
8. Compose your shot so that you have plenty of sky visible. Including some foreground or structures in the frame can make the photos more interesting.
9. Choose a focal point. If you’re shooting with city lights or some object in the frame, try to get them in focus. If you can’t find something to focus on, set your focus to infinity. If possible, lock the focusing ring or use a piece of gaffer’s tape.
10. Take a few test exposures using your remote, counting the number of seconds while you hold the shutter open. The time of day or night and the brightness of any lights in the frame will determine how long your exposures can be. Check your results. If you’re shooting a very dark area, you can probably use exposure times of 20 to 30 seconds. This gives you a better chance of catching one or more strikes.
11. Start shooting by holding the shutter open for the length of time you’ve chosen. When you see lightning strikes while the shutter is open, you’ll have something to check out when you’re back home. Re-compose your shot as the storm moves, and remember to be aware of how close the danger is.
The steps above are intended as a guide to help you get good results in a short time. The best teacher for any type of photography is the experience. Keep practicing and you’ll find the gear and settings that work best for you. Try different focal lengths. Shoot storms in rural and urban settings. Use your imagination and find a new angle.
Method 2: Using a Trigger

While the method above is very rewarding when you’re successful, it does require time, patience and perseverance. Thanks to advances in technology, there’s an easier and more reliable way to capture lighting, especially during the daylight hours. Using a camera trigger with a light sensor, you can save all those wasted exposures by taking your photos only when lightning strikes!
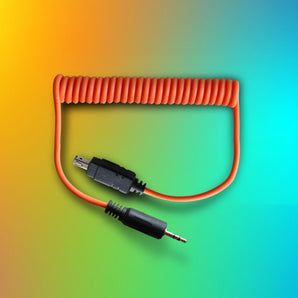
There are a number of sensor triggers available on the market, and their capabilities vary widely. For the purpose of photographing lightning, you’ll need one with a high-speed, adjustable camera trigger like the MIOPS Smart. These triggers detect the intense light of the flash and trigger the camera shutter in a matter of milliseconds.
The setup is much like the procedure for Method 1, except that you’ll want to move the shutter speed off of the Bulb setting. Shutter speeds of 1/8 to ¼ of a second will be sufficient for most strikes. If your camera will allow you to set continuous shutter mode, the trigger will take multiple frames of strikes with longer duration. You can then blend these in post-processing or use them as individual images.

MIOPS SMART+
Take impossible photos by turning your camera into a high-speed capture device!
Keep in mind that if you’re trying to capture scenery in the frame, you’ll want to adjust your shutter speed to balance the exposure for it. Remember, however, that you’ll still want to set the exposure manually since the lightning bolts will affect your camera’s exposure metering.
As mentioned above, practice is the best way to learn what works for you. Play with the trigger’s sensitivity adjustment. Try it in daylight and night shooting situations as well as during the Golden Hours. There is an incredible number of possibilities, so get out there and shoot!
Find Your Own Way
After safety, the most important things to remember in photographing lightning are to experiment and be creative. By exploring different settings and trying different gear, you’ll soon develop your own style and that’s what will make your images special.

Try swapping lenses. A wide-angle lens will probably increase the odds of capturing strikes. On the other hand, a telephoto lens will let you focus on the tops of those clouds that keep lighting up from the discharges inside them. Change things up now and then and you’ll get more interesting images.
Try using the MIOPS Smart in intervalometer (time-lapse) mode at night. This will let you automatically take those multiple long exposures described in the first method, as well as providing the opportunity to merge them into a time-lapse movie.
Do some light painting. While the shutter is open, use a flashlight or portable flash to illuminate some of the objects in the frame. Point the light at yourself to “get into the act”. You can even use colored filters for some extra fun.

Once again, I want to stress that this is only a guide to the most basic steps for two consistent methods to capture lighting photos. There is no “right” way, only the way that works best for you and your equipment. No matter which method you prefer to try (I hope you’ll try both!), please remember to use common sense to reduce the danger of being struck. Protect yourself and your equipment and have fun!
Related Article: How to Take the Extraordinary Lightning Photos
Related Article: Lightning Explore Site


