


Nowadays photography is the latest trend worldwide. Everyone has a camera in their hands and everyone is doing photography. Millions of photos are being captured and shared on social media every day and most of the photos get lost in the crowd. If you want to stand out in this crowd, you need to take some extraordinary pictures. One of the ways to click an exceptional photo is called panning photography.
Panning is a photography technique where we click a moving subject in a way that the moving subject looks still and the background looks like it’s moving. Initially, it seems very tough but with practice and proper camera settings, you can master it easily.
In this technique, we set a slow shutter speed and pan the camera along with the subject so that we get the still subject and background with a motion blur. Let’s talk about how to master panning photography in details.
1. Equipment: You don’t need any special equipment for panning photos, a camera with shutter priority or manual mode and a tripod is all you need. After some practice, you don’t even need a tripod. You can easily do it handheld. A wide angle lens is good for panning photography.

2. Location: You need to choose a location where you can find moving subjects and a plain background. You can find it easily because every road has a moving subject and you just need to find a spot where you can stand and click the pictures. Your position should be parallel to your subject and you should have plenty of space to pan your camera. Remember to avoid colorful backgrounds as it will be distracting.
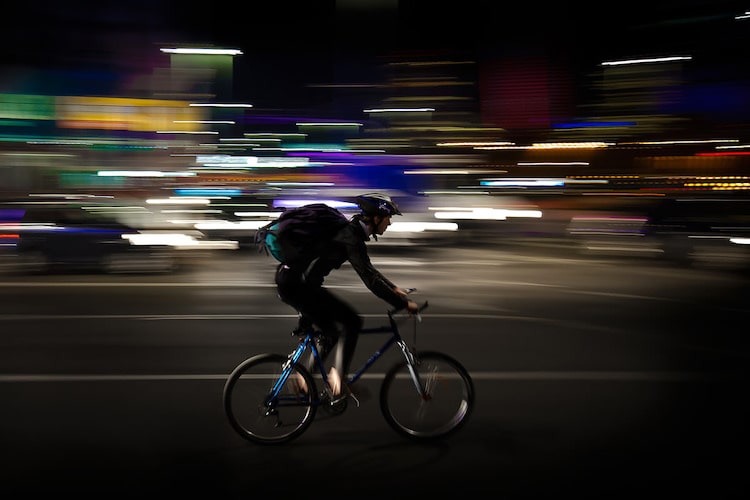
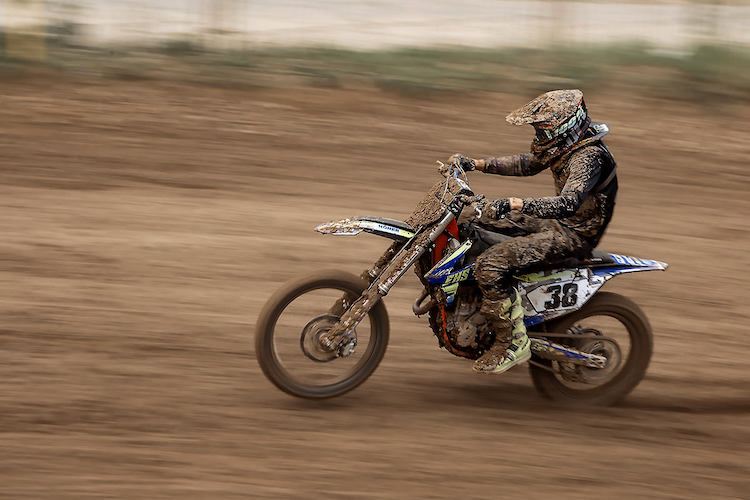
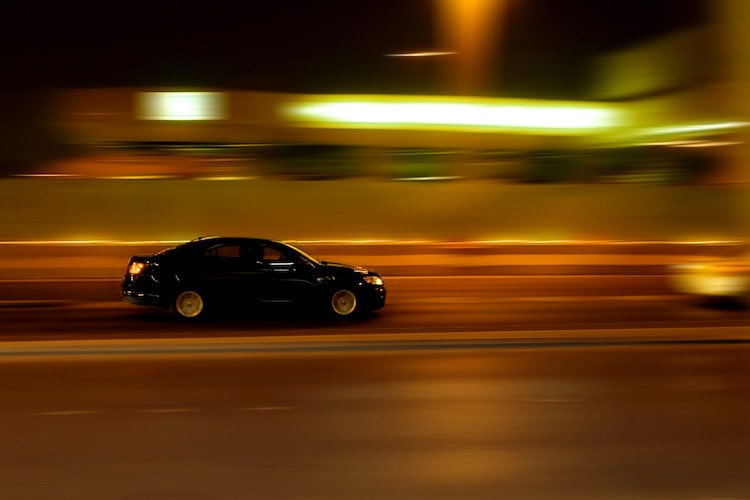
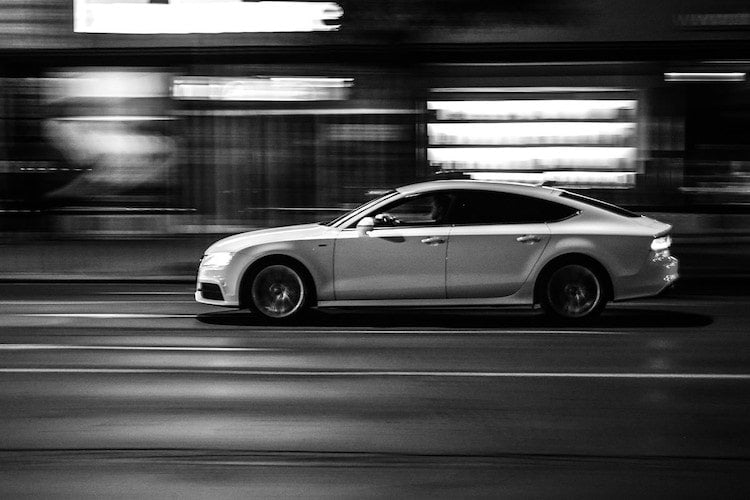
3. Subject: All moving objects can be your subject and it’s recommended that you choose a slow-moving subject like a bicycle or people initially. After doing some practice, you may go with fast-moving subjects like cars and bikes. Once you become perfect in panning, you can try racing cars and bikes which moves at very high speed.
4. Camera settings: Camera settings are important in this photography technique. Since time is the main factor in panning, we capture in shutter priority mode or manual mode.
A. Shutter priority mode: If you just started and you are not comfortable with manual mode, go with shutter priority mode. In this mode, you set the ISO and shutter speed and camera will automatically set aperture according to the light. Since you have no control over aperture, you can’t control the depth of field.
B. Manual mode: If you want full control, go with manual mode. Manual mode let you choose the shutter speed, aperture, and ISO so you can control both exposure and depth of field.
Initially, you may set the ISO to auto and by doing this, you need to set only aperture and shutter speed and still you can control depth of field.
C. Shutter speed: Shutter speed for panning should be between 1/10 seconds to 1/60 seconds. Shutter speed depends on two factors, first, the speed of your subject and second how much motion blur you want in the background. Let’s say your subject is a bicycle or a person on a skateboard which is a slow-moving subject, in this case, you can go with a shutter speed like 1/10 seconds.
But if your subject is a fast moving car, you need to set the shutter speed to 1/60 or 1/30 seconds. If you use slower shutter speed like 1/10 for a fast-moving subject, it’ll be difficult for you to keep the subject in the frame during the entire exposure time.
It’s not advisable to go below 1/10 as you’ll have more chances to get a blurry subject.
D. Focus: It’s advisable to go with manual focus because if you go with autofocus, your camera will take time to focus and you’ll miss the shot or gets an out of focus shot. Find the spot where your subject will come and pre-focus at that spot. Keep a narrow aperture like f/8 or f/11 so that you’ll get deep depth of field and if your subject is slightly off to the spot where you’ve focused, it’ll still be in focus.

5. Shooting Technique: Now you’ve found a place with a plain background, you are standing parallel to your subject, your camera is on a tripod and you’ve pre-focused at the spot where your subject will come. All settings are done in camera, now let’s talk about how to shoot.
Look in the viewfinder and wait for your subject to enter into the frame. Once your subject enters in the frame and reaches around one-third of the frame, start moving your camera at the same speed of your subject. At this moment, don’t click the shutter and just try to keep the subject at the same place in the frame.

Once you do it successfully a few times, you are ready to click your first panning shot. When the next subject enters into the frame, start panning and once your camera movement is aligned with your subject, press the shutter while keeping the movement at the same pace.
Here you need to remember that when you press the shutter, your viewfinder will go dark and you won’t see the subject. So you have to train yourself to keep moving the camera at the same speed. After some practice, you can do it easily.
If you are more comfortable with LCD screen instead of the viewfinder, you may use that but in the case of handheld, you need to use the viewfinder.
6. Things to Remember: Have patience, sometimes you won’t get a single good shot after many clicks, don’t lose your heart and keep practicing. Soon you’ll find it very easy and start getting amazing shots.
Also always try to place your subject off-center as per the rule of thirds and have more space in the direction where your subject is heading. It looks better compare to a subject that is at the center of the frame.
Okay, you know everything now, let’s go out and take some mind blowing shots and amaze the world. Don’t forget to share them here too. All the best and happy clicking.
About the Author
Ramakant Sharda is an author, iOS App publisher, passionate photographer and a MIOPS Ambassador based in the beautiful “Pink City” of India, known as Jaipur. His work has been published in various magazines, newspapers, and blogs. He has published three Coffee Table Books, he writes about photography and also teaches photography in his workshops. Check out his website http://ClickManic.com to see the masterpieces created by him or download his free app for iPhone and iPad “30 Days to an Ace Photographer“.
Related Article: High Speed Photography Explore Site


