



The Short Answer
You need five things for lightning photography, and only one of them is actually expensive: a camera with a manual mode, a mid range zoom lens (24 to 70mm or 24 to 105mm covers most shots, go wider if you want more sky in frame), a tripod solid enough to hold steady in wind and rain, a camera trigger with a dedicated lightning mode, and basic weatherproofing for you and your gear. The trigger is the piece that actually matters most, since nobody can react fast enough to a bolt that's gone before your brain has finished processing it. Set your camera to ISO 100, an aperture around f/5.6 to f/10, and manual focus, let the trigger watch for the flash and fire the shutter, and keep enough distance and shelter that the shot isn't the thing that gets you hurt.
Lightning photography has a reputation for demanding a small fortune in equipment. It doesn't, not really. Most of what determines whether you come home with a usable shot has nothing to do with how expensive your camera body is, and everything to do with a handful of specific pieces of gear working together, plus one habit most beginners skip: using a trigger instead of trying to time the shot by eye.
This guide breaks down exactly what you need, roughly in order of how much it actually matters, what's worth spending real money on, and what you can get away with using entry level. It also covers the safety side, since this is one of the few photography genres where getting the gear wrong can cost you more than a wasted trip out.
Why Most People Overspend on the Wrong Gear
Ask ten photographers what they'd buy first for lightning photography and most will say a better camera or a faster lens. That's usually not where the money should go.
The Camera Body Is Rarely the Bottleneck
A lightning bolt doesn't care whether your sensor cost 500 dollars or 5,000. Once your shutter is open and waiting, or your trigger fires it at the right instant, an entry level DSLR captures the strike just as well as a flagship body. Where camera quality actually shows up is in low light noise on longer exposures and in how the files hold up to editing, both nice to have, neither the reason people miss shots. Spend money chasing a cleaner sensor before you've solved the timing problem, and you'll end up with beautifully clean frames of an empty sky.
They Try to Catch Bolts by Reflex
A lightning flash is on screen for a fraction of a second, and human reaction time isn't built to catch something that fast, day or night. Photographers who watch the sky and mash the shutter the moment they see a flash lose the vast majority of bolts, because by the time the signal reaches your brain and your finger moves, the bolt is already gone. This is the single biggest reason people come home with empty cards after a good storm, and it's also the easiest one to fix. A trigger removes your reaction time from the equation entirely.
Safety Gear Gets Treated as Optional
Rain covers, lens cloths, a vehicle to shoot from, all of it gets deprioritized in favor of glass and camera bodies. Then the first real storm soaks a sensor or the wind topples a light tripod, and the gear that actually needed the budget was never the camera.
The Core Gear List: What You Actually Need
Camera
Any camera with a full manual mode works: DSLR, mirrorless, even a capable point and shoot. If you're a beginner just figuring out your technique, focus your budget elsewhere and use what you already own. If you want the cleanest possible files for large prints or heavy editing, a modern DSLR or mirrorless body with strong low light performance is worth it, but it's a quality upgrade, not a requirement to get the shot at all.
Is Your Phone Enough?
Same instinct as reaching for a better camera body, aimed at a cheaper target. A phone can capture lightning under the right conditions, mainly bright, close, frequent strikes at night with the phone locked down on a stand. Where phones fall apart is manual control. Most phone cameras cap your exposure time and don't give you real control over ISO and aperture together, so you lose the fine tuning that separates a lucky snapshot from a shot you can reliably repeat. A basic DSLR or mirrorless with full manual mode will out perform a phone for anything beyond a quick, casual capture.
Lens
A mid range zoom, something like a 24 to 70mm or 24 to 105mm, covers most lightning scenes and gives you flexibility to reframe as the storm moves. Wide angle lenses are also popular, since a wider frame catches more sky and improves your odds of getting a bolt somewhere in frame during a long exposure. Prime lens shooters tend to pick one look and commit to it. There isn't a single correct choice here, it depends on whether you want one dramatic, tightly framed bolt or a wide scene with multiple strikes across the sky.
Tripod
Non negotiable. Long exposures at a low aperture need a completely still camera, and lightning storms come with wind and rain that a light tripod won't survive. As a rule of thumb, a tripod can reliably hold about three times the combined weight of your camera, lens, and tripod head. If you're shooting in rough conditions, wind and driving rain rather than a light breeze, hang a weighted bag from the center column to add stability, but don't overload it past that ratio.
Camera Trigger
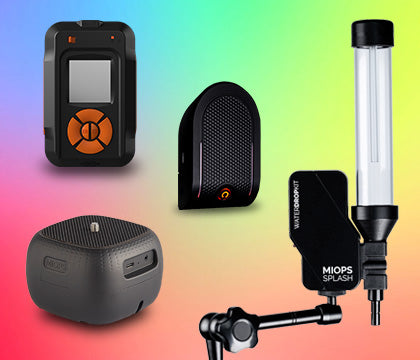
This is the one item on this list actually worth prioritizing. A dedicated lightning trigger, like the MIOPS Smart+, uses a light sensor tuned to detect a strike and fire the shutter automatically, in a fraction of the time it would take you to notice a flash even happened. It works day or night, since it's watching for the light change itself rather than relying on darkness to make the bolt visible to you. If you're deciding between spending on a better lens or a trigger, the trigger is what actually changes your hit rate. For a broader look at what separates a good trigger from a gimmick, our guide on what makes a good camera trigger covers the criteria worth caring about.
Weatherproofing
Lightning shows up with rain, and your gear is not rainproof by default. A rain cover for your camera and lens, a stock of lens cloths, and a plan for keeping moisture off your gear during a multi hour session all matter more than people expect. A soaked sensor or a lens smeared with water drops ends the session regardless of how good your other gear is.

Smart+ Multi-Mode Camera Trigger | Lightning, Sound, Laser and Timelapse
Take almost impossible photos by turning your camera into a high-speed capture device! MIOPS Smart Trigger is a versatile camera...
Types of Lightning and Why They Change Your Gear Choices
Lightning isn't one uniform subject, and knowing the differences shapes how you frame a shot before you even pick a lens.
-
Cloud to ground: a descending bolt that strikes something below it. The most classic, most photogenic pattern, and the type most beginners are chasing.
-
Cloud to cloud: a bolt that travels across the sky without striking anything. Works well with a wider lens since the action spans more of the frame.
-
Intra cloud: lightning inside a cloud, visible mostly as a burst like flash rather than a clean bolt. Harder to compose around, since there's no defined line to frame.
-
Color: white is most common, but lightning can appear red, green, yellow, purple, or blue depending on atmospheric gases, chemicals, and temperature. Worth watching for if you want a shot that stands out from the usual white bolt on a dark sky.
-
Intensity: brighter bolts push your exposure further than dim ones, which is exactly why it pays to watch a storm for a few minutes before you commit to a setting. A trigger that lets you fire off several test frames early in a session makes this a lot less guesswork heavy, since you can see how the storm is behaving on your specific settings before the best bolts arrive.
If a storm is producing a lot of cloud to ground activity in a specific area, a mid range or longer lens focused on that section of sky will get you a cleaner, more dramatic single bolt. If the activity is spread across the horizon, go wider and let the trigger fire on whatever crosses it. For a deeper dive into composing around these patterns, see our lightning photography composition guide.
Camera Settings to Pair With Your Gear
Once the gear's in place, these starting settings work for most lightning scenes:
-
ISO: 100. Lightning provides plenty of light on its own, and a higher ISO just adds noise and increases the risk of a blown out bolt.
-
Aperture: f/5.6 to f/10 for most shots. Move toward f/10 if bolts are close or very bright.
-
Focus: manual, set to infinity rather than trusting your lens's infinity mark blindly. Verify it visually using live view on a distant light before you start a session.
-
Mode and shutter: bulb mode or a long exposure at night, since the goal is keeping the shutter open long enough that a bolt is likely to fire during the window. In daylight, a fast shutter speed suited to the ambient light works, since the trigger is doing the timing rather than a long exposure.
Safety Comes Before the Shot
Lightning kills people every year in the United States alone, and the storms that produce the best photos are the same storms that produce the most risk. The National Weather Service's lightning safety guidance is direct about this: there's no truly safe place outdoors once a storm is in the area, and if you can hear thunder, you're within striking distance. Their standing advice is blunt: when thunder roars, go indoors.
For photographers, that means shooting from inside a vehicle with the windows up and the camera on a window mount or a small clamp is one of the safer practical setups during an active storm, rather than standing in an open field with a tripod. A trigger helps here too, since it lets you fire your camera remotely from shelter instead of standing next to your gear waiting for a bolt.
Common Mistakes and Why They Happen
Coming home with a card full of black frames and no bolts almost always means no trigger was involved, or the trigger's sensitivity wasn't tuned to the storm's brightness. Start with the manufacturer's default sensitivity and adjust from there once you see how the storm's flashes register.
Blurry bolts on a tripod usually mean the tripod was too light for the wind that night, or the shutter was triggered by hand instead of remotely, introducing vibration right as the shutter opened.
A soft, hazy look across otherwise sharp shots usually means moisture on the lens. Check and wipe the front element between shots during any rain, not just at the start of a session.
Getting caught out in the open when a storm turns is the most serious mistake on this list, and the one gear can't fix after the fact. Plan your position and your exit before the storm arrives, not once it's overhead.
A cluttered, uncertain composition, too much empty sky, no sense of scale, usually comes from setting up in a hurry once a storm is already active. Scout your spot and rough out your framing before the lightning starts, the same way you'd plan a landscape shot in daylight, so you're only adjusting for where the bolts actually land rather than building the whole composition from scratch under pressure.
Frequently Asked Questions
What's the most important piece of gear for lightning photography?
A camera trigger with a dedicated lightning mode. It solves the actual bottleneck, human reaction time, which no camera body or lens upgrade can fix on its own.
Do I need an expensive camera for lightning photography?
No. Any camera with a full manual mode can capture lightning well. A pricier body improves low light noise and file quality for editing, but it doesn't determine whether you get the shot in the first place.
What camera settings should I use for lightning photography?
Start at ISO 100, an aperture between f/5.6 and f/10, manual focus set to infinity and verified visually, and bulb mode or a long exposure at night. In daylight, expose for the ambient scene and let a trigger handle the timing.
What lens is best for lightning photography?
A mid range zoom around 24 to 70mm or 24 to 105mm suits most scenes. Go wider if you want to capture more sky and improve your odds of catching multiple bolts in one frame.
Is lightning photography dangerous?
Yes, and it should be treated that way. If you can hear thunder, you're within range of a strike. Shoot from inside a vehicle or another sheltered position during active storms rather than standing in the open with a tripod.
Can I use a phone or a point and shoot camera for lightning photography?
You can get occasional results with a phone locked on a stand during bright, frequent strikes at night, but limited manual control over exposure makes it hard to get consistent shots. A basic camera with full manual mode will outperform a phone for anything beyond a casual capture.
Keep Exploring
Related reading: Lightning Photography Tips and Unique Lightning Photo Compositions
Related reading: What Is the Best Camera Trigger
Related reading: Lightning Photography Handbook
Sources
MIOPS Smart+ product page: lightning mode, sensitivity settings, and compatible camera list:
https://www.miops.com/products/smart
MIOPS: Lightning Photography Tips and Unique Lightning Photo Compositions:
https://www.miops.com/blogs/news/lightning-photography-tips-and-unique-lightning-photo-compositions
MIOPS: What Is the Best Camera Trigger:
https://www.miops.com/blogs/news/what-is-the-best-camera-trigger
NOAA National Weather Service: Lightning Safety, official guidance on outdoor risk and the when thunder roars go indoors rule:
https://www.weather.gov/safety/lightning-safety